Connecting to the Console or Auxiliary Port
IP390 Security Platform Installation Guide 27
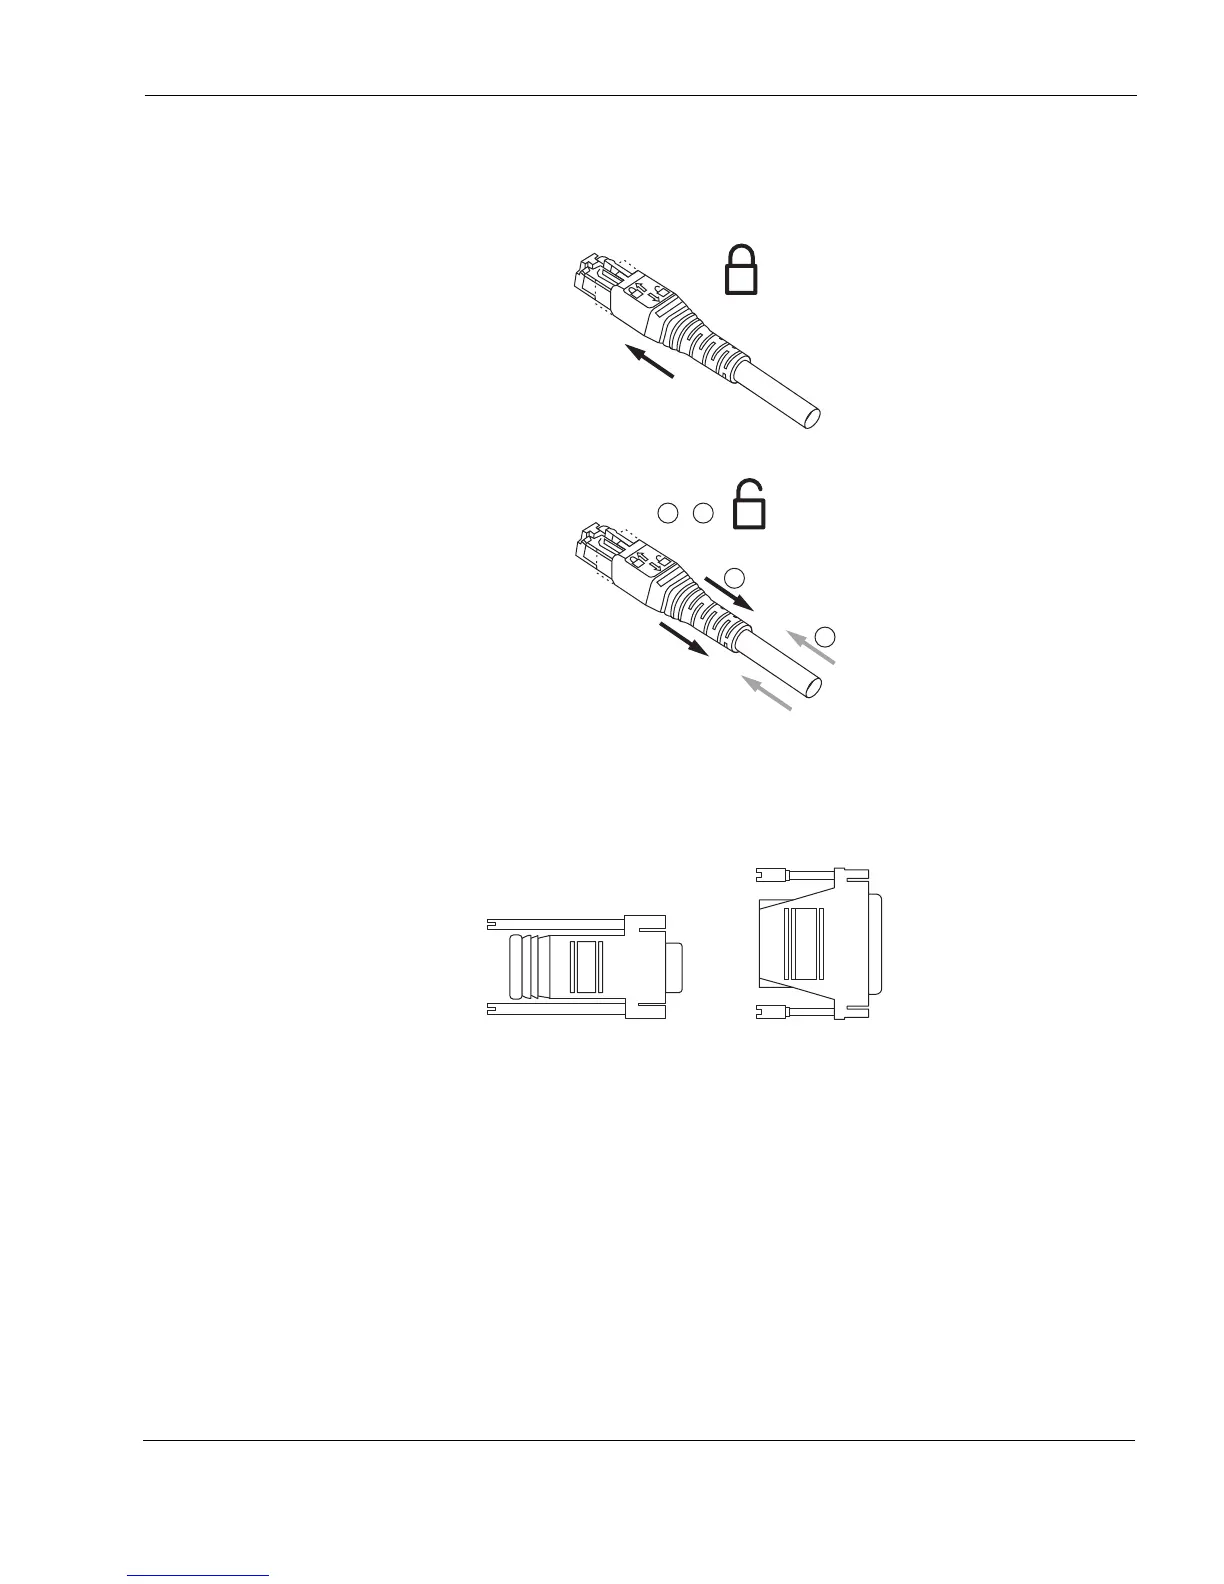
To connect the cable, push the connector into the receptacle, as you would with other similar
cables. To disconnect the cable, push the cable toward the appliance, pull back on the boot to
release the latch, and pull the connector out of the receptacle.
You can connect the other end of the cable to a DB-9 console connection (using the appliance
console port and the DB-9 female adaptor) or to a DB-25 modem connection (using the
appliance auxiliary port and the DB-25 male adaptor). The DB-9 adapter is provided with the
cable. The DB-25 adaptor is provided with Nokia modem cable kits for the IP390.
Console Port
Use the built-in console port, shown in Figure 6, to supply information that makes the appliance
available on the network at speeds up to 9600 bps. The default configuration of the serial ports
are: 9600 baud, 8 bits, no parity, and 1 stop. Table 6 provides pin assignment information for
console connections. If you need to access the devices locally, you must use the console port.
1 + 2 =
2
1
00548a
Push cable
Pull boot
To connect the cable
To disconnect the cable
00552
DB-9 female adapter
DB-25 male adapter