Chapter 39 Hardware procedures 347
Multiservice Switch 7400 Hardware Installation, Maintenance, and Upgrade 6.1S2
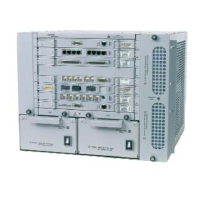
• Before installing the ferrite beads, the power input cables must be
installed and connected to the device. The terminal block that is shown
in the figure
“Location of ferrite beads on dc power cables” (page 348) is
similar for all Multiservice Switch 7400 series devices. The method and
criteria for attaching the beads is the same for all.
• The beads can be added to the cables while the power is on or off. If the
power is on, the insulation shield must cover the terminal block and each
lug barrel on a dc power input cable must be insulated with no exposed
metal.
Procedure steps
1 At the rear of the device, locate the terminal strip on the terminal block
where the dc power input cables connect. See the middle of the figure
“Location of ferrite beads on dc power cables” (page 348).
The insulating shield is not shown in the figure.
2 Where the cable pairs exit from under the insulation shield, ensure that
there is enough space for the beads to be added before the cable bends.
Carefully straighten or bend the cables in parallel pairs, as required.
3 On the terminal strip, locate the pair of power cables for PS 1. Cables can
exit above or below the terminal strip. Refer to the inset in the figure
“Location of ferrite beads on dc power cables” (page 348).
4 At the edge of the insulation shield, fasten a tie-wrap around the cable pair
as close to the edge as possible, but not under it. Tighten the tie-wrap until
the cables start to pinch. This tie-wrap prevents the bead from sliding into
the cable lugs and causing a short.
5 Align a ferrite bead around the cable pair immediately beside the tie-wrap.
To maximize the effectiveness of the ferrite bead, it should reside next to
the tie-wrap and be within 2.5
cm (1 inch) of the connections.
6 Press the halves of the bead together until the tabs engage. It is
acceptable if the bead fits loosely provided it remains in position.
7 Keep the ferrite bead in position next to the tie-wrap by placing another
tie-wrap around the cable pair on the other side of the bead. Tighten it until
it starts to pinch the cable.
The ferrite bead has a tie-wrap on either side of it to prevent sliding along
the cable.
8 Repeat step 3 to step 7 for each power supply and its pair of power input
cables. Move from left to right across the terminal strip.
 Loading...