5-8
Maintenance
AN2016 Cabinet User Guide Rel 1.0 Standard May 1999
Procedure 5-5 (continued)
Replacing the fan
Step Action
Top Fan Replacement
11
Disconnect power to the fan you are replacing. Verify that power is off before
proceeding.
12
You can access top fans through a top cap in the solar shield. To remove and
replace one of the top fans, use a 216-type tool. Remove the bolts securing
the top cap of the fan to be replaced (see Figure 5-5). Lift the top cap and set
it aside for later reattachment.
13
Remove the six bolts from the interior fan mounting plate (see Figure 5-6).
Set the hardware for use again later. The top fan is attached to this plate.
Note:
Additional screws are supplied in case screws are misplaced.
14
Pull out the harness assembly under the frame.Disconnect the power plug
and remove the fan plate assembly (see Figure 5-7 and Figure 5-8).
15
Remove the old fan assembly (see Figure 5-9). To install the new fan-plate
assembly, place the new inner fan-plate over the appropriate fan opening.
16
Secure the interior fan-mount plate assembly using the hardware set aside in
step 4. Tighten all bolts.
17
Connect the power plug and secure it between the bridge walls and under the
frame of the top cap. Ensure the power plug or cable does not interfere with
fan operation.
18
Secure the top cap using the hardware set aside in step 3.
19
When all work is complete, apply power to the fans and verify fan operation.
—end—
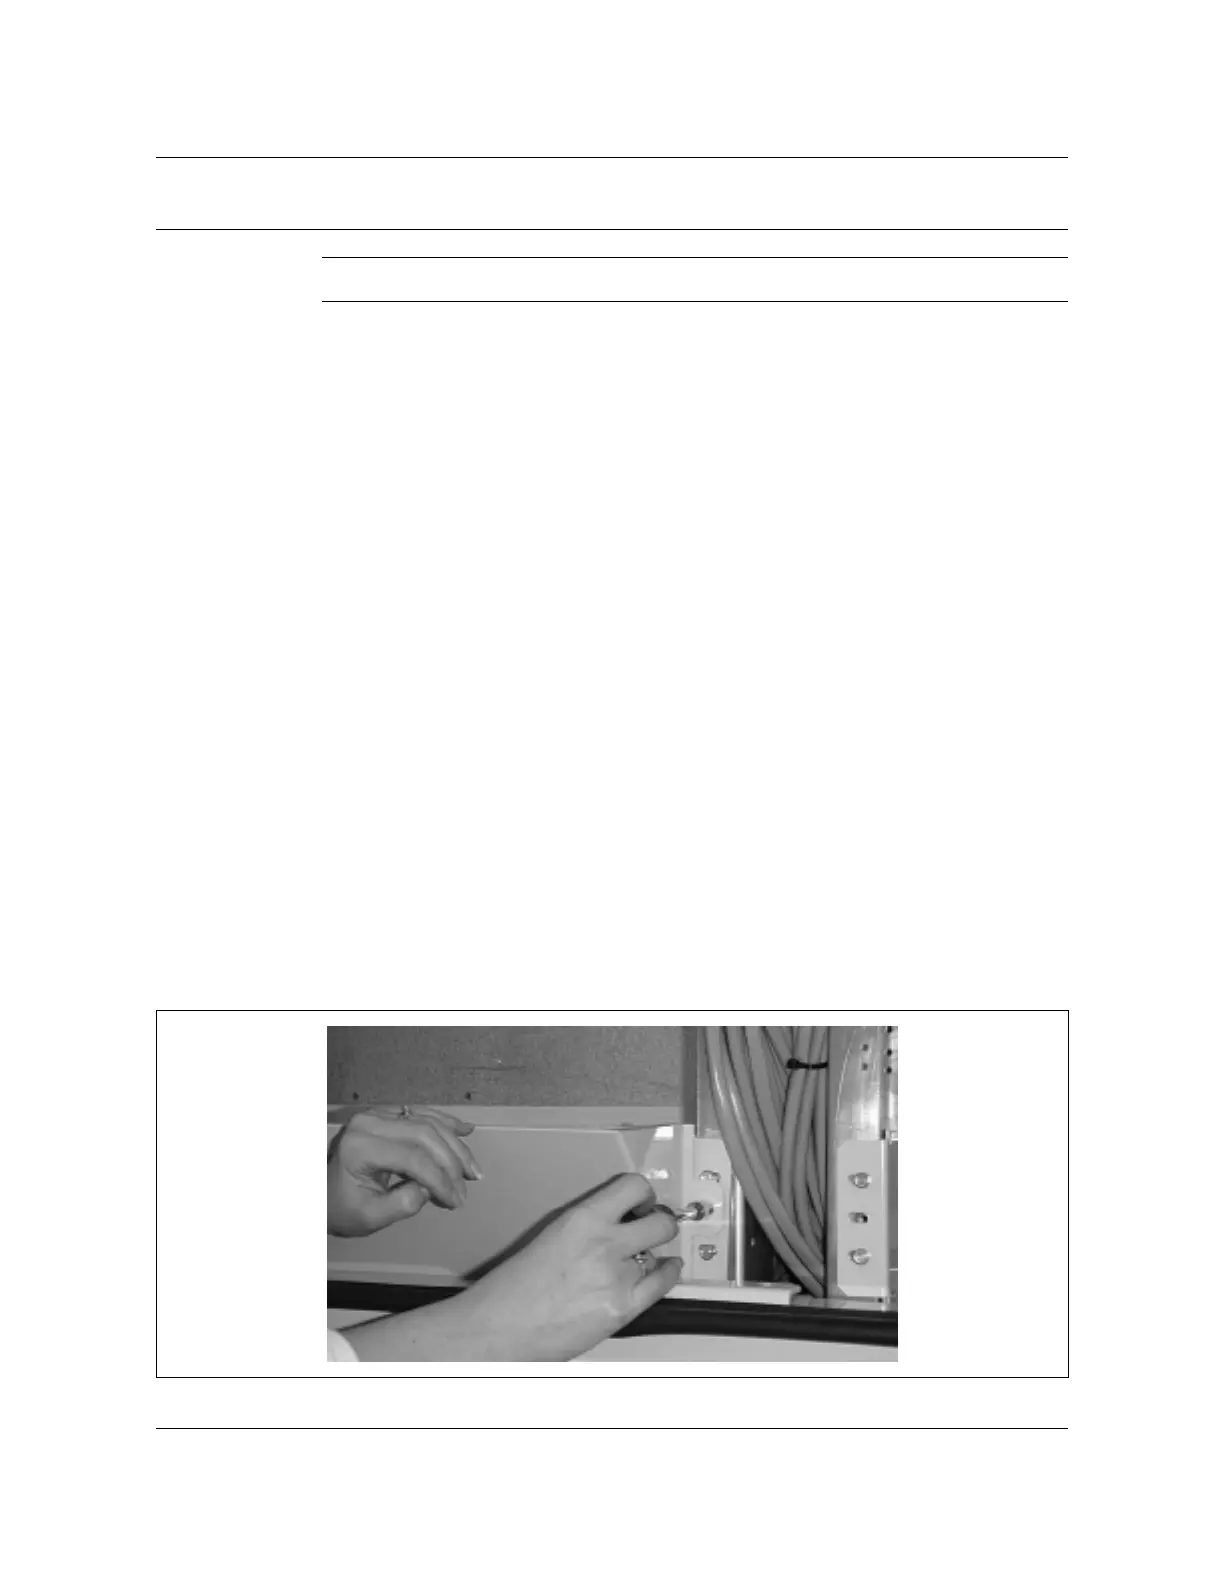
Figure 5-2
Removing front baffle
AN0059.tif