If you want to delete a drum hit, just press its pad again: you can do this while the sequence is
playing or stopped. The brightly lit pads tell you where the hits are.
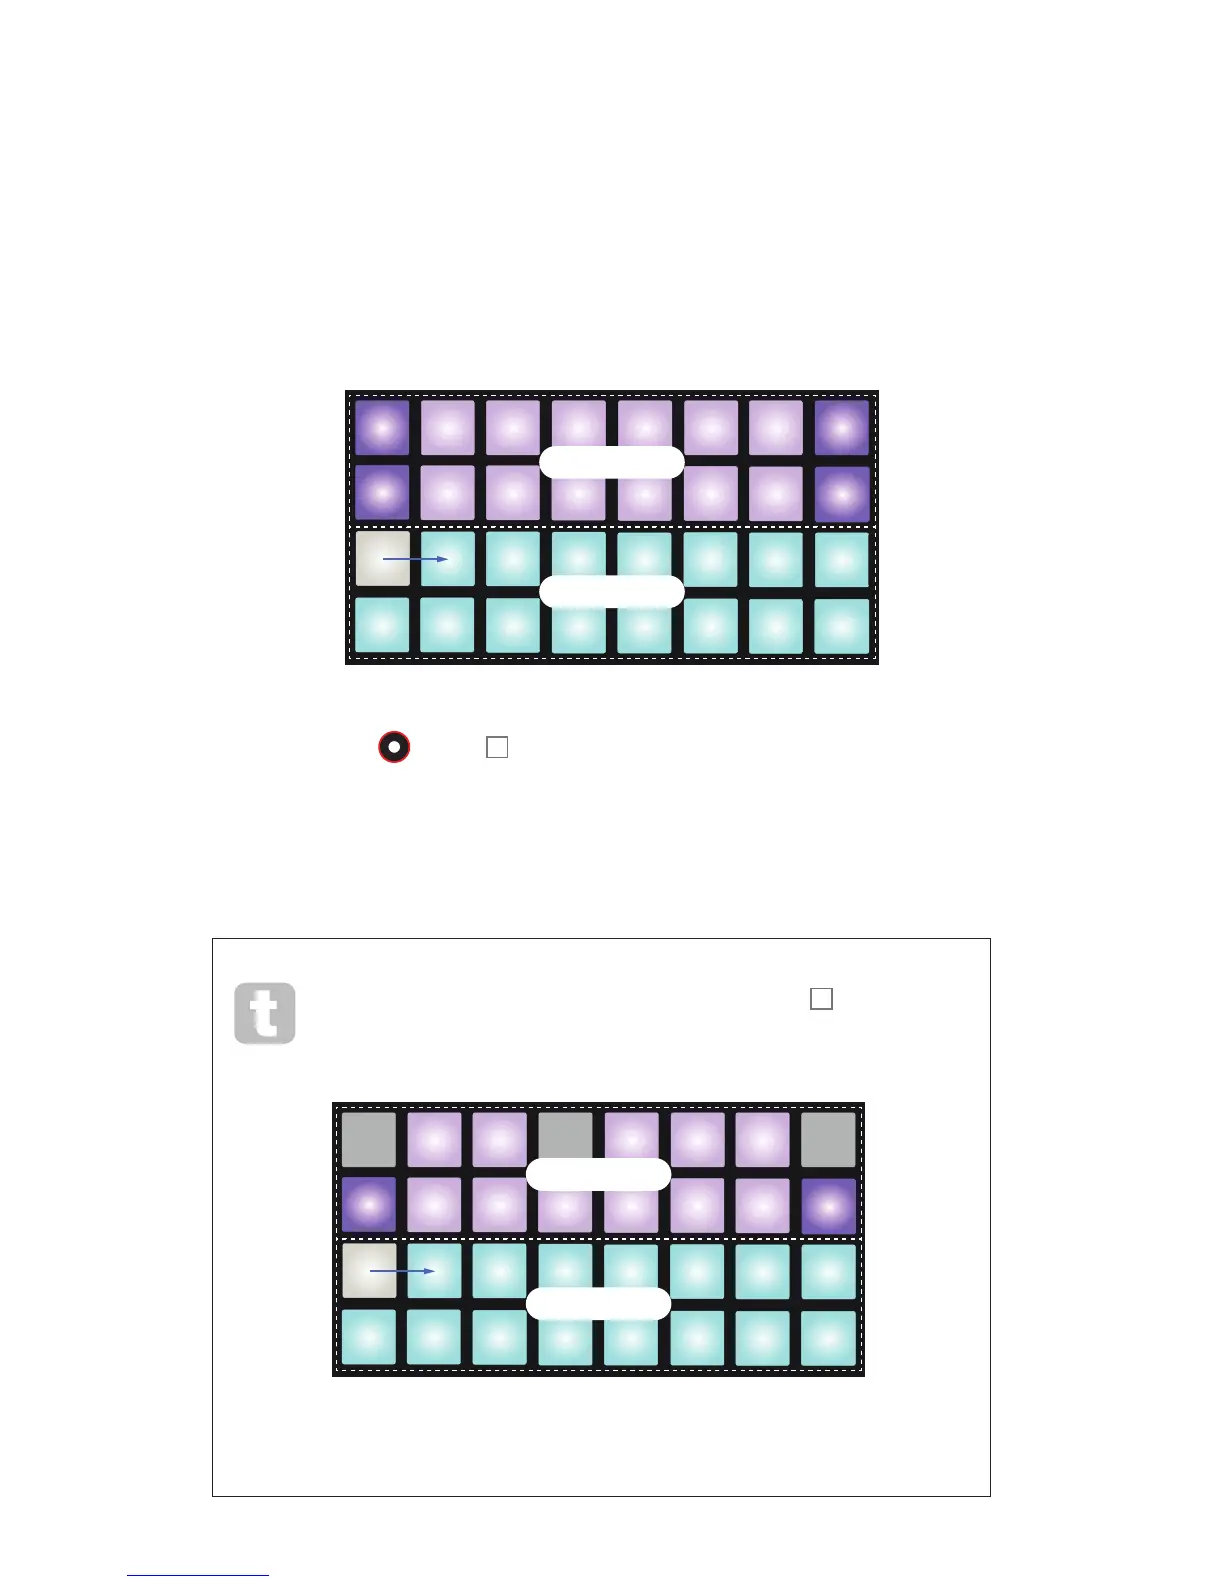
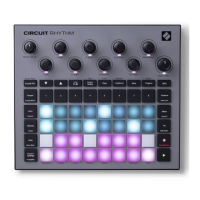
Now you can add synth notes. Press Synth 1 to open Synth 1 View. The top two rows represent
a music keyboard, the lower two show you where you are in the sequence. When Play is
pressed, you can see the white pad progressing through the steps.
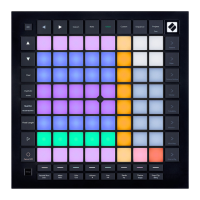
With all scales except Chromatic (see “Scales” on page 24), the grid display looks like this:
PLAY
Synth keyboard
Pattern display
The “keyboard” is two octaves, with the mauve pads representing the lowest and highest notes
in each. You can add synth notes in real time by just playing them, or you can add them to the
pattern by pressing Record
12
. While the Record button is lit, anything you play in either of
the Synth Views (Synth 1 or Synth 2) will become part of the pattern.
The Oct K and Oct J buttons alter the pitch range of the currently selected synth keyboard, by
one octave each time they are pressed, up to a maximum of ve octaves above or six octaves
below the default octave. The lowest note in the default octave is ‘middle C’ on a standard piano
keyboard.
For a conventional piano keyboard, press and hold Scales
8
and then press
Pad 32 (the bottom right one), which will turn bright pink. This gives the
keyboard Chromatic scaling, and the layout differs from that in the other
scales:
CD
C# D# F# G# A#
EFGA


![Preview: Novation Launchpad Mini [MK3]](https://data.easymanua.ls/products/284351/200x200/novation-launchpad-mini-mk3.webp)