E
45
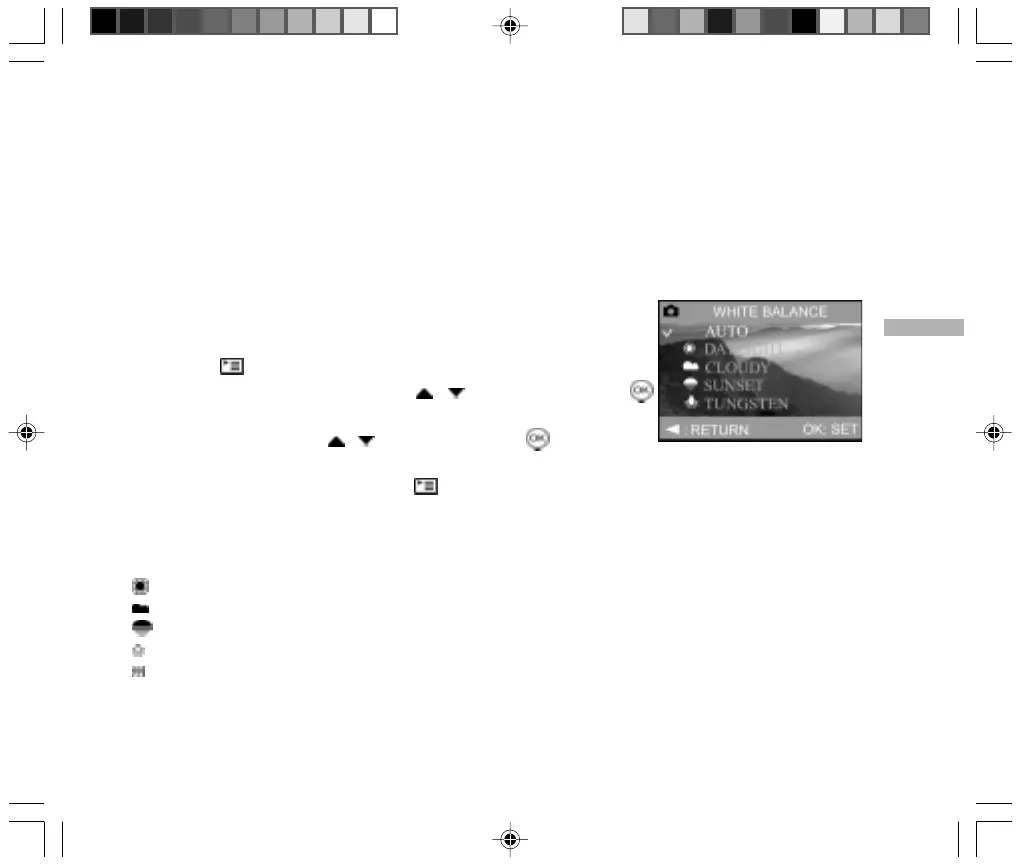
Setting the White Balance
The human eye adapts to changes in light so that white objects still appear white even when the light changes.
With cameras, however, the color of the subject is influenced by the color of the light surrounding it. This color
adjustment is called “white balance adjustment”. This setting allows you to set the white balance when taking
images under specific lighting conditions.
1. Rotate the mode dial to one of [ M ] Manual mode, [ Av ] Aperture Priority
mode, [ Tv ] Shutter Speed Priority or [ P ] Program mode.
2. Power on your camera.
3. Press the [ ] menu button.
4. Select “WHITE BALANCE” by using the / buttons, then press the
button.
5. Change the setting with the / buttons and press the button again to
confirm.
6. To exit from the menu mode, press the [ ] menu button.
7. Compose your picture.
8. Press the shutter button.
[ AUTO ]: automatically adjusts the white balance.
[ DAYLIGHT ]: for recording outdoors on a bright day.
[ CLOUDY ]: for recording overcast, dull, twilight or evening skies.
[ SUNSET ]: for recording during sunsets.
[ TUNGSTEN ]: for recording in tungsten lighting conditions.
[ FLUORESCENT ]: for recording in fluorescent lighting conditions.