42641101TH Rev.1 15 /
Oki Data CONFIDENTIAL
2. PARTS REPLACEMENT
The section explains the procedures for replacement of parts, assemblies, and units in the field. Only
the disassembly procedures are explained here. For reassembly, reverse the disassembly procedure.
2.1 Precautions for Parts Replacement
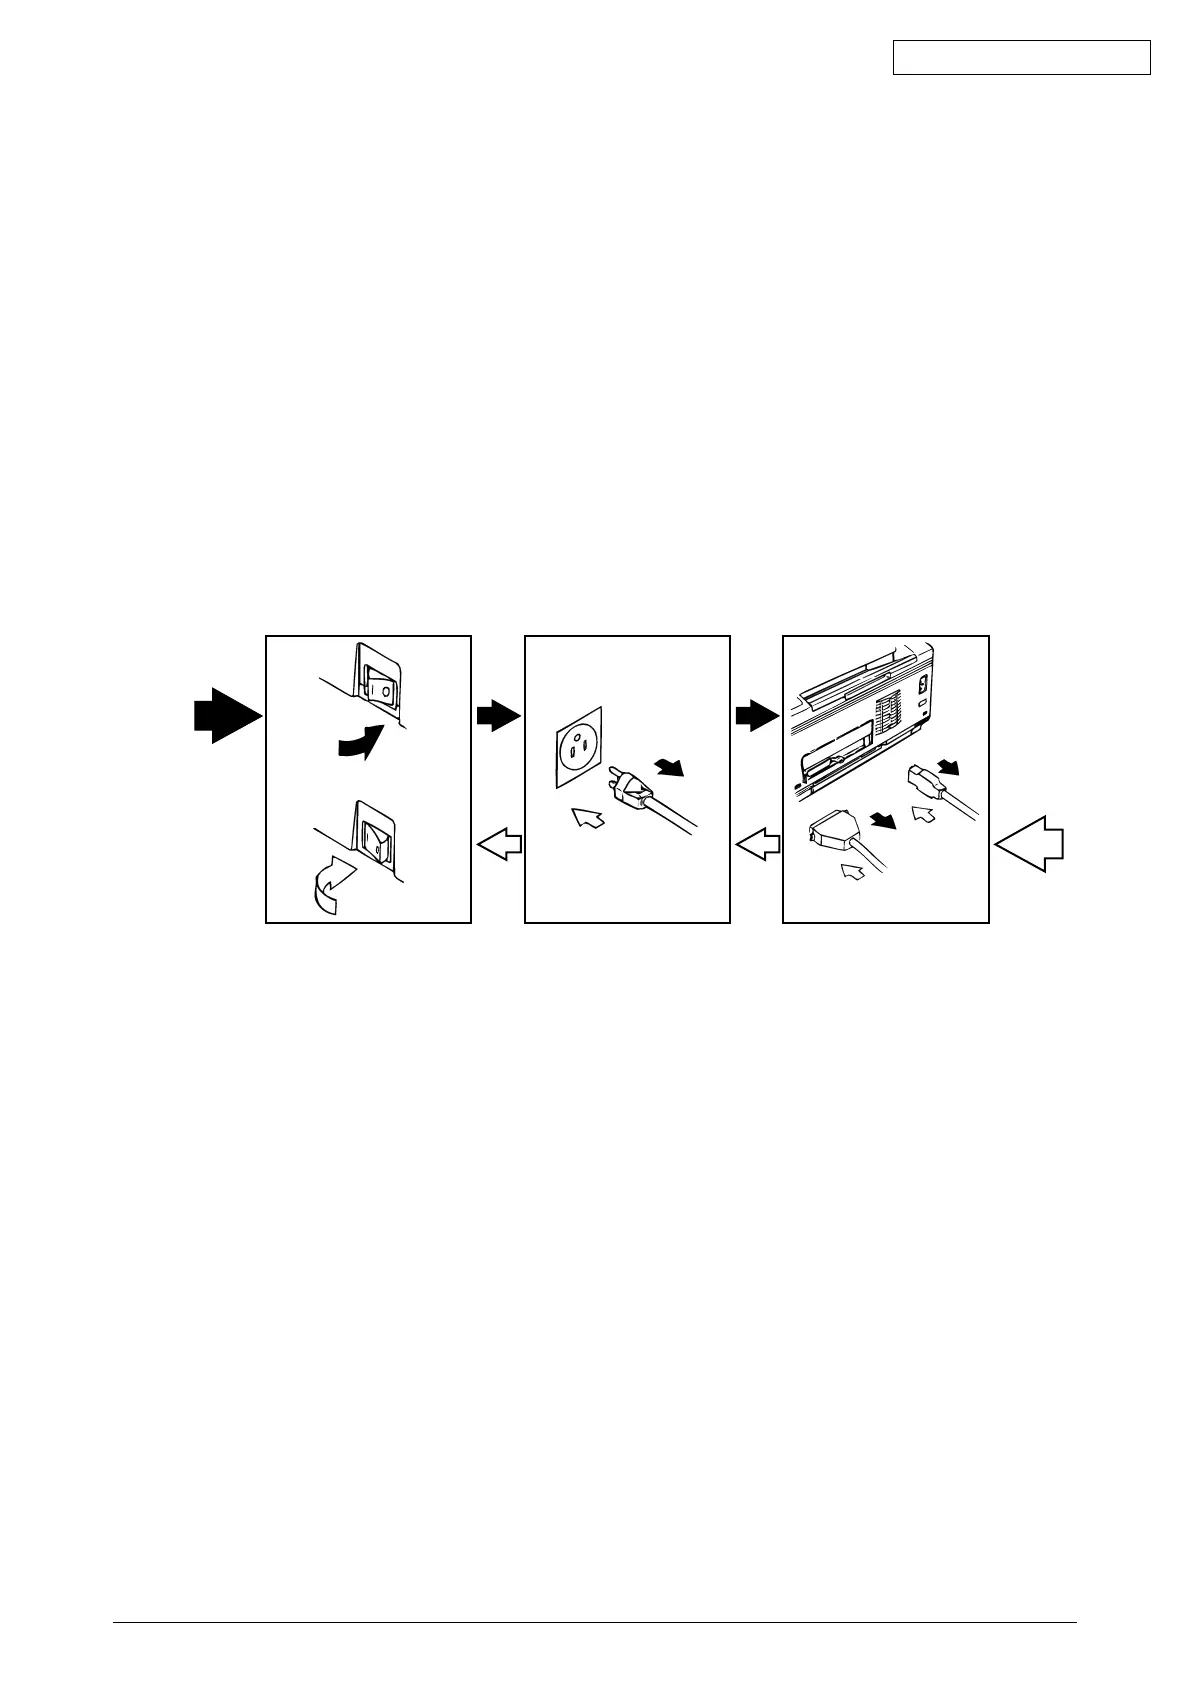
(1) Before starting to replace parts, remove the AC cord and interface cable.
(a) Remove the AC cord in the following sequence:
i) Turn off (“o”) the power switch of the printer
ii) Disconnect the AC inlet plug of the AC cord from the AC receptacle.
iii) Disconnect the AC cord and interface cable from the printer.
(b) Reconnect the printer in the following procedure.
i) Connect the AC cord and interface cable to the printer.
ii) Connect the AC inlet plug to the AC receptacle.
iii) Turn on (“l”) the power switch of the printer.
(2) Do not disassemble the printer as long as it is operating normally.
(3) Do not remove parts which do not have to be touched; try to keep the disassembly to a minimum.
(4) Use specified service tools.
(5) When disassembling, follow the laid out sequences. Parts may be damaged if these sequences are
not followed.
(6) Since screws, collars and other small parts are likely to be lost, they should temporarily be attached
to the original positions during disassembly.
(7) When handling IC’s such as microprocessors, ROMs and RAMs, or circuit boards, do not wear
gloves that are likely to generate static electricity.
(8) Do not place printed circuit boards directly on the equipment or floor.
Disconnect
Reconnect
OFF
ON