%Control Buttons
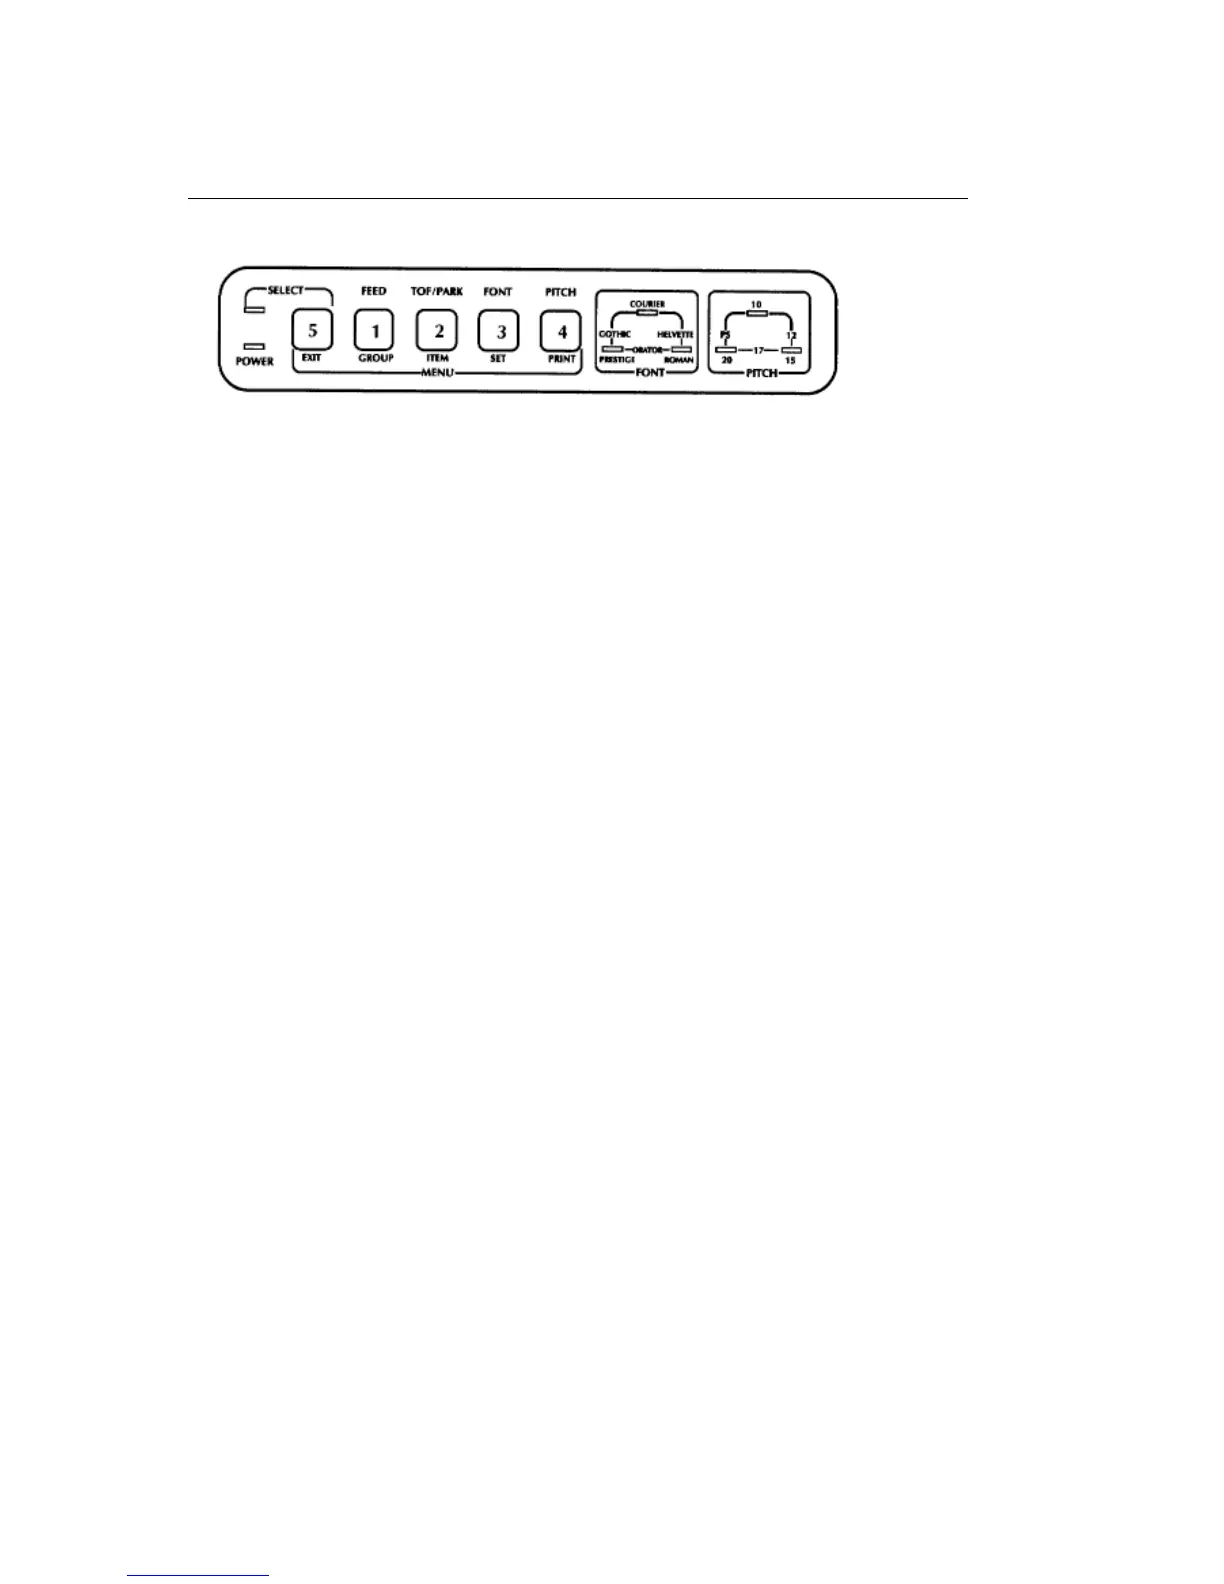
Control Buttons
1.GROUP Button: Push this button to move to the next Group in the menu.
2.ITEM Button: Push this button to move to the next Item within the Group.
3.SET Button: Push this button to move to the next Setting within the Item. Once you have changed
a setting, it will be stored in the printers permanent memory, even if you turn off the printer, until
you once again press the SET button with that Group and Item selected.
4.PRINT Button: Press this button at any time while in Menu Select Mode to print a listing of all the
current menu settings. We recommend that you print out the menu whenever you change it to
keep for reference.
5.EXIT Button: Push this button to exit the Menu Select Mode and return the printer to the Print
Mode.
Example
If you are in the Menu Select Mode and wish to engage the Form Tear-Off feature (look at Appendix
B and youll see that this feature is under the Group Vertical Control):
Press the GROUP button three times to get to the group you want to change. Each time you press
the button you must wait for the printer to print out a line. Pressing the Group button three times
will produce the following lines of print:
Font
Print Mode
LQ Courier
General Control
Cut Sheet Feeder
Not Installed
Vertical Control
Line Spacing
6 LPI
Press the ITEM button once. This will produce the following line of print:
ML 380 ( 96-02-03 )