41
Note ► If no device is selected, the data are stored on the current device shown on the Homepage (1 in Figure
52 a).
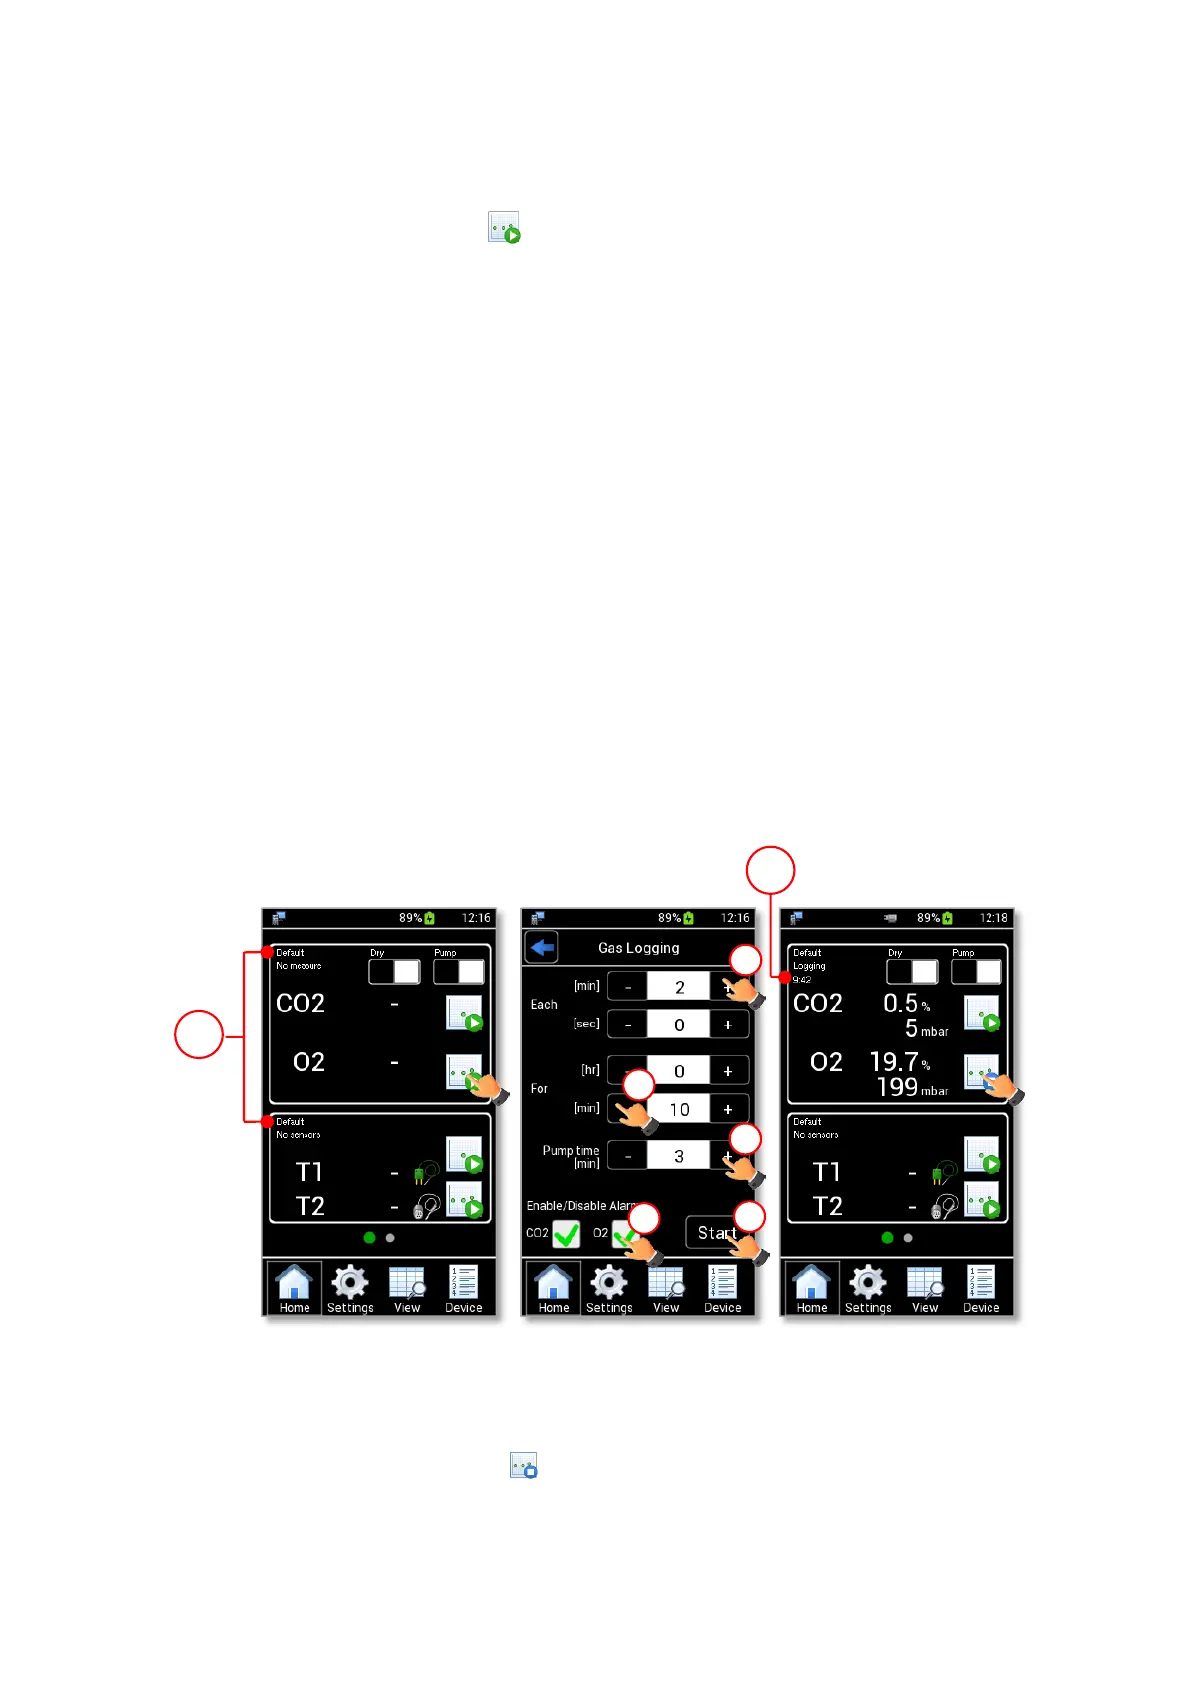
2. Press the CO2-O2 Logging icon (see Figure 52 a). The CO2-O2 Logging Setting is shown.
3. Insert the measurement times using + and – (1, 2 and 3 in Figure 52 b):
• Each: the time between two measurement points. It is the acquisition frequency. The time can be
inserted in minutes and seconds.
• For: the time interval of the CO2-O2 Logging. The time can be inserted in hours and minutes.
• Pump Time: the time, in minutes, the pump is active and aspirates gas, prior to saving a reading.
This parameter is available only if the Aspiration mode is selected.
4. Enable/Disable the alarm on the CO2 and O2 concentration (4 in Figure 52 b). Then press Start to
start the measurement (5 in Figure 52 b).
Note ► If CO2 and/or O2 check boxes are enabled (see Figure 52 b), the alarm triggers when the reading
concentrations values are out of the set range. See paragraph 9.3.4 to set the gas alarm range.
Note ► The Pump Run Time CANNOT be less than 1 min.
Note ► If the time inserted in Each is less than the Pump Time, the Gas Logging occurs with the pump
continually ON. Each time can be set at a minimum of 5 seconds.
Tip ► The recommended Pump Time is 3 min.
Figure 52. Gas logging (a – b – c).
When CO2-O2 Logging is in progress, CO2 and O2 gas concentration measurement values appear on the
Homepage. The CO2-O2 Logging icon becomes .
Note ► During a CO2-O2 Logging, the timer (2 in Figure 52 c) indicates the remaining time for completing
the time interval, set as “For” value (2 in Figure 52 b).