Setup and Registration
OPERATION GUIDE 6-17
6
6 Press [Delete]. When the deletion confirmation
screen appears, press [Yes].
7 To change or delete other Permit FAX numbers,
repeat steps 2 to 6.
8 Press [Close].
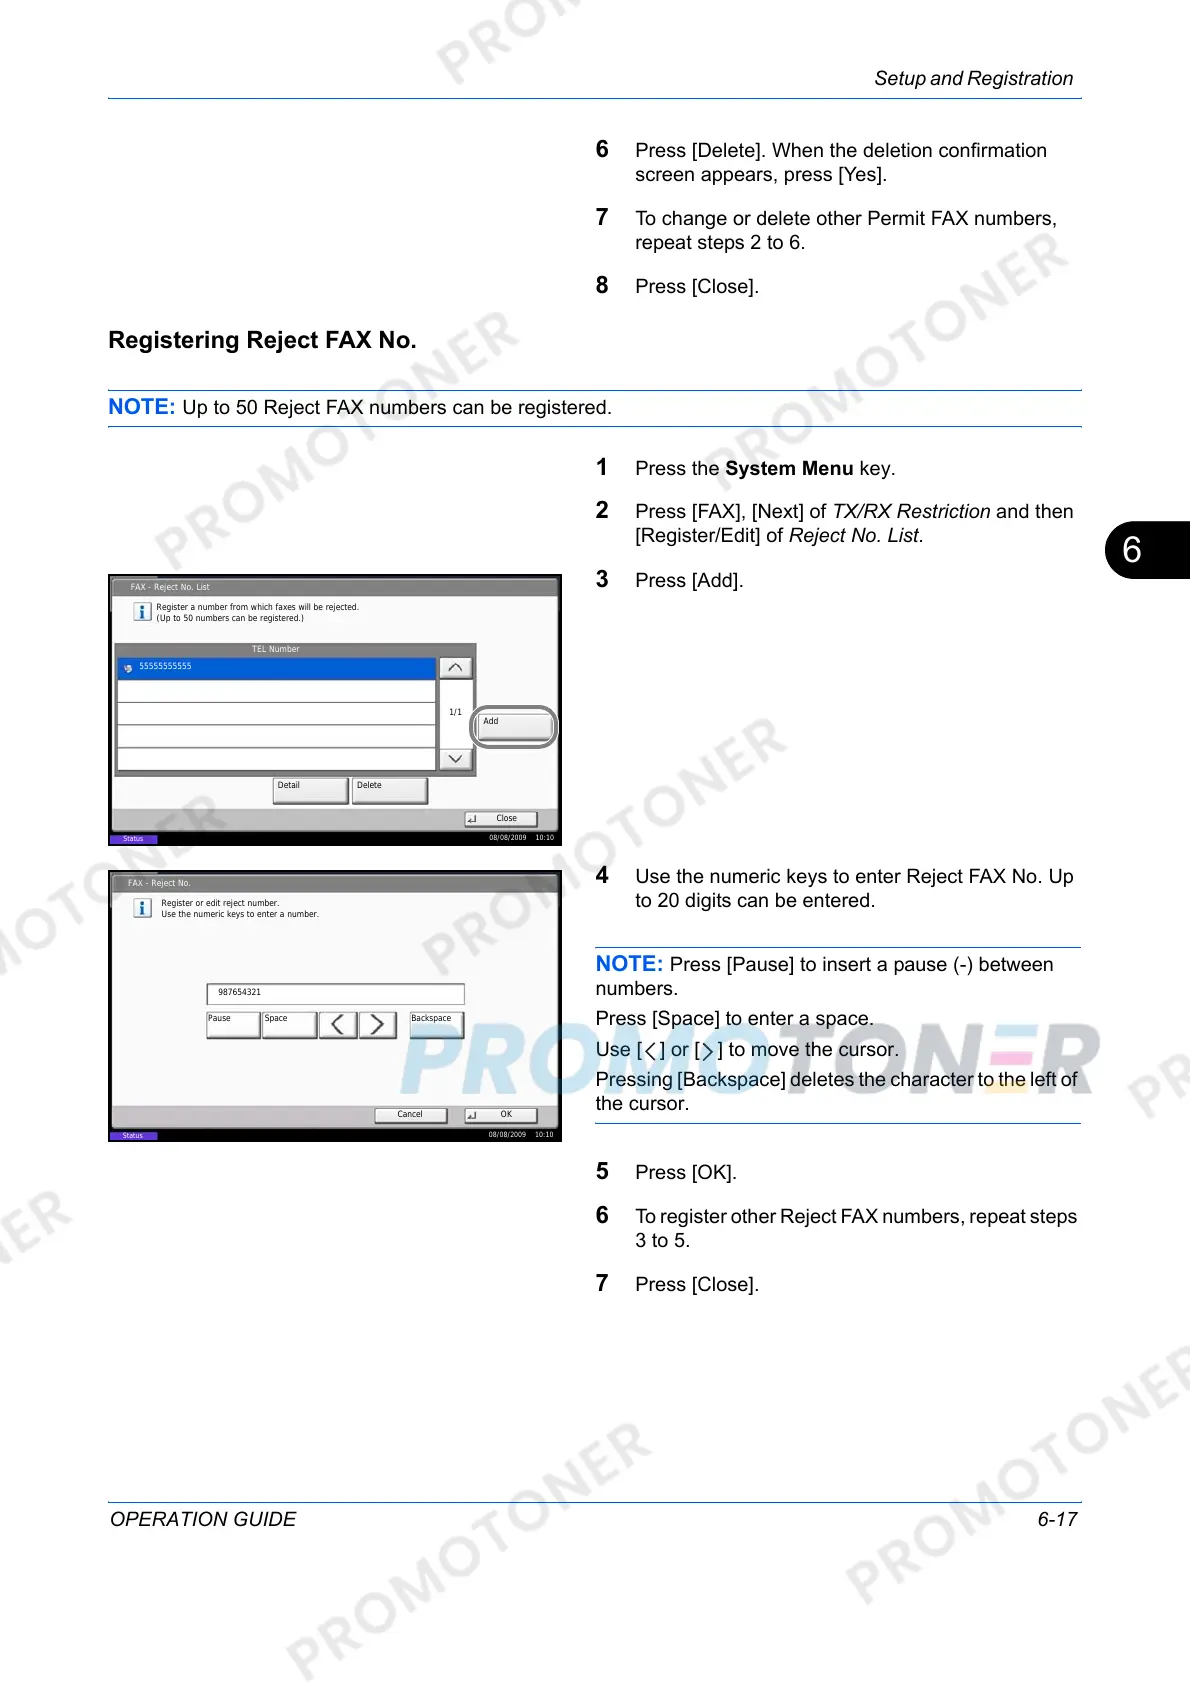
Registering Reject FAX No.
NOTE: Up to 50 Reject FAX numbers can be registered.
1 Press the System Menu key.
2 Press [FAX], [Next] of TX/RX Restriction and then
[Register/Edit] of Reject No. List.
3 Press [Add].
4 Use the numeric keys to enter Reject FAX No. Up
to 20 digits can be entered.
NOTE: Press [Pause] to insert a pause (-) between
numbers.
Press [Space] to enter a space.
Use [ ] or [ ] to move the cursor.
Pressing [Backspace] deletes the character to the left of
the cursor.
5 Press [OK].
6 To register other Reject FAX numbers, repeat steps
3 to 5.
7 Press [Close].
FAX - Reject No. List
TEL Number
Register a number from which faxes will be rejected.
(Up to 50 numbers can be registered.)
Add
Detail Delete
Close
1/1
08/08/2009 10:10
Status
55555555555
Register or edit reject number.
Use the numeric keys to enter a number.
Cancel OK
FAX - Reject No.
987654321
Pause BackspaceSpace
08/08/2009 10:10
Status