Preparation Before Use
OPERATION GUIDE 2-5
2
Date and Time Entry
Register the date and time of the machine’s built-in clock. Because the FAX delayed transmission is conducted
based on the time registered here, be sure to register the correct date and time.
IMPORTANT: Correct the time displayed on the touch panel of the operation panel regularly. Otherwise, the
time displayed may eventually deviate from the current time.
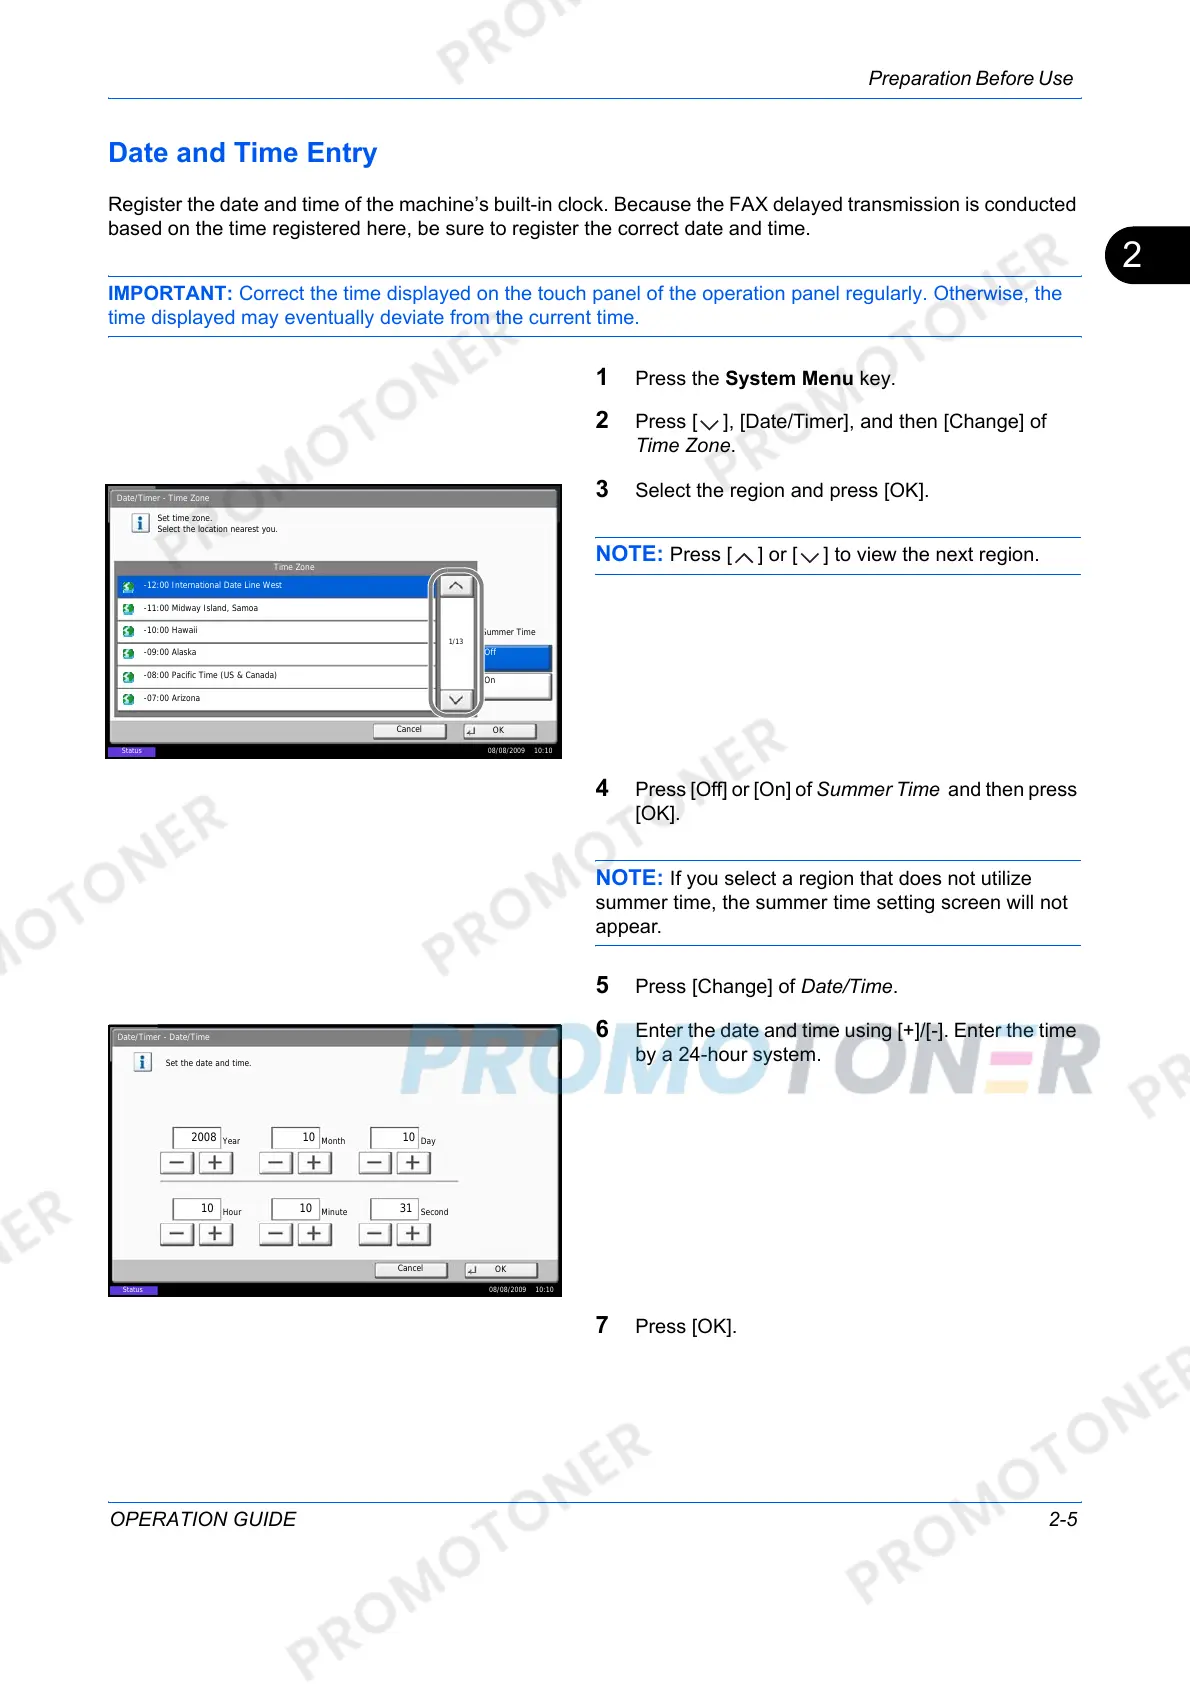
1 Press the System Menu key.
2 Press [ ], [Date/Timer], and then [Change] of
Time Zone.
3 Select the region and press [OK].
NOTE: Press [ ] or [ ] to view the next region.
4 Press [Off] or [On] of Summer Time and then press
[OK].
NOTE: If you select a region that does not utilize
summer time, the summer time setting screen will not
appear.
5 Press [Change] of Date/Time.
6 Enter the date and time using [+]/[-]. Enter the time
by a 24-hour system.
7 Press [OK].
Date/Timer - Time Zone
Set time zone.
Select the location nearest you.
Time Zone
-12:00 International Date Line West
1/13
-11:00 Midway Island, Samoa
-10:00 Hawaii
-09:00 Alaska
-08:00 Pacific Time (US & Canada)
-07:00 Arizona
Summer Time
Off
On
Status 08/08/2009 10:10
Cancel
OK
Date/Timer - Date/Time
Set the date and time.
Off
DayMonthYear
SecondMinuteHour
2008
10 10 31
10 10
Status
08/08/2009 10:10
Cancel
OK