Internet Faxing (i-FAX) (Option)
8-10 OPERATION GUIDE
Selecting the Resolution
4 Select the resolution suitable for sending originals.
For information on how to select the resolution,
refer to Selecting the Resolution on page 3-8.
NOTE: 300 × 300 dpi is not supported for i-FAX
transmissions. If 300 × 300 dpi is selected, the fax is
sent at a lower resolution of 200 × 200 dpi (Fine).
If you selected a resolution that is prohibited by the
destination conditions, the fax is automatically sent
using a lower (permitted) resolution.
Selecting the Density
5 Adjusting the density when scanning originals
For information on how to select the density, refer
to Selecting the Density on page 3-10.
Send Start
6 Press the Start key. Transmission begins.
Checking the Send Status
1 Press the Status/Job Cancel key.
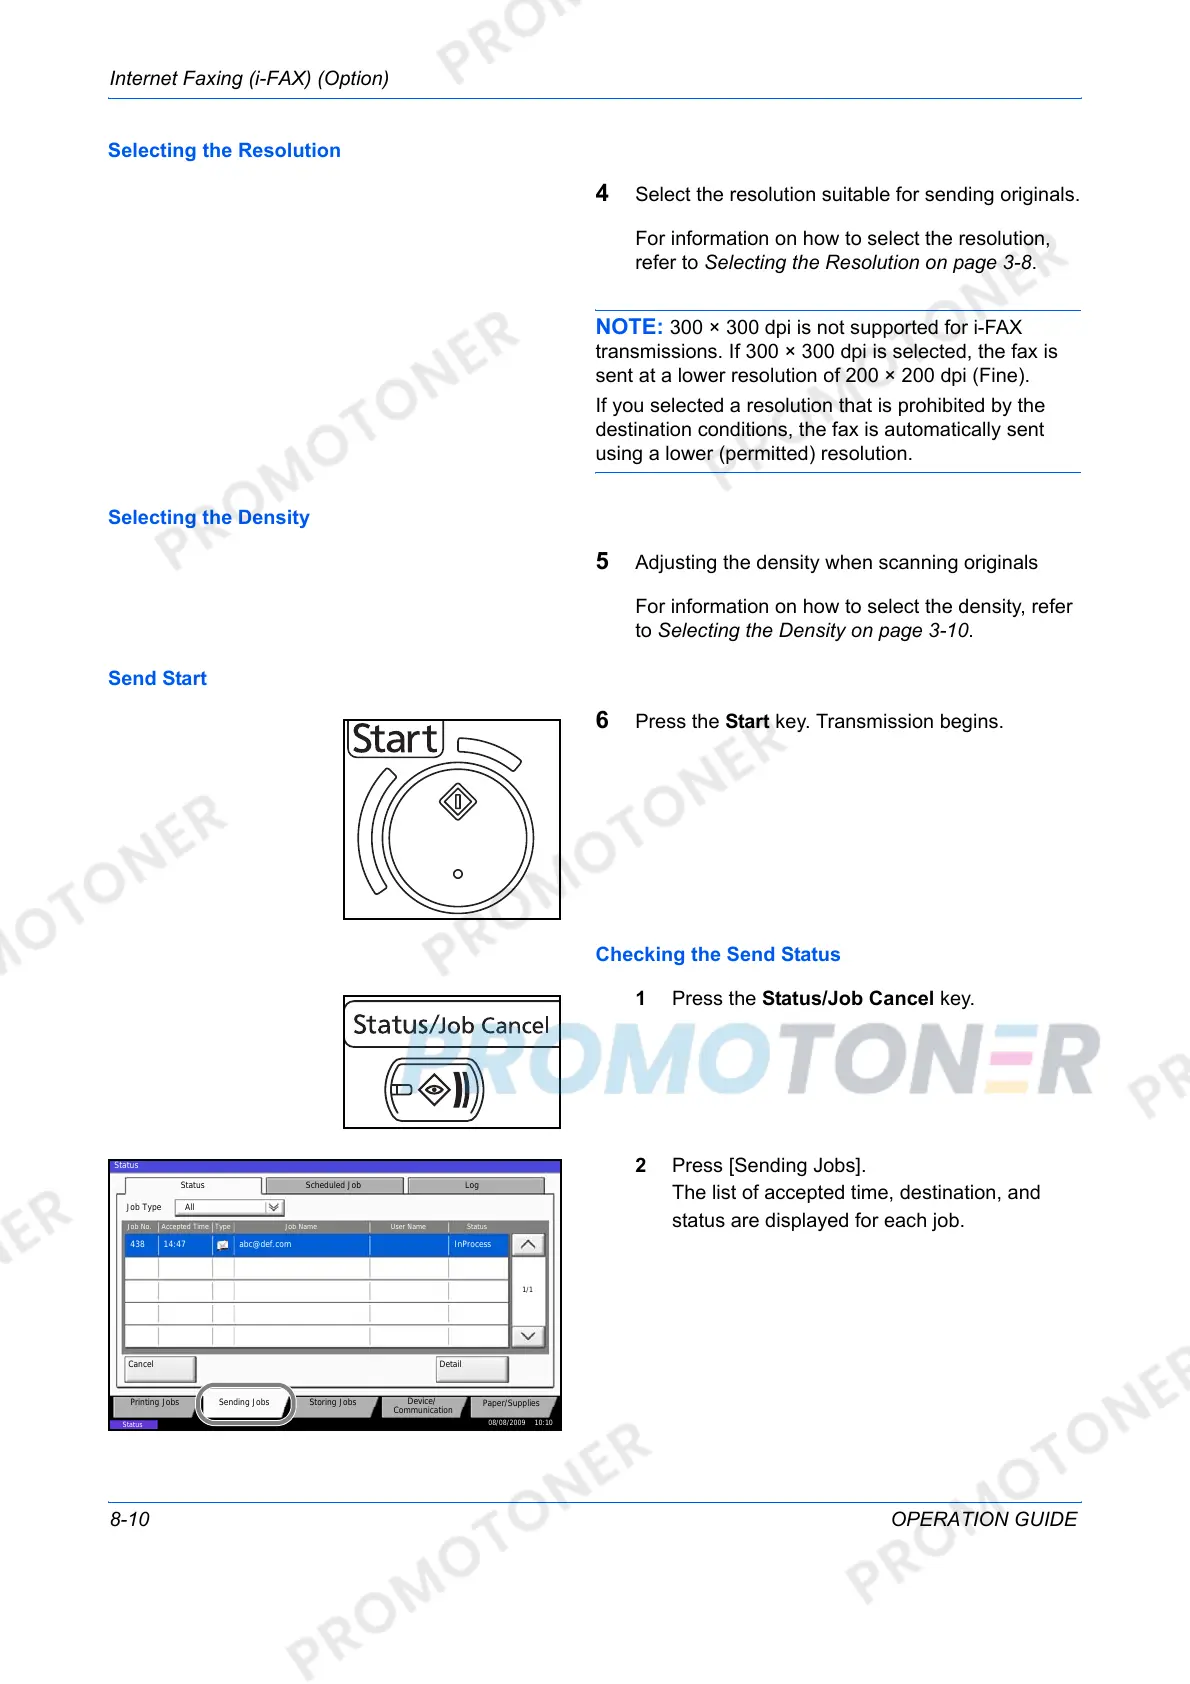
2 Press [Sending Jobs].
The list of accepted time, destination, and
status are displayed for each job.
Log
abc@def.com438 14:47
1/1
08/08/2009 10:10
Status
Printing Jobs Sending Jobs Storing Jobs
Device/
Communication
Paper/Supplies
Detail
InProcess
Status
User NameJob NameType
Accepted Time
Job No.
Cancel
Job Type All
Status
Status
Scheduled Job



 To Next Page