109
BX53M
14
Attaching the lamp
1
When replacing the lamp, set the main switch of the
power supply to (OFF) and wait until the lamp housing
and the lamp are sufficiently cooled down.
Attaching the halogen bulb
Applicable bulb
12V100WHAL-L (made by PHILIPS Co. 7724I)
12V100WHAL (made by PHILIPS Co. 7023)
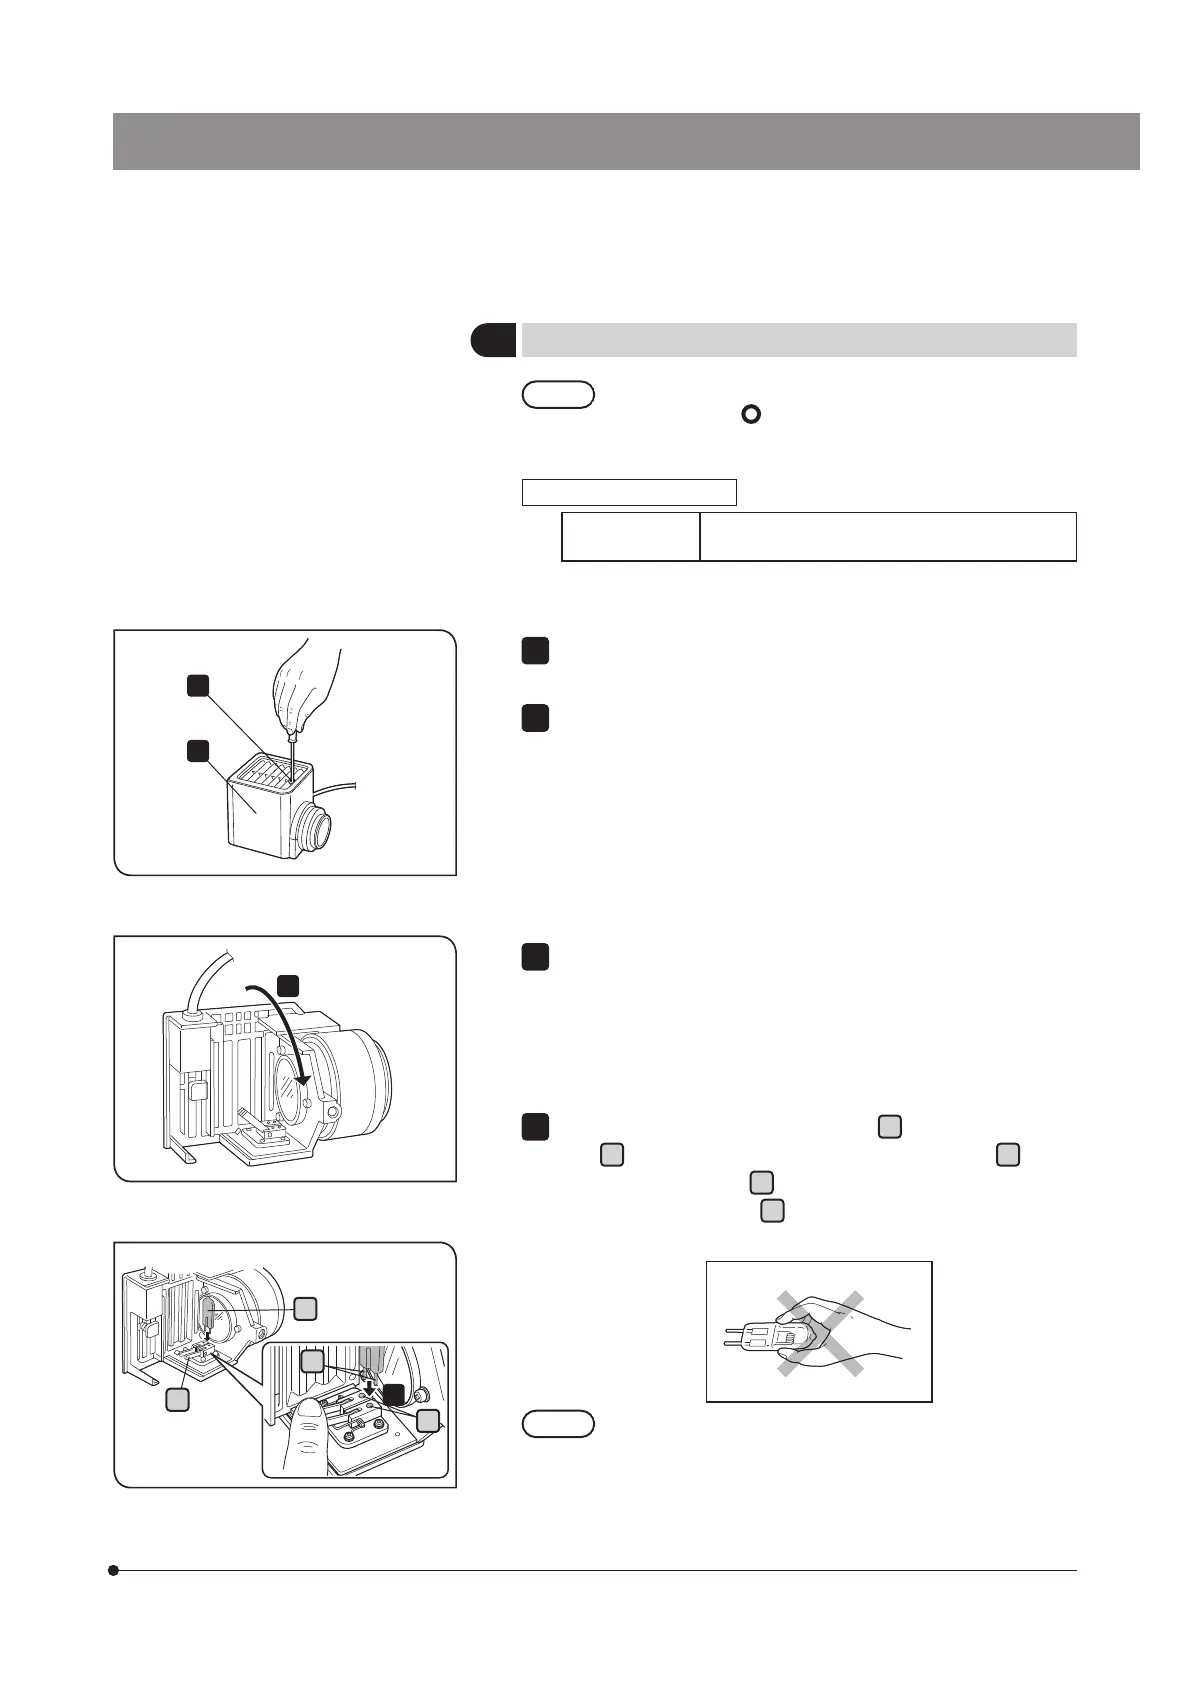
Loosen the clamping screw on the top of the lamp housing using
the Allen screwdriver.
Raise the lamp housing and remove it.
1
2
Tilt the lamp socket in the arrow direction by 90°.
3
a
b
c
d
While pressing down the bulb fixing lever
a
, hold the halogen
bulb
b
wrapped with gauze, etc. and insert the terminal
c
until it
touches the pin position
d
.
Place the bulb fixing lever
a
carefully to the original position to
secure the bulb.
Be careful not to touch the bulb directly with your hand
and avoid leaving fingerprints or stains on the lamp.
Otherwise, the bulb may be exploded due to glass
distortion caused by the stains. If fingerprints or stains
are attached to the bulb, clean it by wiping gently with a
piece of cleaning paper slightly moistened with absolute
alcohol.
4