244
Platinum Resistance Thermometer Calibration (Thermocouple/Resistance Thermometer Input)
Section 6-4
6-4 Platinum Resistance Thermometer Calibration
(Thermocouple/Resistance Thermometer Input)
In this example, calibration is shown for Controller with a Thermocouple/
Resistance Thermometer Universal Input, with a resistance thermometer set
as the input type.
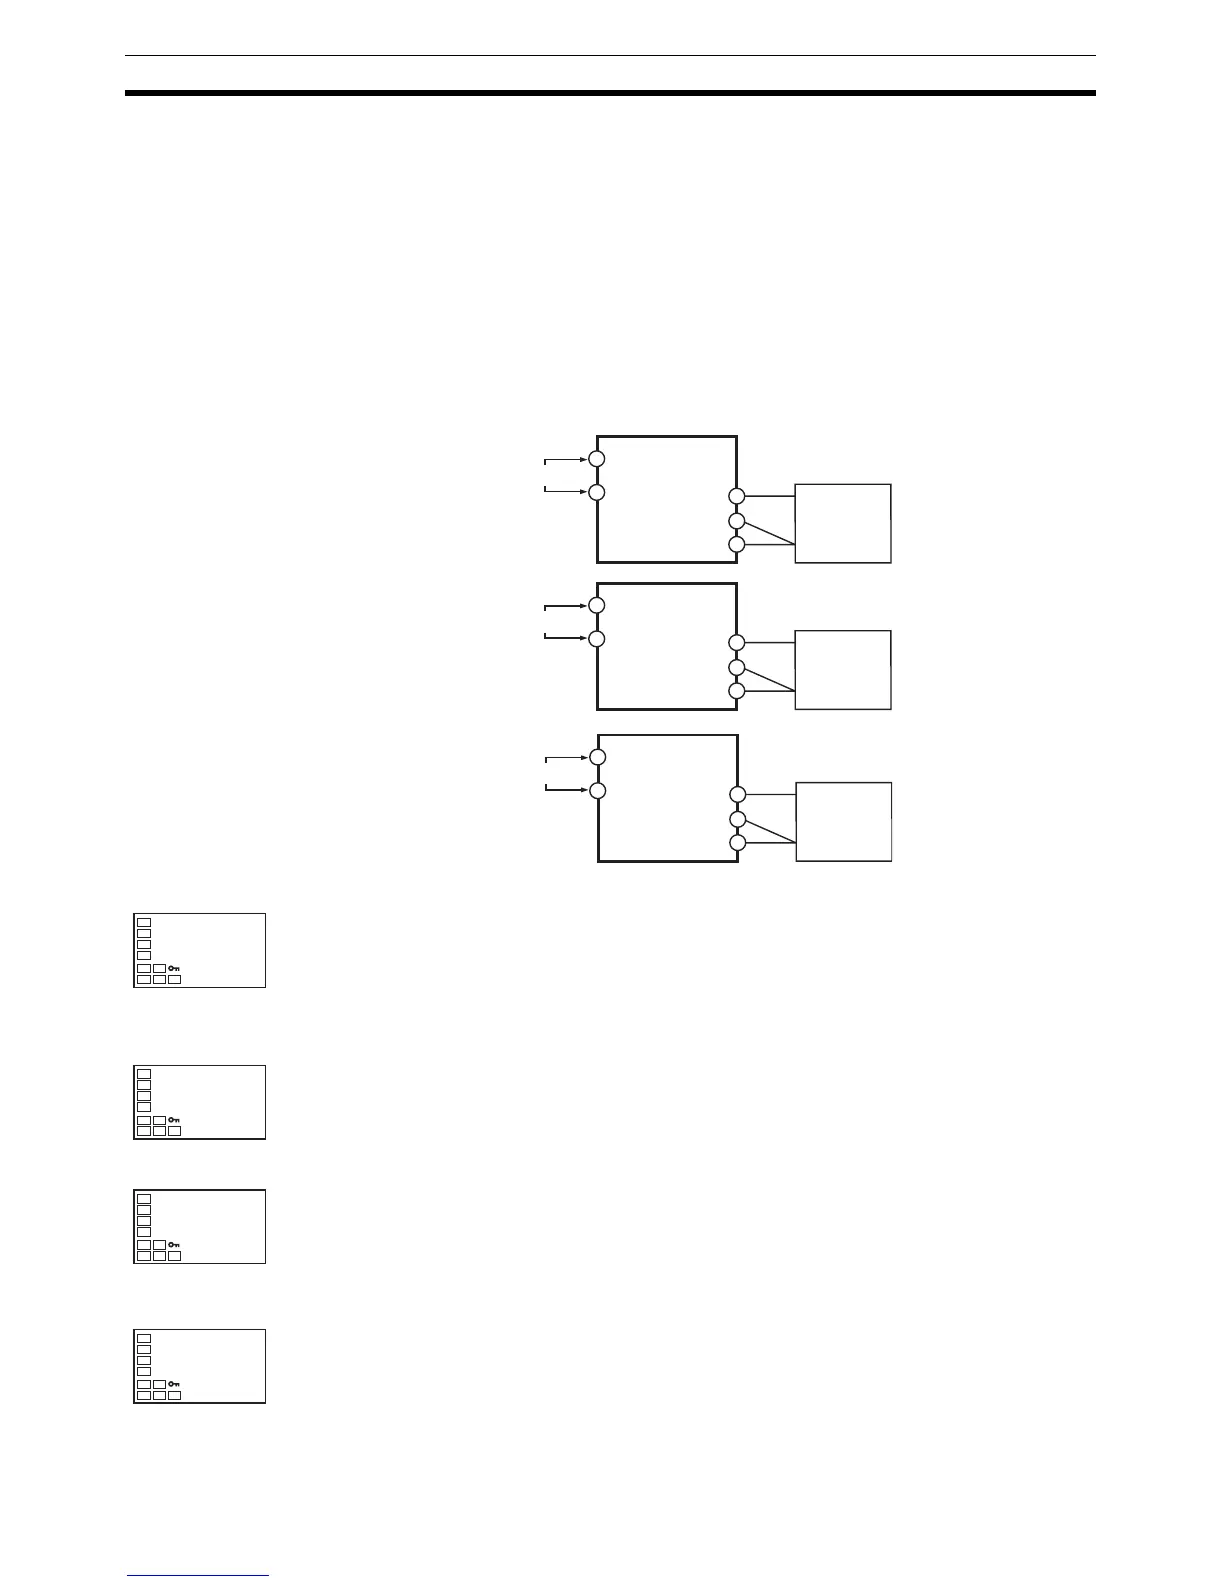
Use connecting wires of the same thickness.
1,2,3... 1. Connect the power supply.
2. Connect a precision resistance box (called a “6-dial” in this manual) to the
platinum resistance thermometer input terminals, as shown in the follow-
ing diagram.
3. Turn the power ON.
4. Move to the calibration level.
This starts the 30-minute aging timer. This timer provides an approximate
timer for aging. After 30 minutes have elapsed, the No. 2 display changes
to 0. You can advance to the next step in this procedure even if 0 is not
displayed.
Input type 0:
Input types 1, 2, 3, 4:
5. Execute calibration for the main input.
Press the M Key to display the count value for each input type.
The No. 2 display at this time shows the currently entered count value in
hexadecimal. Set the 6-dial as follows:
• Input type 0: 390
Ω
• Input type 1, 2, 3 or 4: 280 Ω
Allow the count value on the No. 2 display to fully stabilize, then press the
D Key to temporarily register the calibration settings.
If this count value is outside of the specified range, the No. 2 display will
flash and the count value will not be temporarily registered.
Input type 0: Press the M Key to display the count value for each input type.
The No. 2 display at this time shows the currently entered count value in hexa-
decimal. Set the 6-dial as follows:
• Input type 0: 200 Ω
• Input type 1, 2, 3 or 4: 140 Ω
E5CN
4
3
5
10
9
E5CN-U
2
3
1
11
10
A
B'
B
A
B'
B
6-dial
6-dial
Input power supply
Input power supply
E5AN/EN
19
18
20
2
1
A
B'
B
6-dial
Input power supply
adj
30
p390
e20c
p280
e26b
p200
93a7