3-1 Installing the PT
3-4
3-1-2 Installing RS-232C/RS-422A Converters
When using RS-232C/RS-422A Converters, mount the PT to the control panel before install-
ing these Units.
For details on installing and removing RS-232C/RS-422A Converters, refer to Appendix 3
Using NS-AL002 Converters.
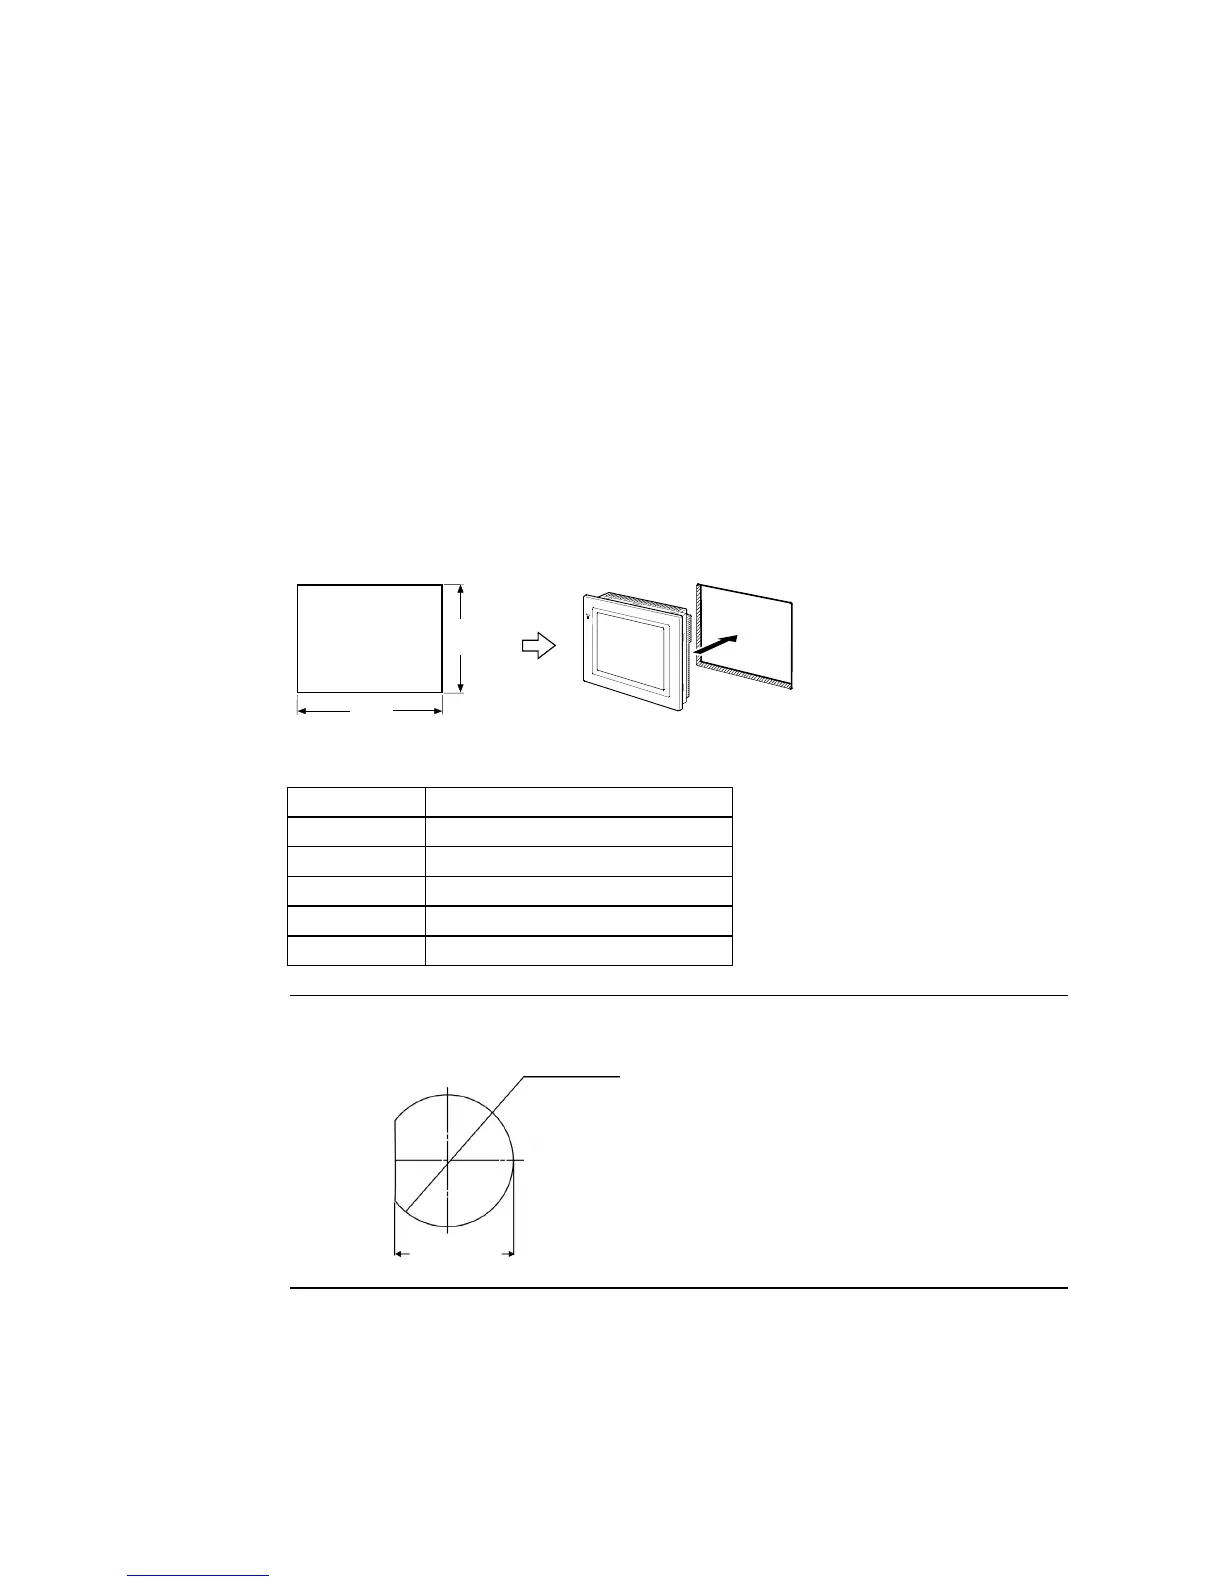
3-1-3 Mounting the PT to the Control Panel
The PT is flush-mounted to the control panel.
The PT is mounted using the panel mounting brackets provided with the PT, and tools, such
as a Phillips screwdriver.
Use the following procedure to mount the PT to the control panel.
1. Make a hole in the panel for flush mounting according to the following dimensions and
insert the PT from the front of the panel.
Recommended panel thickness:
1.6 to 4.8 mm
Width
Height
Model Dimensions
NS15
Width 383.5
+1
0
× Height 282.5
+1
0
mm
NS12
Width 302
+1
0
× Height 228
+1
0
mm
NS10
Width 302
+1
0
× Height 228
+1
0
mm
NS8
Width 220.5
+0.5
0
× Height 165.5
+0.5
0
mm
NS5
Width 184
+0.5
0
× Height 131
+0.5
0
mm
Reference
A NS-USBEXT-1M USB Relay Cable can be used to place a USB slave connector on the
front of the control panel. To use a USB Relay Cable, mount the Cable connector in a
panel cutout with the following dimensions.
20.8±0.1 dia.
19.4±0.1 dia.
Unit: mm