15
3.3 Unpacking Your Engraver
Your engraving machine arrives in a wooden crate with its accessories (including this manual) packaged inside. You
should have placed the crate in a spacious at area for unpacking, ideally near where you plan to operate the machine
permanently. If you have not already done so, nish removing the crate from around your engraver.
Note that your chiller is not prelled with coolant. ALWAYS check the chiller’s coolant level before turning
the power on. Use antifreeze as needed. It is recommended that you use OMTech antifreeze for optimal
performance.
Step 1. Roll the engraver slowly and carefully into place. Position the clamps to lock the engraver rmly in place.
Step 2. Retrieve the access keys from the main bay of the machine, along with the accessory toolbox. Check that
you have received all of the following:
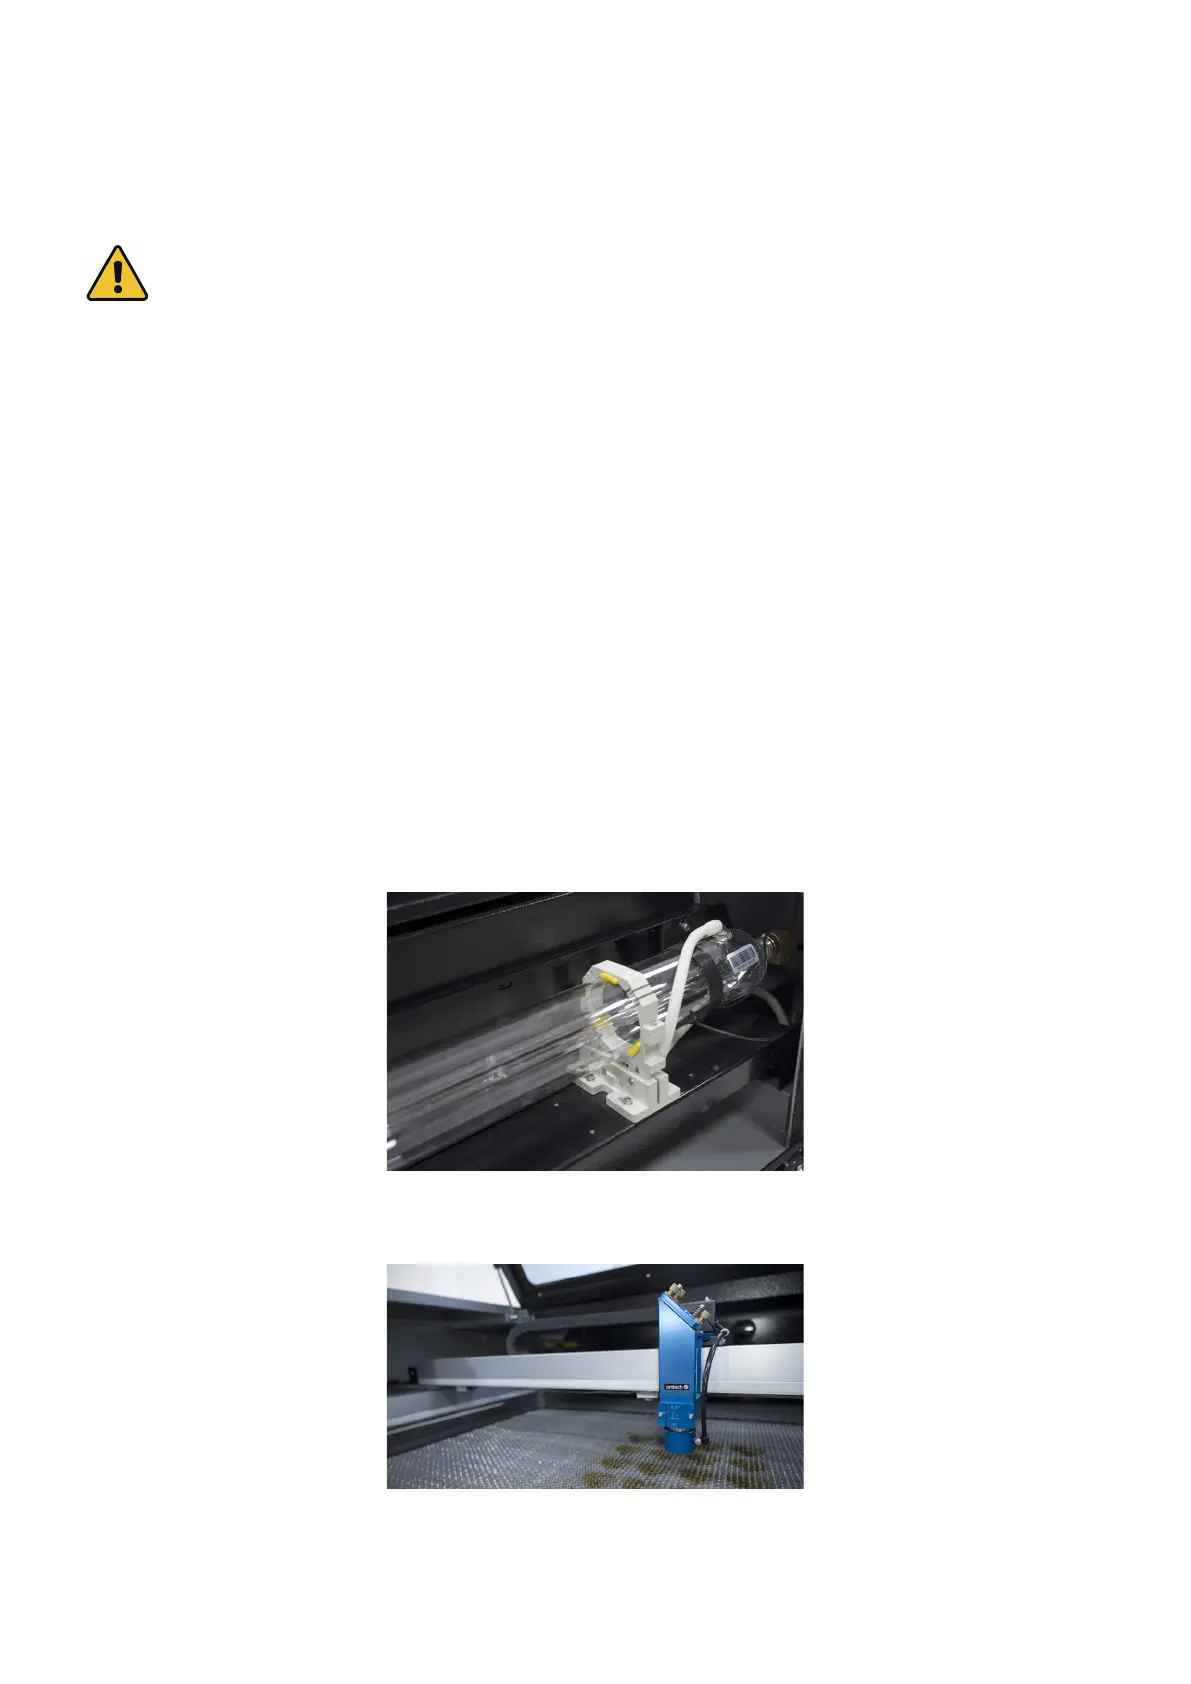
Step 3. CAREFULLY remove the rest of the foam packaging material from around the laser tube, the viewing
window, and the rest of the machine. The laser tube is a highly fragile object and should be handled delicately
and as little as possible.
Step 4. Inside the main bay, remove the nylon cable ties from the X axis and the workbed.
Step 5. You may keep the packaging in case of future return but, if you dispose of it or any accessories, be sure to
do so in compliance with applicable waste disposal regulations.
• 1×Toolk it
• 1×External Fan (with power cord)
• 2×Exhaust Pipes
• 5×Hose Clamps (150mm)
• 1×Hex Wrench Set
• 1×Flathead Screwdriver
• 1×Phillips Screwdriver
• 2×Focal Length Rulers
• 1×USB Cable
• 1×Ethernet Cable
• 1×USB Flash Drive (preloaded with RDWorks V8)
• 1×Limit Switch
• 1×Laser Glasses (OD5+)
• 2×Power Cords (15A)
• 2×Focal Lens Tools (15A)
• 2×Laser Keys
• 4×Acesess Keys (15A)
• 1×Manual