46
5.8 Manual Adjustment
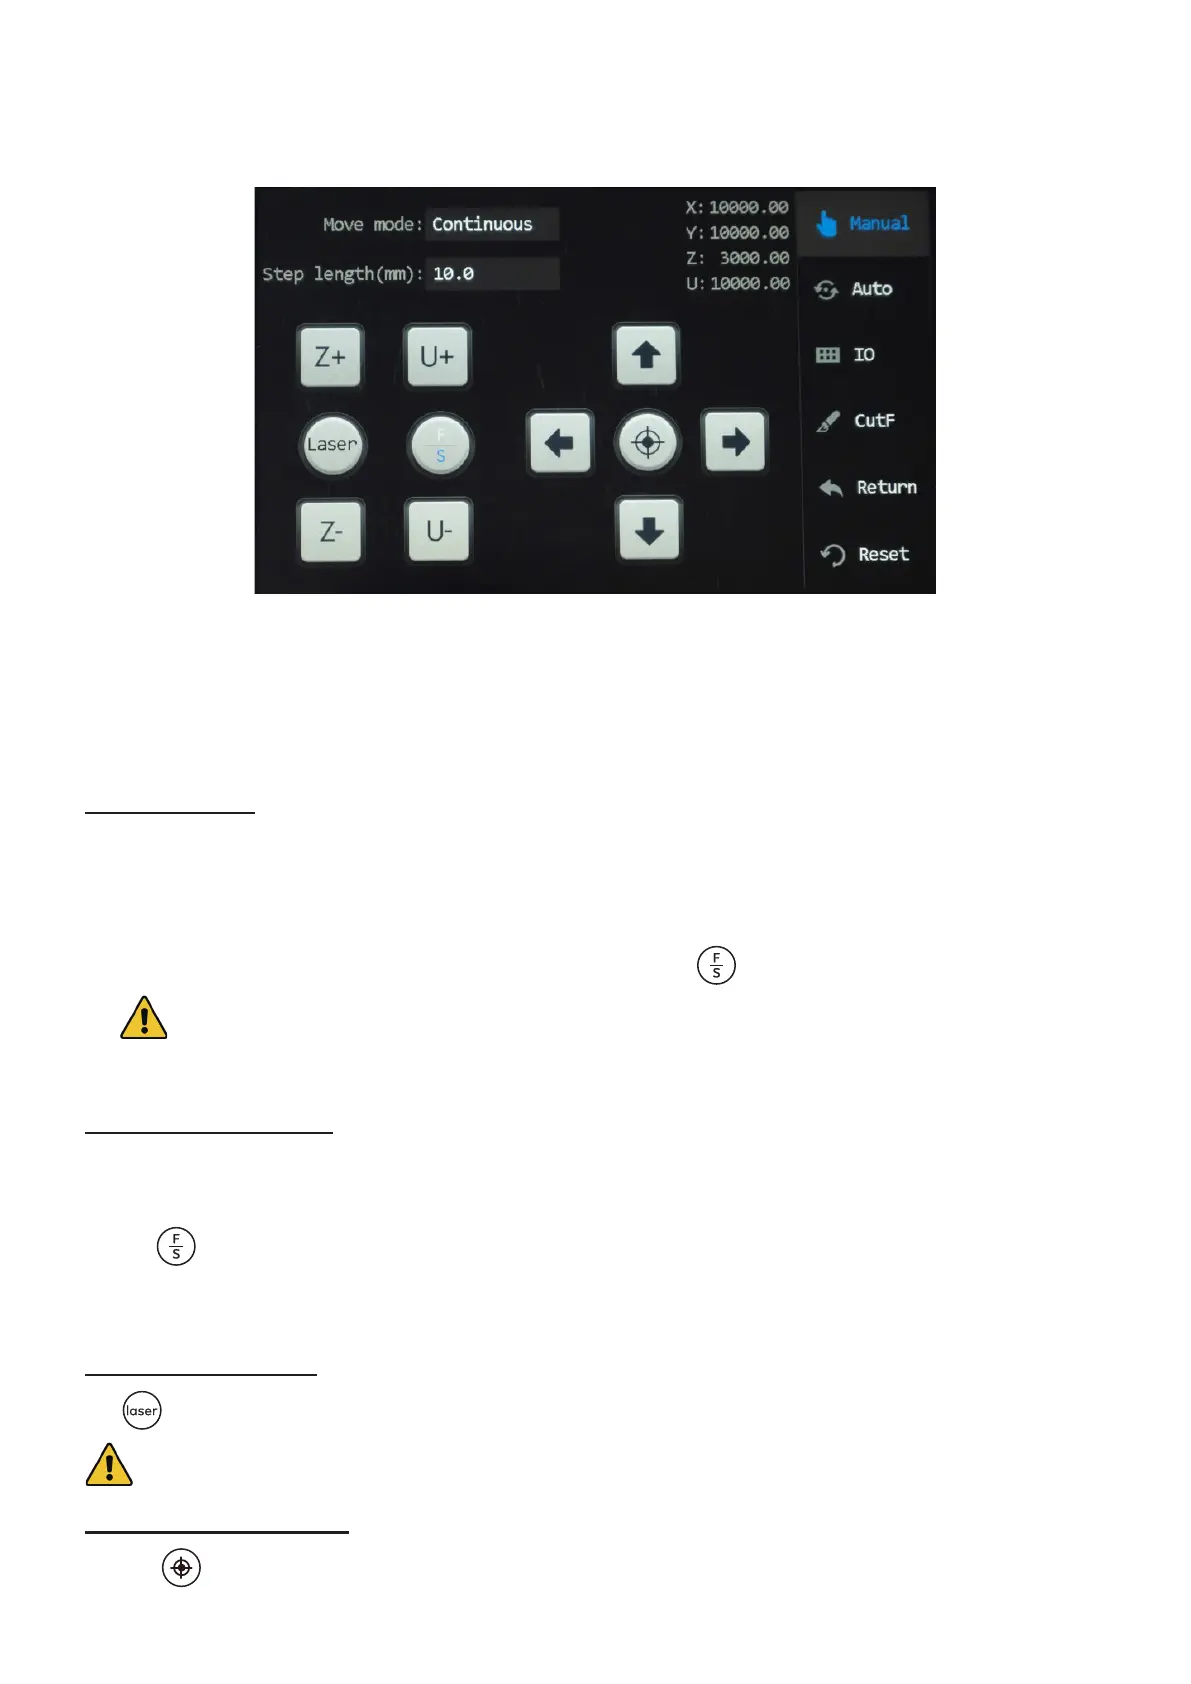
Tap “Manual” in the main menu, and the following menu pops up.
This menu is mainly for manual debugging, including axes (X, Y, Z, & U) motion, manual laser ring, positioning,
IO diagnosis, frame cutting, return and system reset, and aligning the laser path. To exit this menu, tap “Auto” in
this menu.
5.8.1 Manual Axes Adjustment
Step Movement
To check that the laser head and the workbed can move normally for a set distance under manual mode,
1. Tap “Manual” in the main menu, and the menu above pops up.
2. Tap “Manual mode” and select “step”.
3. Set “Step length” to a value that you desire (other than zero). Tap to use a set slow or fast speed.
When “F” is in blue, the selected axis travels at a fast speed. When “S” is in blue, the selected axis travels
at a slow speed. For speed Adjustment, see 5.4 Setting Speed Levels.
4. Tap any axis icon, and the laser head or workbed should move for the distance that you set.
Continuous Movement
To check that the laser head and the workbed can move continuously under manual mode,
1. Tap “Manual mode” and select the other option than “step”.
2. Tap to use a set slow or fast speed. When “S” is in blue, the selected axis travels at a slow speed. For speed
adjustment, see 5.2.4 Setting Speed Levels.
3. Tap any axis icon, and the laser head or workbed should move as you tap the icon and stop as you release.
Manual Laser Firing
Tap and the laser head should re laser beam. The laser stops as the icon is released.
Always make sure there is a laserable workpiece under the laser every time before you re the laser.
Laser Head Positioning
Tapping sets the current position of the laser head as a positioning point.