17
5. For initial use, press ⯆ to speed activation of the compressor. The default setting is to keep the chiller within
3.6°F (±2°C) of 77°F (25°C).
6. To change the target temperature, press SET, use ⯅ and ⯆ to adjust the value up or down, and press RST to save
your changes. For other adjustments, see §5.5 below.)
Once the chiller is fully operational, its cooling liquid should begin to run through your machine and back into your
tank.
Caut i on! ALWAYS obtain visual conrmation that the liquid is owing through the laser tube behind the top
rear access door before starting your laser. Check that the water level remains in the “NORMAL” area of the
gauge after lling the cooling pathway for your engraver. If it has fallen to the “ALARM” level, check for any
leaks and then add more distilled water or laser-safe antifreeze as necessary. There may be alarms from the
chiller or engraver when the chiller rst begins operation: This is because of air bubbles being cleared from
the line, which in normal use would pose a risk of overheating the laser tube. The bubbles should dissipate and
the alarms should cease after a few minutes of operation. If any other alarms occur, see the Troubleshooting
section for the meaning of the specic error code.
Caution! NEVER allow the liquid in the tank to become too hot to cool the laser. If you have deactivated the
chiller’s automated alarms, periodically check the liquid’s temperature during prolonged use. If the liquid ever
begins to approach 100°F (38°C), operate the laser at a lower power setting or pause its activity to allow time
for the chiller to further cool the machine.
Your chiller includes a small amount of R-410A refrigerant. This should never present a hazard or need replacement
but, if you ever notice the chiller struggling to cool your machine during normal operation, stop use of the machine,
make sure the area is well ventilated, and have a trained and skilled professional contact Customer Service for
instructions on how to check the refrigerant level, safely repair any leaks, and add additional refrigerant before
further use.
NEVER attempt to adjust the refrigerant yourself without professional training.
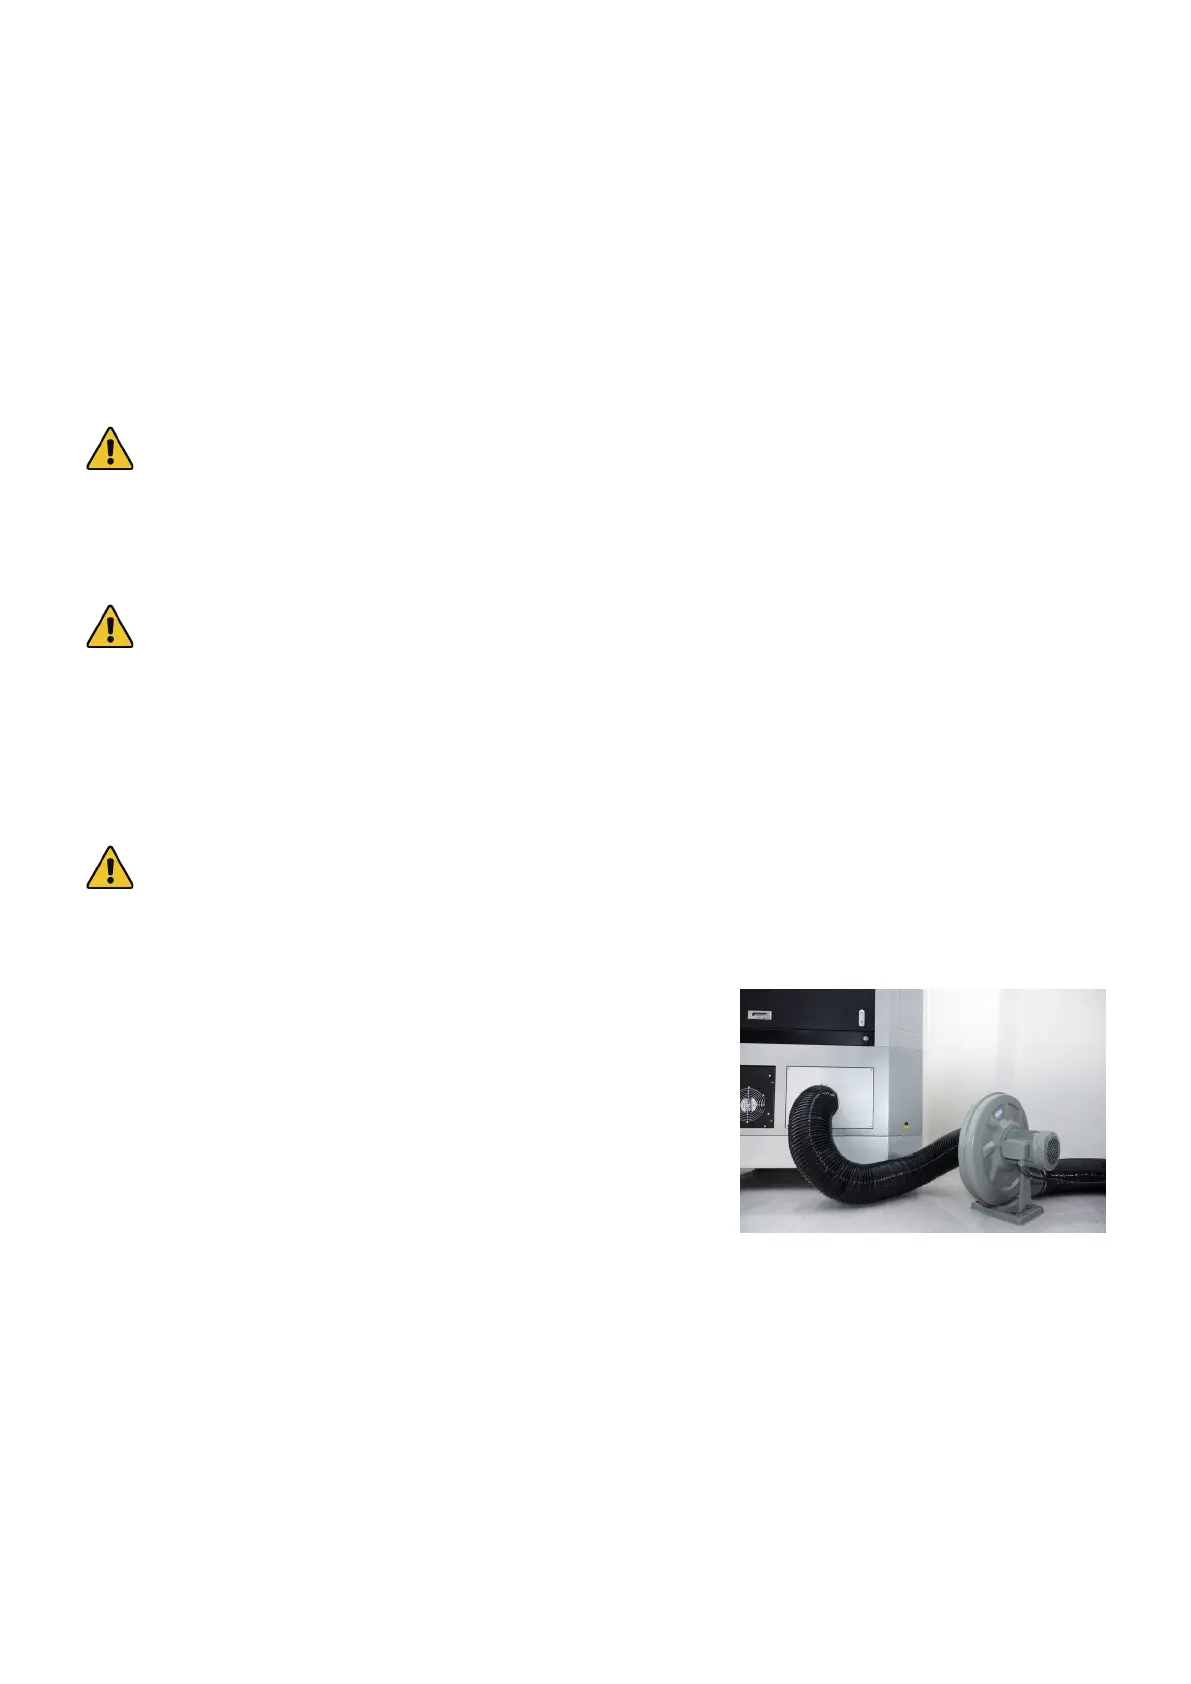
3.6 Exhaust System
Install one of the provided 150 mm ducts directly onto the exhaust
vent on the rear of the engraver, fastening it into place with one of the
hose clamps. The pipe can be expanded to a full length of about 5 feet
(1.5 m). The other end should be fastened onto the external fan’s inlet
with a second hose clamp. The fan can be plugged into the outlet on
the back of the engraver if the water chiller will be using a dedicated
line or if you have prepared a robust circuit able to handle the full load
of the entire machine.
The second duct should be tted onto the fan’s outlet with a third hose clamp. It can also be extended to a length of
about 5 feet, after which it should be tted into a dedicated purier or—if the fumes are not hazardous and meet
local and national air safety standards—placed out a window. If additional ducts are necessary, ONLY use metal:
nonconductive material such as PVC pipe cannot be safely grounded and can build dangerous static electric charges
during use. Seal all seams and connections tightly.
NEVER operate the laser if the fan and ducts are not working to purify or remove the fumes produced by the target
material. Research materials before use and never operate the laser on any (such as PVC, teon, and other halogen-
containing substances) that can produce corrosive, hazardous, or even deadly fumes.