35
4.2 Typical Operation Instructions
Step 1. Create the design that you’d like to engrave or cut into standard materials. (See §4.3 for engraving circular
objects.) You can do this directly in your engraving software or use any other graphics program to create
the image and set its engraving parameters. Files should not exceed 128 MB in size. Larger images will
need to be reduced in resolution or divided into pieces for separate engraving.
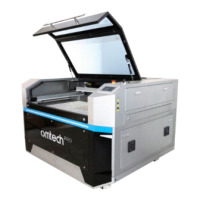
Step 2. Open the engraver’s cover and adjust the workbed if necessary. If needed, remove the aluminum knife bed
for thicker projects.
Step 3. Place a sample piece of your material on the workbed. The standard location is in the top right corner of
the workbed. This can be changed by moving either your design or the engraver’s origin position using the
control panel or your engraving software
If you will be adjusting the laser head or its nozzles, it can be helpful to briey cover the material
with something soft and wide to catch any loose parts that might accidentally be dropped during the
process. Remove any such material before engraving.
For heavier pieces of material, be careful to distribute its weight as evenly as possible across the reinforced
supports. For larger pieces of material, you may open the front, rear, or side pass-through doors.
DO NOT insert anything through the pass-through doors other than the material once the laser is active.
Pay special attention to the fumes and dust that may be released through these doors. Be sure that your
ventilation system is strong enough to pull in all of the byproducts or wear the necessary PPE to ensure the
health of users and passersby.
Step 4. Use the Z keys to move the workbed so that the top of your material is about 1 or 2 inches below the nozzle.
Step 5. Check your water chiller’s gauge to conrm that your cooling liquid is completely clear and in the upper
half of the green “NORMAL” zone. Flip the circuit breaker and water chiller on. Open the top rear door to
visually conrm that the liquid is owing through the whole system and any air bubbles are removed from
the line. Check the gauge again and add more laser-safe antifreeze or distilled water if the liquid level is
too low after lling the system.
Step 6. Turn on any fume extractor or additional ventilation system. Turn on the external fan that was provided
with the machine. Check that everything is functioning normally and will be able to remove any fumes or
dust safely during work.
Step 7. Release the emergency stop button by turning it clockwise and conrm that the ammeter’s knob is
turned completely clockwise as well. Load your chosen design onto the engraver’s mainboard using your
engraving software or through the control panel and the engraver’s USB port (§5.3).
Step 8. Conrm the air assist is working well, blowing air through the nozzle, and then close the cover.
Step 9. Customize your design’s contrast and engraving depth by adjusting the parameters in your engraving
software or directly through the control panel. See §5.1–5.9 for details.
The threshold for the lowest setting is around 10% and the laser will not have sucient voltage to
re at settings below this. It is NOT recommended to use the laser tube at full capacity either,
especially for extended periods. The recommended maximum power setting is 70%, as prolonged
use above that amount will shorten your laser’s service life. To increase the engraving depth, increase
the amount of energy per unit area by increasing the laser’s power or the number of loops or by
slowing down the speed parameter. Engraving too deep, however, reduces image quality, especially
for coated materials.
When working with new materials, remember that you should always start on the low end of likely
settings. If the eect is not yet strong enough, you can always rerun the design loop several times or
rerun it with more powerful settings until you create the eect that you want. You can also try grids
of possible settings at rst to nd what works best with your material.
Step 10. Turn on the laser power supply using the laser key. To reduce the risk of electric shock, once the laser tube
is on, try to touch the engraver with only one hand at a time.