WorkBee CNC Wiring & Commissioning 43
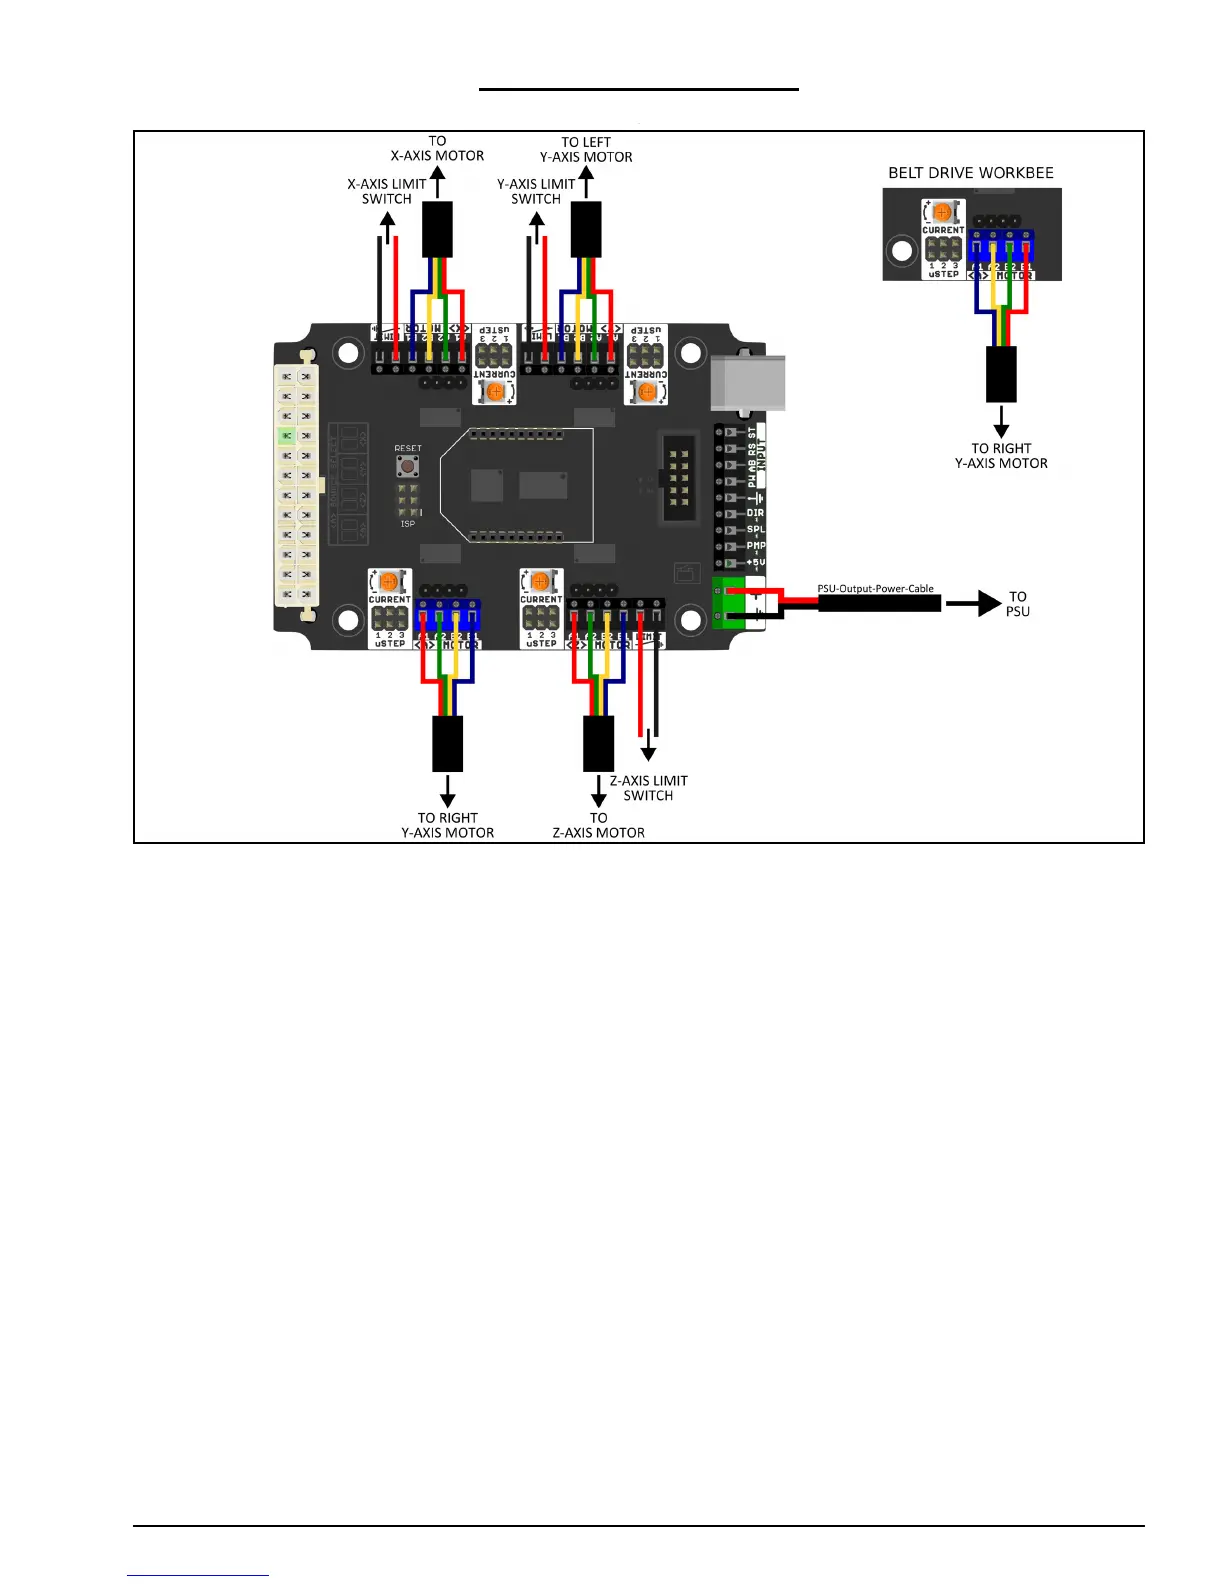
6.1 CNC-xPro Wiring
A. Following the wiring diagram above, strip and connect the second PSU-Output-Power-
Cable to the power input terminal on the CNC-xPro.
B. Connect the 4 x NEMA23-Stepper-Motors to the CNC-xPro as shown above. Take note
of the order of the wire colours. For the belt drive version of the WorkBee notice that
the colour order is reversed on the A driver (this is also true for a 1000x1500mm Belt
& Screw drive WorkBee).
C. Wire in the 3 Limit-Switches, note the polarity of the wires in the image above.
D. Plug both PSU-Output-Power-Cables into the XT60-Male Outputs on the assembled
24V-360W-Power-Supply. Do not tidy up the wiring just yet, as this is best left until
the machine has been fully checked to ensure that it is operating correctly.
E. If interested, it is a good idea to read the CNC-xPro Wiki for more in-depth informa-
tion: https://github.com/Spark-Concepts/xPRO/wiki
 Loading...