U
U
s
s
e
e
r
r
m
m
a
a
n
n
u
u
a
a
l
l
15
this key, system will switch its outputting video
resolution by sequence “by source-> by native TV -
> 480i-> 480P-> 576i-> 576p-> 720P-> 1080i”.
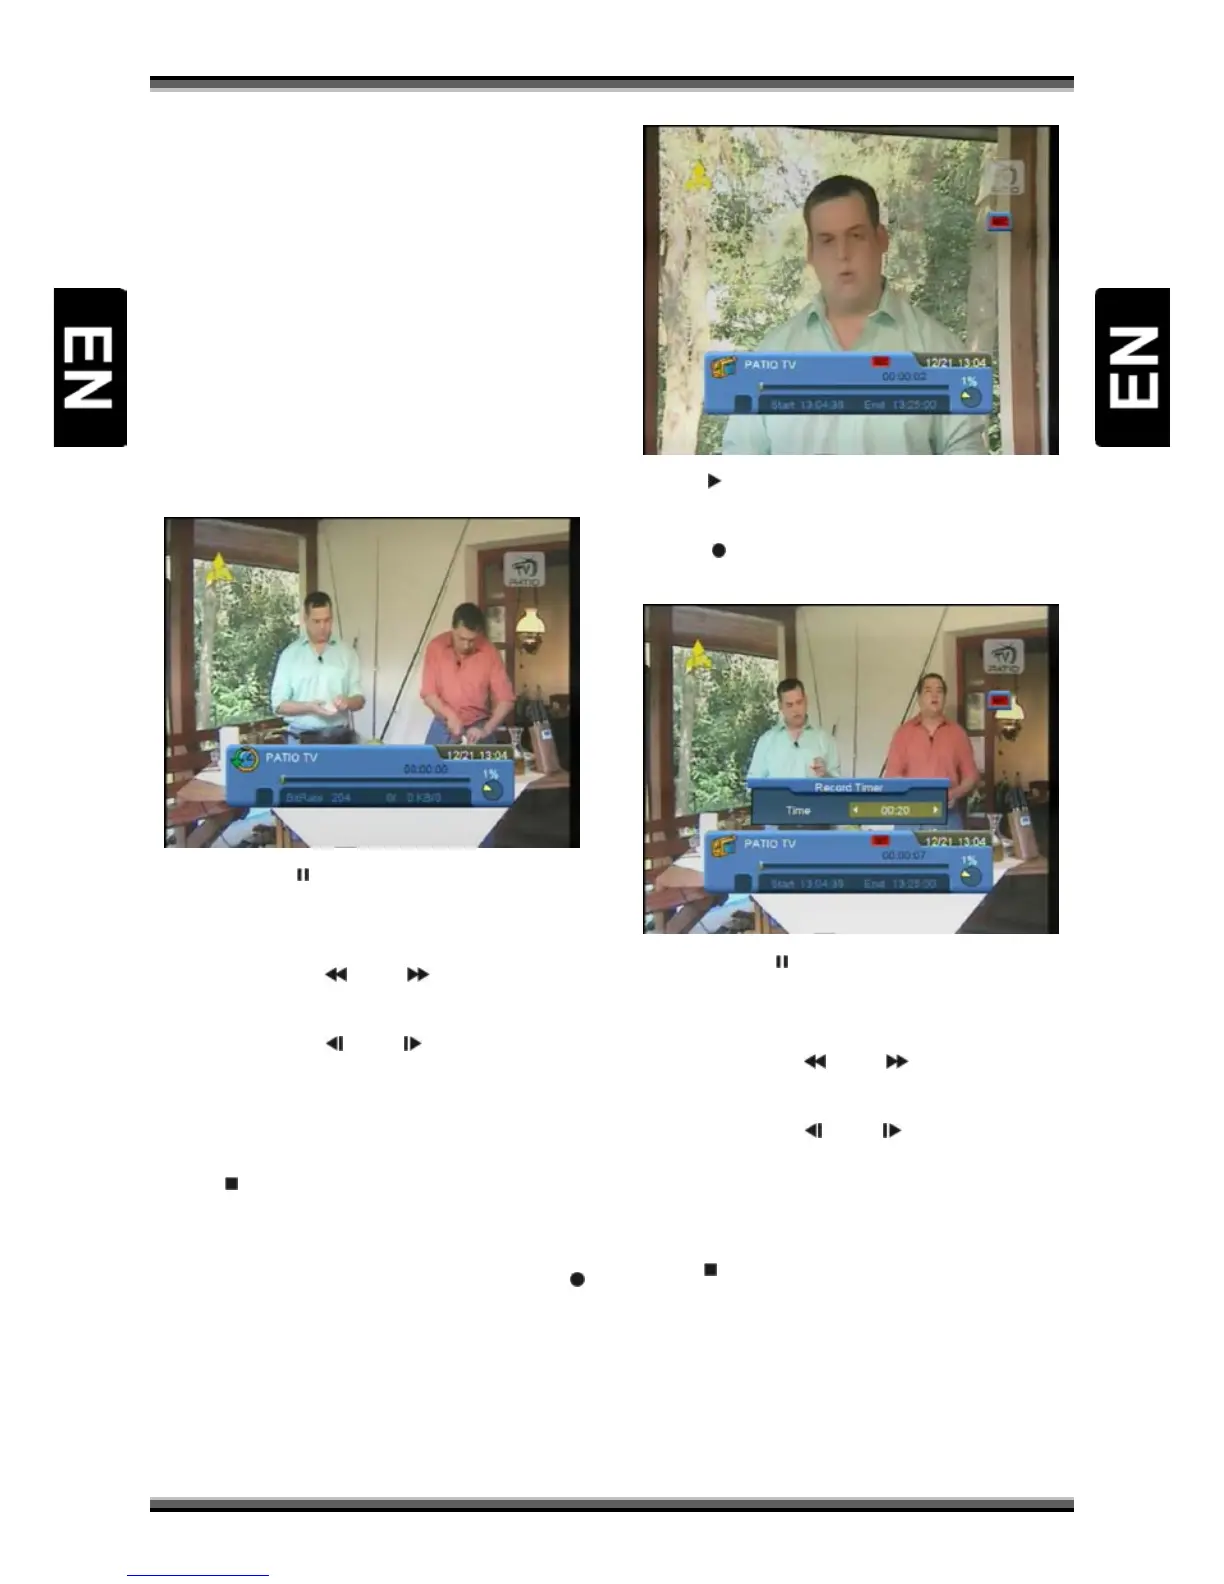
9.24. Time Shift
1.If you connect the USB HDD, and enable the
Time Shift function in the menu "Main Menu/
USB/ PVR Setting/Time Shift", it will start the
Time Shift function automatically after you switch
the program, and when you press the [Tms]
button the Time Shift info bar will displayed as the
following picture:
2.You can press [ ] button to pause the video, and
can save the picture to flash by press [P+] button
when the video is paused.
3.You can press [
] or [ ] button to Fast
Backward or Fast Forward.
4.You can press [
] or [ ] button to Slow
Backward or Slow Forward.
5.Press [←] or [→] button to jump to different
position, then press [OK] button to confirm.
6.Press [
] button to exit the playback.
9.25. Record
1.If you connect the USB HDD, You can press [ ]
button to start record function, as following
picture:
2.Press [ ] button to display the record info bar
when you recording.
3.Press [
] button again to setting the record
time.
4.You can press [ ] button to pause the video, and
can save the picture to flash by press [P+] button
when the video is paused.
5.You can press [
] or [ ] button to Fast
Backward or Fast Forward.
6.You can press [
] or [ ] button to Slow
Backward or Slow Forward.
7.Press [←] or [→] button to jump to different
position, then press [OK] button to confirm.
8.Press [
] button to stop the recording.
9.26. Exit
Press [EXIT] key can exit the current menu to last
menu or close the window