U
U
s
s
e
e
r
r
m
m
a
a
n
n
u
u
a
a
l
l
19
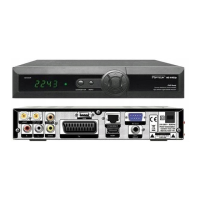
When you enter to “Edit TP” menu, there will
display the screen like below:
1.In “Satellite” item, press [←/→] key to switch
satellite that you want to scan or press [OK] key to
enter satellite list for selection.
2.In “TP Index” item, you not only can use [←/→]
key to select transponder but also can use [Add]
and [Delete] functions.
• When you press [GREEN] key, it will display
“New TP” in “TP Index” item; You should
set the parameters of “TP Frequency” and
“Symbol Rate” for this new transponder.
The parameters of “TP Frequency” and
“Symbol Rate” can set by number keys. The
available range are “3000~13450 MHz” and
“1000~45000Ks/s”.
• When you press [YELLOW] key, there will
show up a warning message for reminding
whether you will delete the current
transponder or not. If you select “Yes”, the
current transponder will be deleted, and
the total account of transponder will
reduce 1 correspondingly.
• When you press [BLUE] key, there will show
up a warning message for reminding
whether you will delete all transponders or
not. If you select “OK”, all transponders will
be deleted.
3.For the existed transponder, you also can use
number keys to modify the parameters of “TP
Frequency” and “Symbol Rate”.
4.When you complete your modification, Press
[RED] key, it will show up a dialog to ask you scan
mode, program type, scan type and NIT Search
on/off. After you set up, press [OK] key to start
scanning.
5.In the “TP Scan” item, press [EXIT] key to exit the
scanning and save the current parameters.
11.1.10. Single Scan
1.Press [RED] key, it will show up a dialog to ask
you scan mode (means you want to scan all
channels or only scan free channels), program
type (means you want to scan all channels or only
scan TV/Radio channels), scan type (means preset
scan, that is searching the existed TP. Automatic
Scan means blind scan. It is no need existed TP
info) and NIT Search on/off. After you set up, press
[OK] key to start scanning.
11.1.11. Blindscan
1.Press [WHITE] key into the blind scanning
immediately.
11.2. Auto Installation
This function will try to analyze Your dish/LNB
configuration and automatically scan for founded
settings.
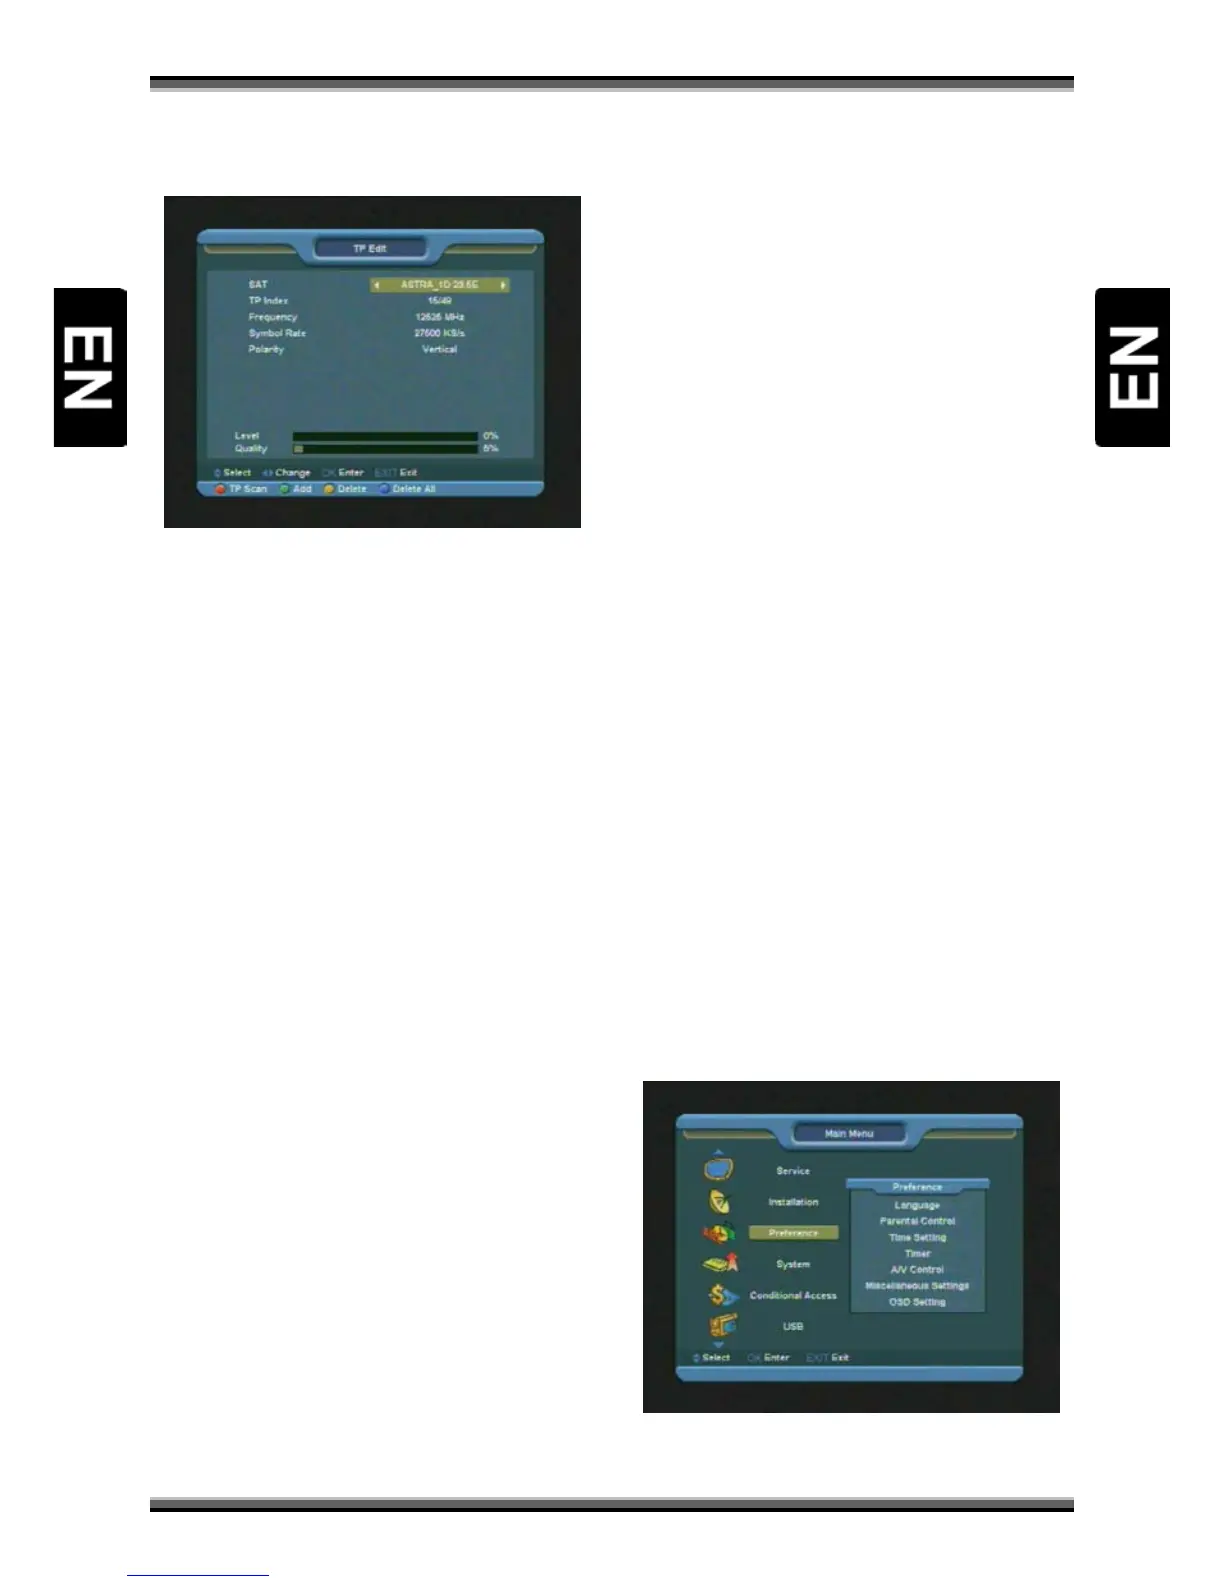
12. Menu “Preferences”
When you enter to “Preferences” menu, you will
see the screen like below:
In “Preferences” menu:
 Loading...