PULSAR
2
ESP
Installation and Operating Manual
OPTIKON 2000
Cod. 111007EN Rev.E
8-8
CAUTION:
Always test the balance between irrigation and aspiration settings by
using the test chamber: fill the test chamber with irrigating solution
and fit it on the irrigation sleeve.
Venturi pump:
Place the test chamber to the same level of the patient’s eye and
activate aspiration at the levels set for subsequent surgery. The test
chamber should not collapse. If it collapses, reduce the vacuum
setting or increase the irrigating solution height. Do not proceed until
the correct balance is obtained.
Peristaltic pump:
Place the test chamber to the same level of the patient’s eye and
activate aspiration at the levels set for subsequent surgery.
Bend the aspiration line close to the handpiece, wait for the vacuum
to rise to the preset level.
Release the aspiration tube, the test chamber should not collapse. If
it collapses, reduce the vacuum setting or increase the irrigating
solution height. Do not proceed until the correct balance is obtained.
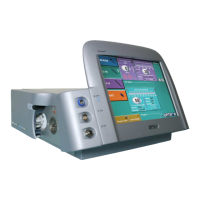
10) Plug the electrical connector of the handpiece into the U/S socket (Fig.1, No.4)
on the equipment front panel.
11) Touch <U/S> key on the LCD screen to select Ultrasound mode. <U/S> soft key
is depressed and the speech synthesizer announces “US 1”. Ultrasound window
will display preset phaco tip stroke , power mode, pulsed mode, phaco timer,
EPT and timer reset.
12)
Touch the tip stroke display in the Ultrasound window to show the Ultrasound
setup pop-up window. Tip stroke can be adjusted by means of the
<UP>/<DOWN> keys. Linear or panel U/S modes can be selected touching the
toggle <MODE> key. Burst mode can be selected touching the <US RATE> key.
Timer reset can be achieved touching the <RESET> key in the Ultrasound
.
The message “Plug Handpiece” displayed on the screen indicates that the phaco
handpiece is not connected or it is not recognized.
The message “Please Prime” indicates that priming procedure is required.
The touch of the Prime soft key activates the priming procedure; the I/A lines are
tested for correct installation, for proper functioning and completely filled with
BSS solution.
I/A priming procedure can be skipped in some special circumstances, i.e. when it is
necessary to replace the ultrasound handpiece or tip after a successful priming. To
skip the I/A priming procedure, depress the system footswitch beyond position #3:
a pop-up window will ask you to confirm if you want really to skip the Priming.