Installation
10
900-0209-01-00 Rev A
Installation
Installing the Fan
The fan must be connected before the controller can be used, though it does not have to be installed first.
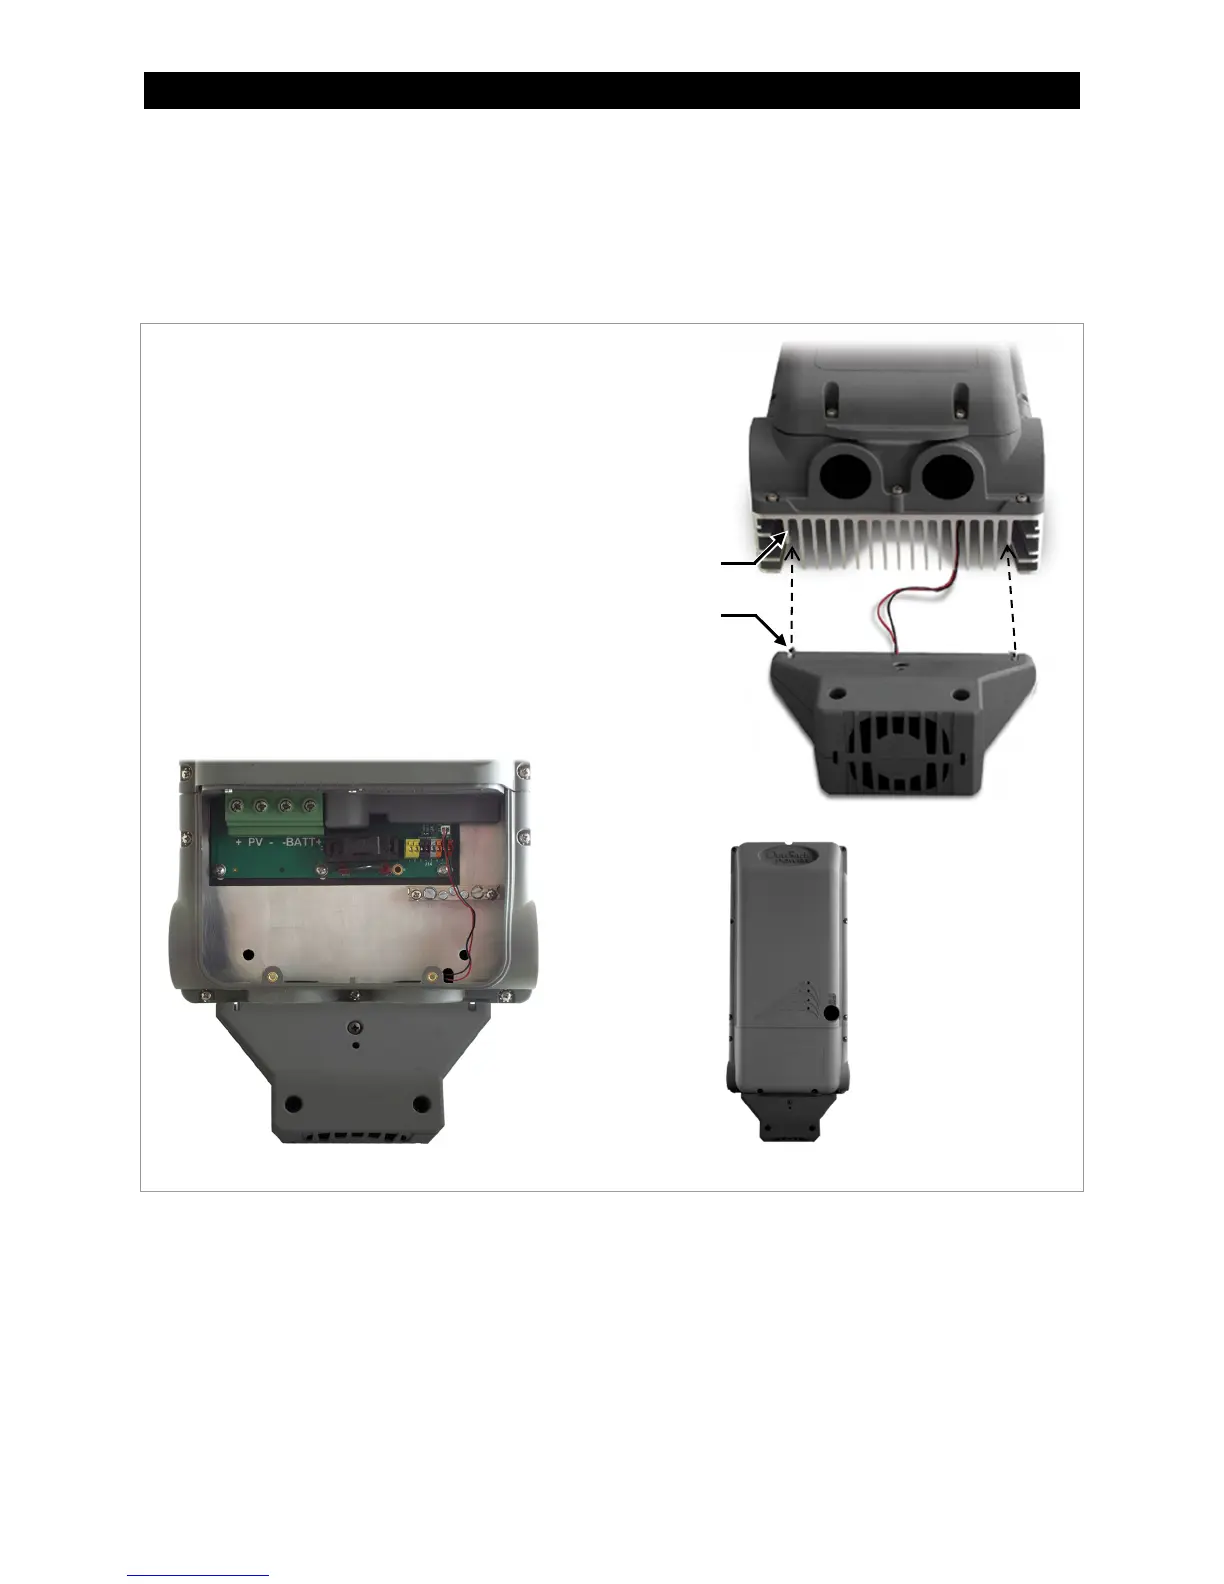
Figure 3 Installing the Fan
Mounting the Charge Controller
The FLEXmax 100 must be mounted upright on a wall or similar flat upright mounting surface. It must be
mounted at least 36” (91.4 cm) above the ground or floor. No other mounting positions are allowed.
Installation in shade is recommended.
Clearance requirements include a minimum of 6“ (15.2 cm) above and below the controller. On the right
and left sides, 1” (2.5 cm) clearance is sufficient. This includes clearance for multiple controllers installed
next to each other.
Two mounting methods are available. The first method uses keyhole slots on the back of the controller for
hanging directly on a wall. This method is useful for a standalone installation.
To install the cooling fan:
1.
Place the fan against the base of the controller. Two
of
the heat sink
fins have holes which receive the locking
tabs on the fan. Align
the tabs with these fins.
2.
Press the fan straight along the
fins until the tabs snap
into the holes.
3. Insert the fan connector through the hole in the
back of the controlle
r and into the fan po
rt in
the wiring c
ompartment.
(See illustration below;
also
see page 19.
)
Fan install
ation is complete. The fan will operate
automatically based on the internal temperature.
See page 38 to read the temperature using the
system display. This page also lists the
temperatures at which the fan turns on and off.
Heat
Sink
Fins
Tab