Installation
900-0209-01-00 Rev A
11
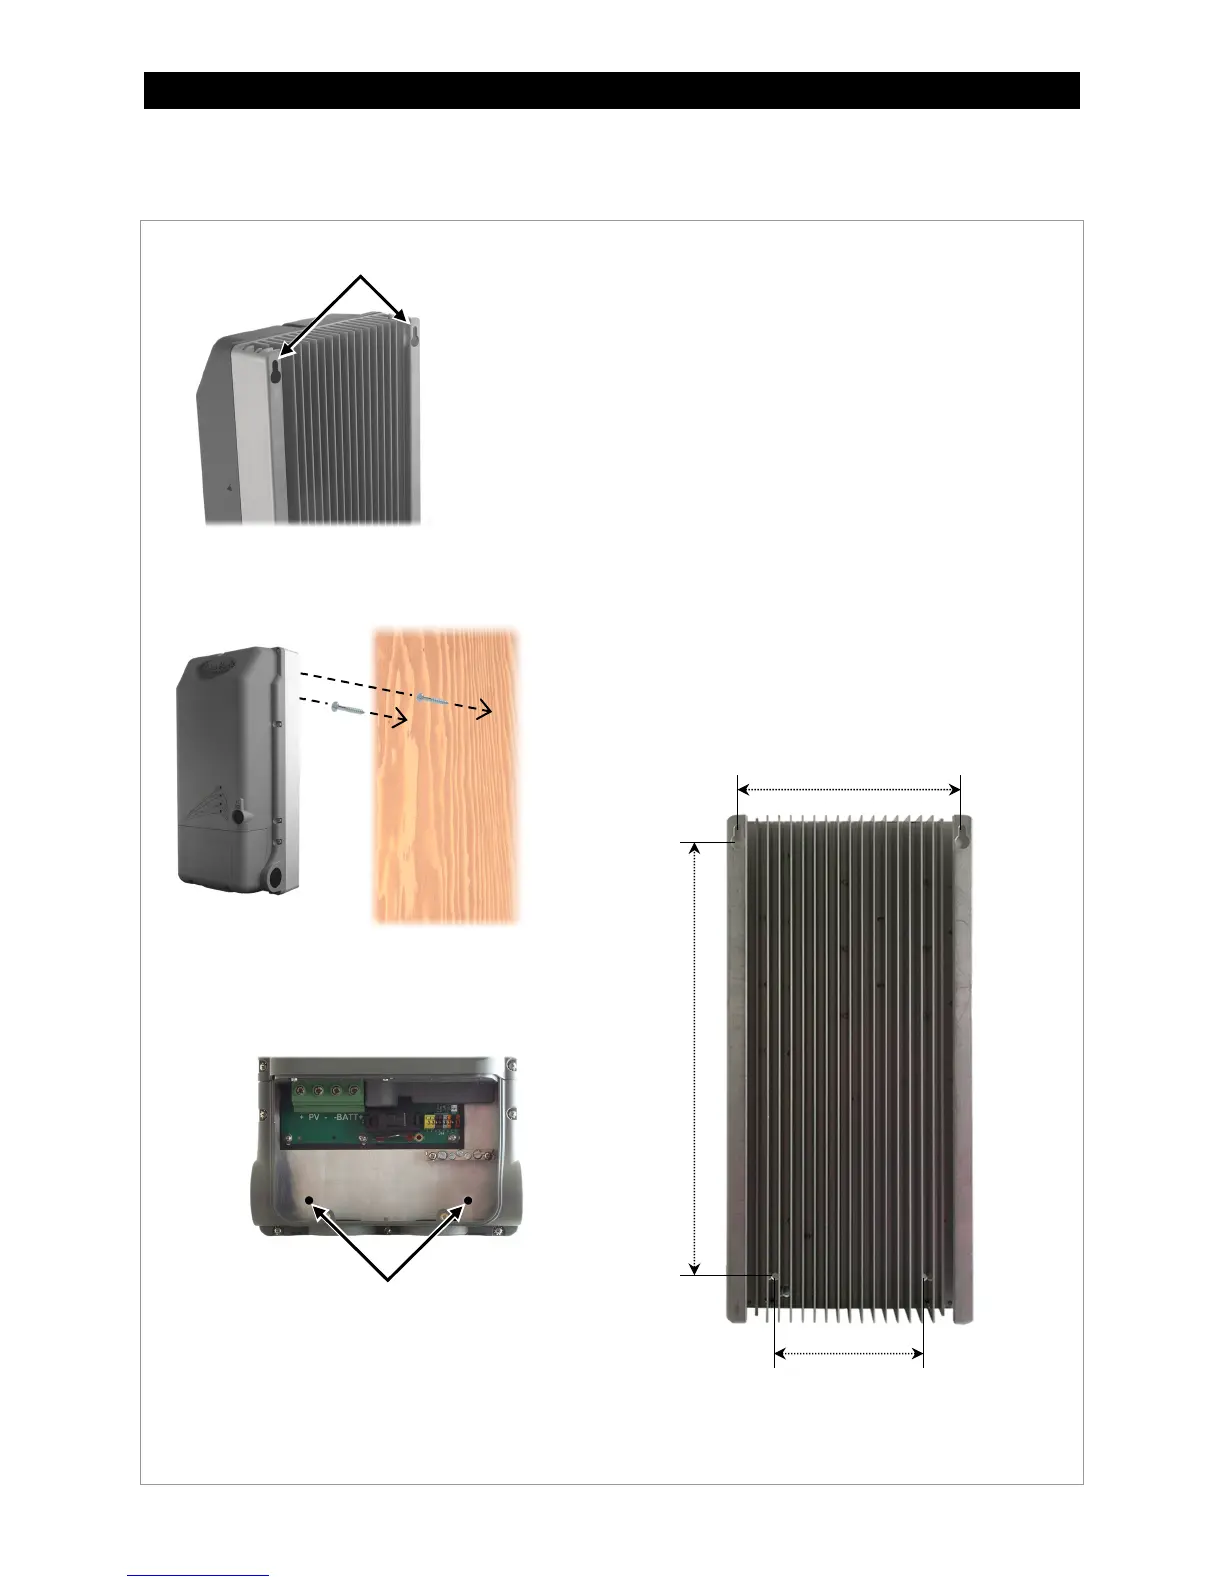
Keyhole Slot Mount
Figure 4 Mounting the Charge Controller (keyhole)
To mount using keyhole slots (A):
1. Use two slotted #14 wood screws. The mounting surface must
be strong enough to support the weight of the FLEXmax 100.
NOTE: OutBack is not responsible for damage resulting from
inadequate mounting hardware or preparation.
2. Mark the locations where the screws will be inserted on the
surface as in
B. Space them according to the keyhole slot
locations as in
D.
NOTE: The brackets included with the controller have holes
with the same spacing which can be used as a marking template.
3. Using the appropriate tools, set the screws into the
surface. The heads should protrude by ⅛” (0.3 cm).
4. Hang the FLEXmax 100 by placing its back against the
mounting surface and aligning the keyhole slots with
the screws. Settle the controller so that the screws
seat in the narrow end of each slot.
5. Secure the base of the controller to the surface. Insert
two ¼” hex head lag screws into the holes shown in
C.
Keyhole slots
A
B
Securing holes
C
D
Slot spacing 7.9” (20.1 cm)
Hole spacing 5.5” (13.9 cm)
Distance
16.9”
(42.9 cm)
Mounting is complete. Proceed to charge controller wiring or other installation steps.