B-149-4N-E
18
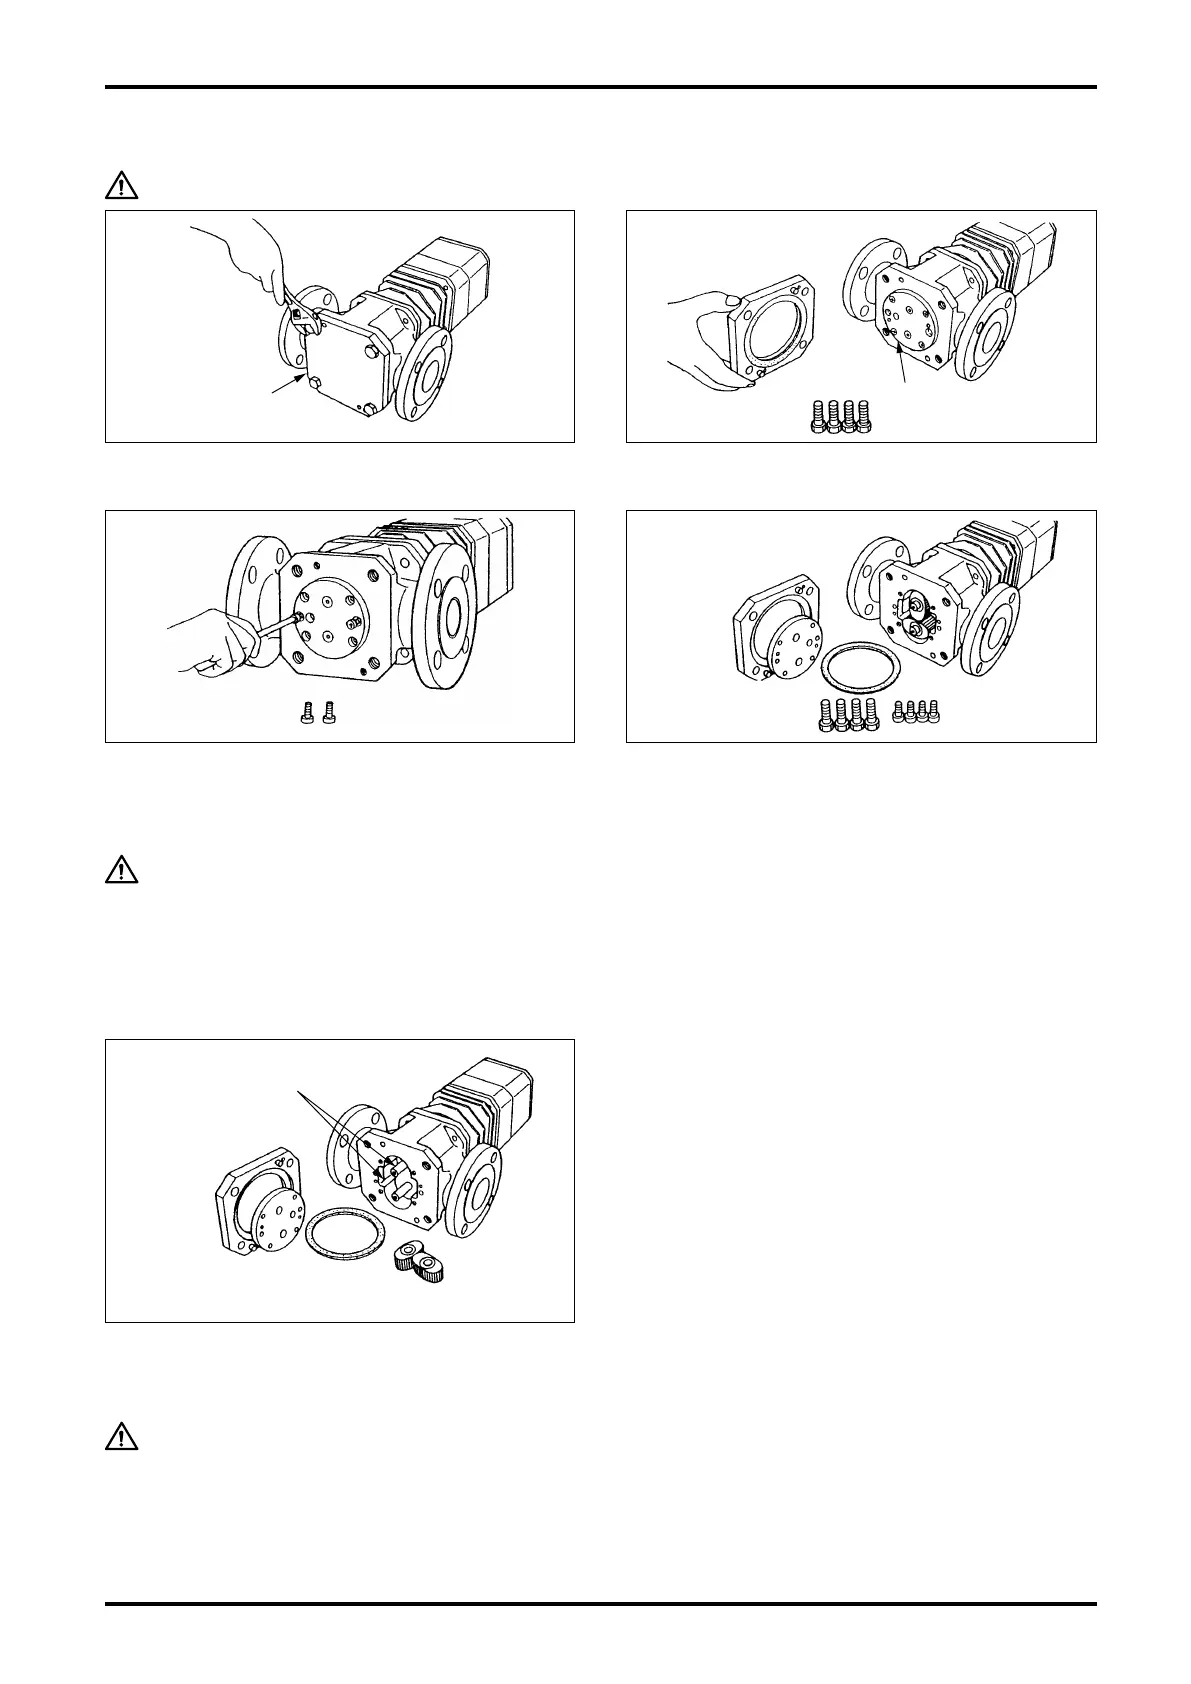
10.3 Sizes 52, 53, 55, 56, 57 Meter Body Disassembly and Inspection
CAUTION: Be sure to deenergize before you disassemble.
(1) Take off all rear cover tting bolts, using wrench.
REAR COVER
HEX BOLTS
TOP COVER
(2) Remove the rear cover to gain access to the top
cover.
(3) Using cross slot screwdriver, remove all four
bolts securing the top cover in place. Then, use
two of them to jack up the top cover, eventually
to remove it.
CAUTION
When jacking the top cover off, turn the
jacking screws evenly and alternately so
that the top cover not slant.
REAR
COVER
GASKET
END PLATE
(4) With the top cover removed, the measuring
chamber with oval rotors and other components
are now accessible.
ROTOR SHAFT
REAR
COVER
TOP COVER
GASKET
ROTORS
(5) Remove oval rotors and rotor shafts, in this order,
from the measuring chamber and inspect them
for condition. (The rotor shafts should be drawn
out straight.)
(a) Make sure to see if the oval rotors are
jammed with foreign matter.
(b) Check to see if the rotors, shafts and other
components are worn.
(c) Inspect if the measuring chamber and inner
wall of the front cover have any sign of
scratches or other damage.
Upon completion of these inspections, clean
the oval rotors, rotor shafts, measuring
chamber and front cover with cleans water or
suitable solvent thoroughly.
CAUTION
1. Score marks, scratches, high spots due to impressions, or other flaws should be
reconditioned flat with oil stone or other tool.
2. If the areas which have been in contact with rear cover forcing bolts are distorted
outwardly, recondition it flat with oil stone.