HydroControl M
Commissioning
1
2
3
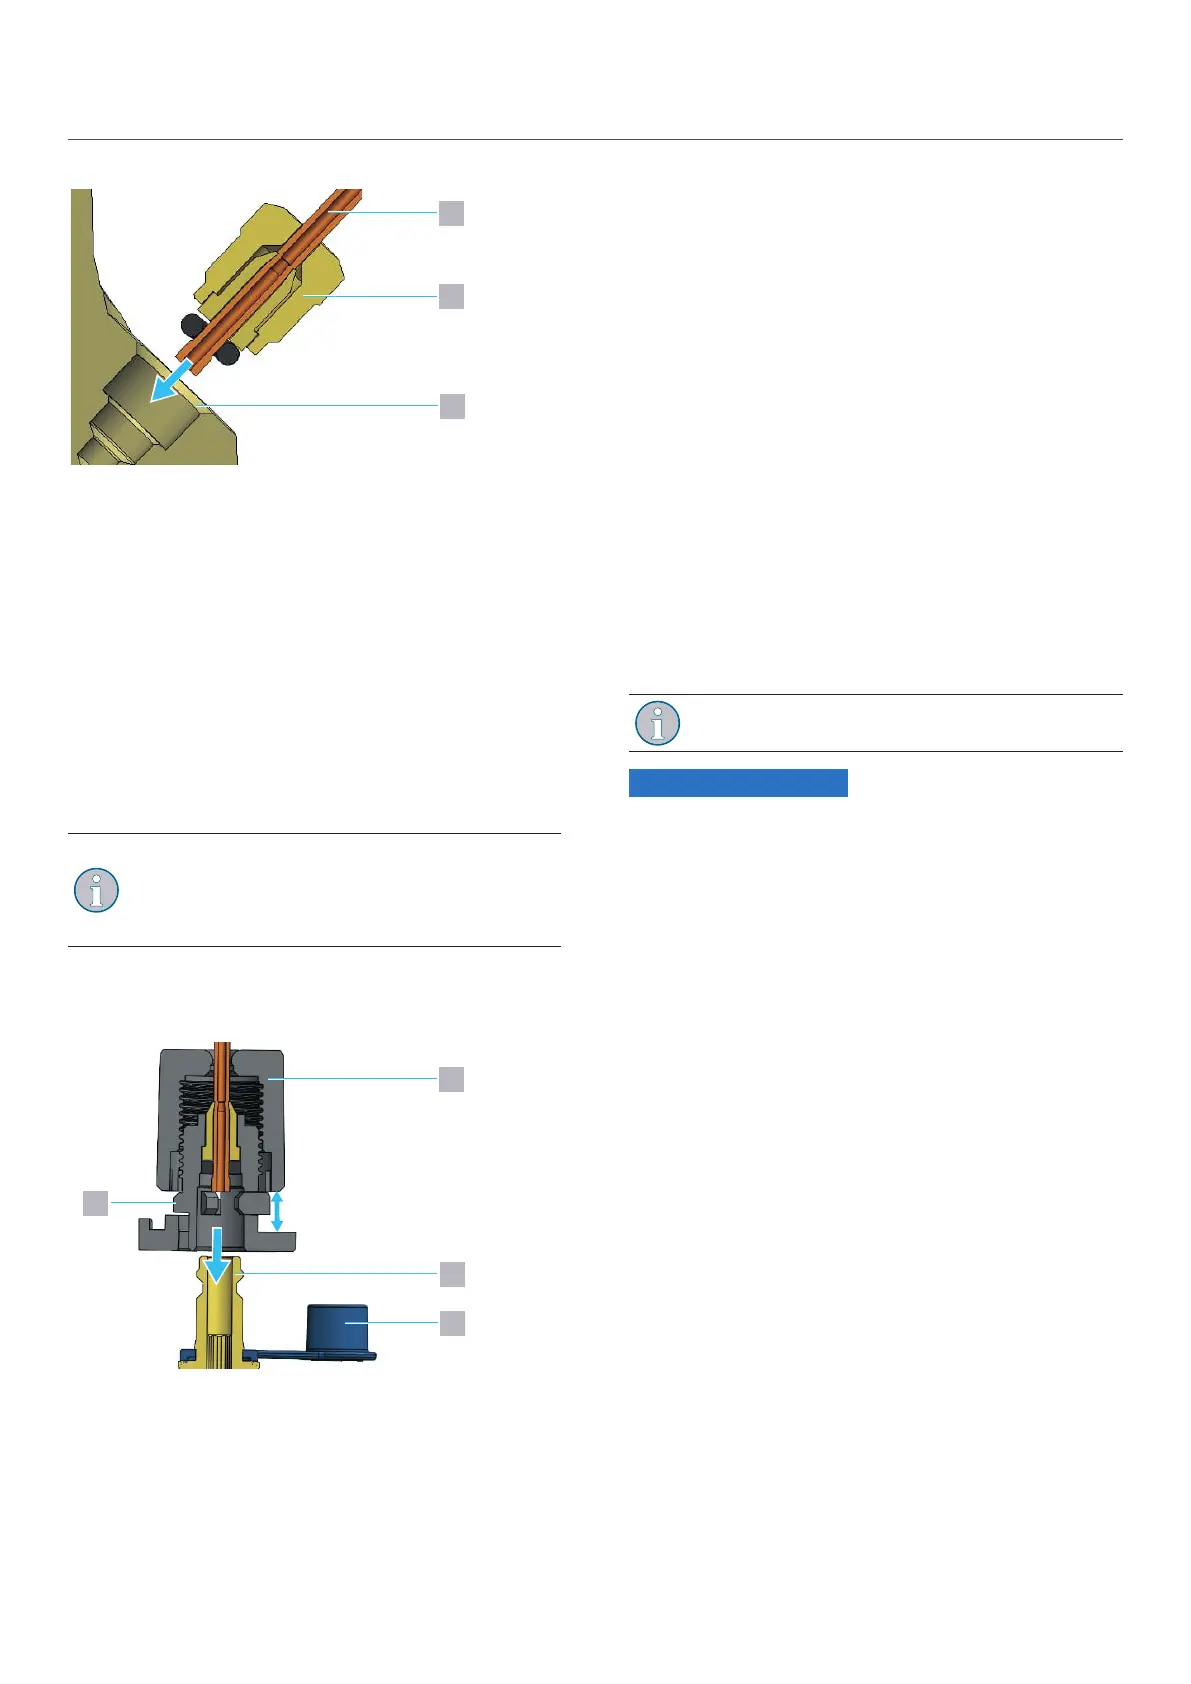
Fig. 5: Connection of the impulse tube to the
HydroControlD
1
Impulse tube
2
Fastening screw
3
Connection for the impulse tube of the
HydroControlD
Tighten the fastening screw of the impulse tube
(12mm spanner).
Remove the blue protection cap from the HydroPort
valve of the HydroControlM.
Make sure that the sealing cap is positioned on
top of the circlip.
To detach the impulse tube, press in the circlip to
release the sealing cap.
Push the sealing cap of the impulse tube onto the blue
HydroPort valve of the HydroControlM until the circlip
engages.
2
1
4
3
Fig. 6: Connection of the impulse tube to the partner
valve
1
Circlip
2
Sealing cap
3
HydroPort valve (HydroControlM)
4
Protection cap
Tighten the sealing cap as far as it will go to secure the
impulse tube.
Open the HydroPort valve on the HydroControlM with
a 14mm open-end spanner by turning it a quarter
turn.
6. Commissioning
6.1 Filling, venting and checking for
leaks
Fill the heating system.
Vent the heating system.
Carry out a leak test according to DIN EN 1264.
6.2 Presetting
Avoid valve settings below the recommended
setting range.
NOTICE
Damage to the valve due to excessive differential
pressure!
Excessive differential pressure across the valve unit
can cause noise and damage to the valve.
!
Operate your double regulating valve within the
recommended setting range.
Determine the set value using the flow charts in the
appendix.
Turn the handwheel until the desired value is visible
on the basic and fine setting scale (see Fig. 1 on page
37 (3) and (4)).
6.3 Reproduction of the presetting
When the valve is in the desired presetting, you can secure
it using the adjusting screw in the handwheel (a 3mm
Allen key is required for this).
If the valve is shut off, you can open it to the secured
position when you open it again.
6.4 Securing the presetting
The set value can be secured against adjustment.
Pull the limiting clip out of the parking position under
the handwheel.
Slide the limiting clip into the blocking position (see
Fig. 3 on page 38).
To prevent unauthorised persons from changing the
presetting, you can attach a seal.
Guide the sealing wire (accessory item no. 1089091)
through the hole in the limiting clip.
411000086521_10242266 000 00
 Loading...