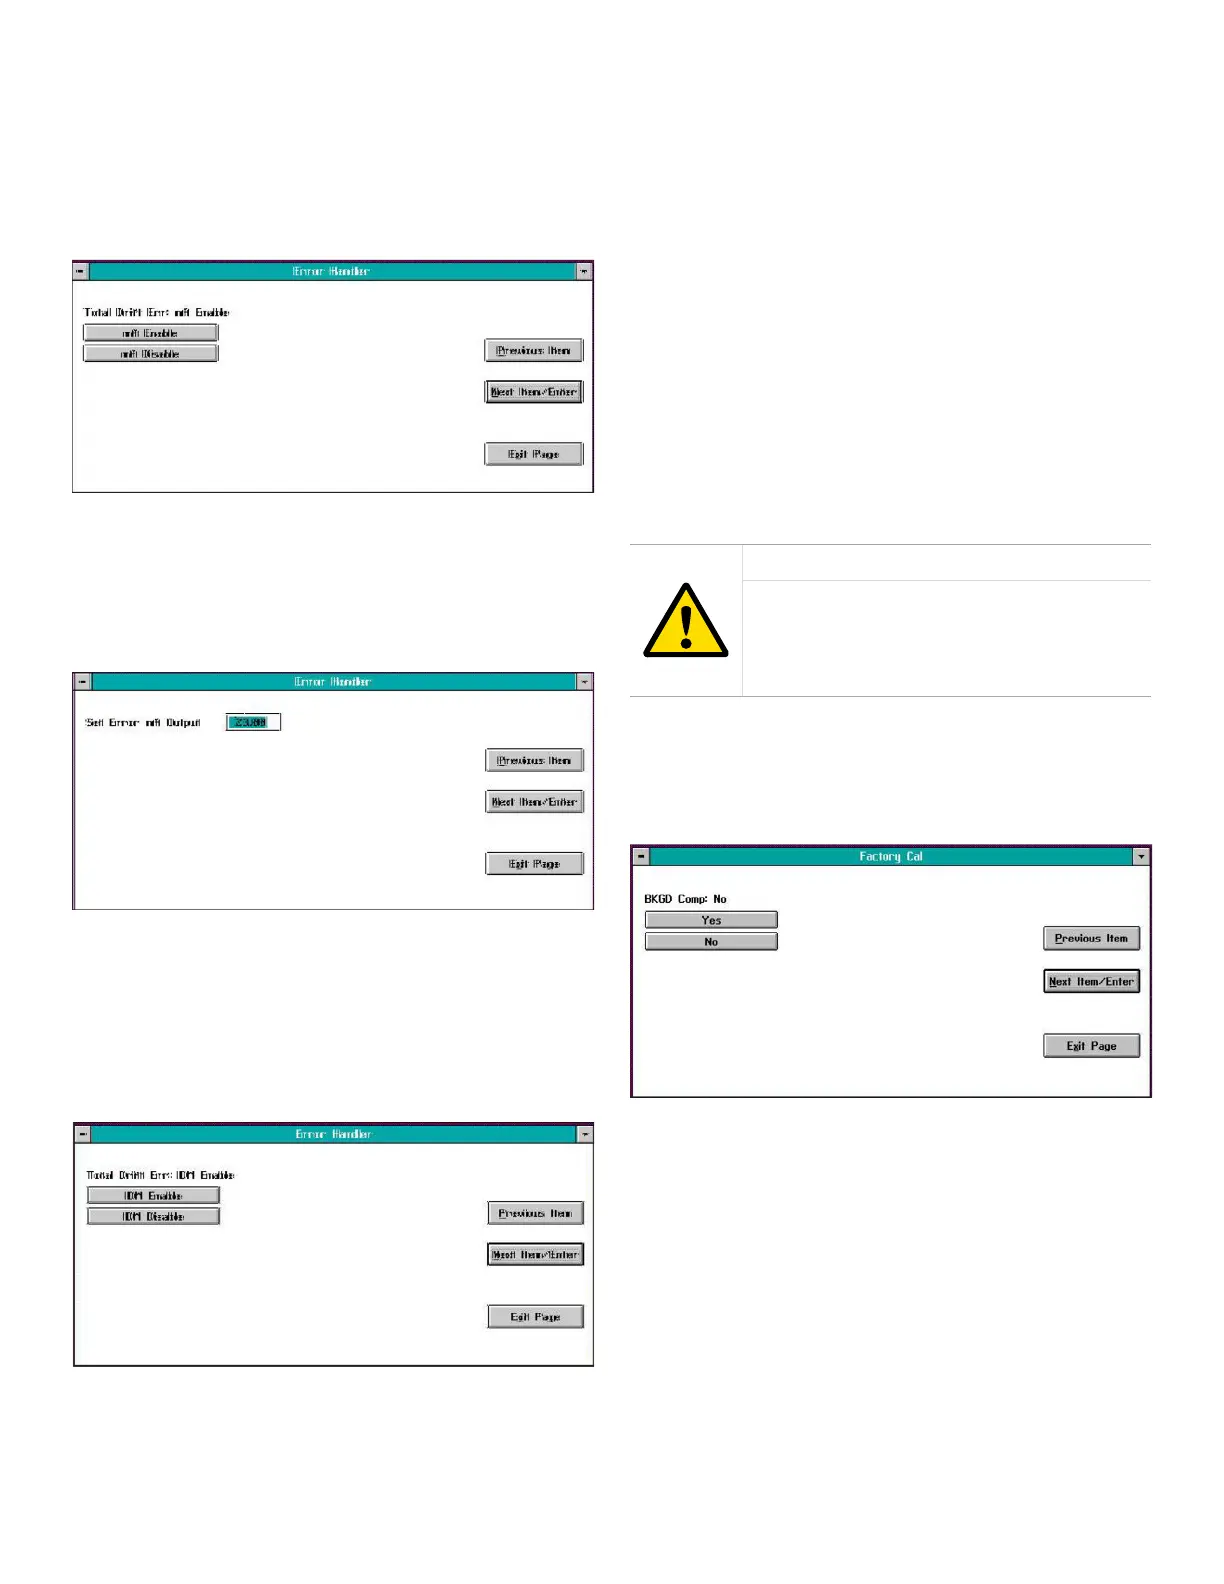
4.2.2 Total drift error
The Total Drift Error option lets you enable or disable error
handling for a total calibration drift error and to specify the
mA output that will be generated during an error condition
(typically 23 mA). Clicking on this button opens a window
similar to Figure 36 below.
Figure 36: Total drift error mA window
Click on the appropriate button to either enable or disable
error handling for this condition at the XMO2’s analog
output. If you clicked on the mA Disable button, skip the
next screen. If you clicked on mA Enable, a window similar to
Figure 37 below opens.
Figure 37: Error mA output entry window
In the text box at the above screen, enter the mA output that
you wish to have generated in the event of a total calibration
drift error. Click on the Next Item/Enter button to confirm the
entry.
After specifying the analog output response to this error
condition, a window similar to Figure 38 below opens.
Figure 38: Total drift error IDM window
Click on the appropriate button to either enable or disable
the generation of an error signal for this condition via
the XMO2’s IDM link. In either case, you will be returned
immediately to the main Error Handler menu.
4.2.3 All other error conditions
The programming for all of the other XMO2 error conditions
listed on page 44 is identical to that described in the
previous section for the Total Drift Err condition. Therefore,
simply refer to the instructions in the previous section
to configure the error handling for any of these other
conditions. All three windows will be identical to those shown
in the previous section, except that the error listed above the
Enable/Disable buttons will reflect the specific error currently
being programmed.
4.3 The factory cal menu
The XMO2 comes from the factory completely programmed
for your particular application. Should it become necessary
to restore the factory setup, you can use the Factory Cal
menu and your Calibration Data Sheet to reenter the factory
data.
CAUTION!
Always refer to your Calibration Data Sheet
for the data to enter in the Factory Cal
menu. Entering incorrect data will result in
inaccurate operation of the XMO2.
4.3.1 Background gas labels
From the Edit Functions menu (shown in Figure 34 on page
27), click on the Factory Cal button. A screen similar to Figure
39 below opens.
Figure 39: BKGD comp window
Note: If background gas compensation is not required for
your XMO2, click on the No button in the above window and
proceed directly to the Pressure Compensation section on
the next page.
28