D.4 Adding the XMO2
To add the XMO2 on the IDM-configured communications
port, complete the following steps:
1. Highlight the communication port to which the meter
will be added by clicking on it, and then open the “Edit”
menu on the menu bar (if the communication port is
not highlighted first, the “New Meter” option is not active
in the “Edit” menu).
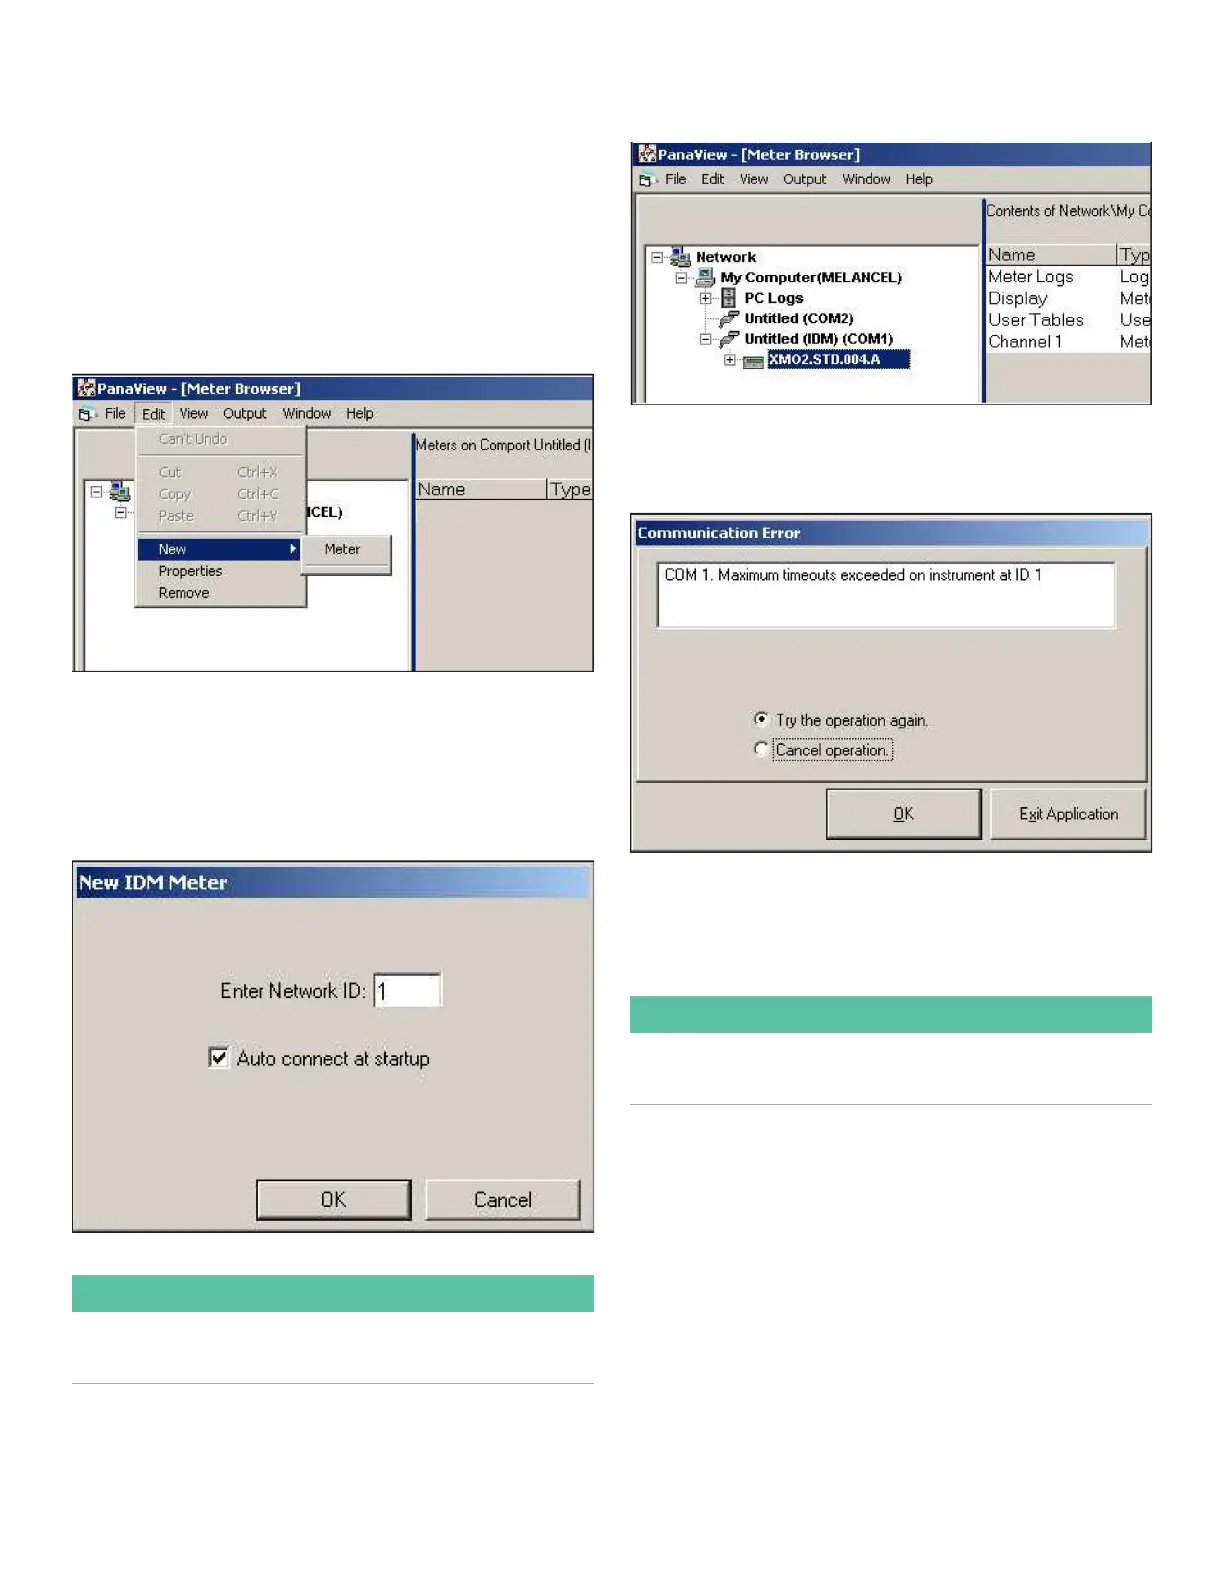
2. Click on the “New” option in the “Edit” menu (see Figure
79 below).
Figure 79: “New” option in the “Edit” menu
3. After clicking on the “New” option, the “Meter” menu
option appears. Click on this option to select it.
4. The “New IDM Meter” screen (shown in Figure 80 below)
opens. Enter the Network ID number for the meter, and
click [OK].
Figure 80: New IDM meter screen
IMPORTANT:
The Network ID number must match the Network ID
programmed in the meter Communications menu.
If the initialization is successful, the Meter Browser shows a
listing similar to Figure 81 below.
Figure 81: Updated network tree
However, if the settings do not match, or there is some other
difficulty, a screen appears similar to Figure 82 below.
Figure 82: Communication error screen
The screen offers the options of trying again or of canceling
the operation. Click on the desired choice, and then on
[OK] to confirm the choice or on [Exit Application] to close
PanaView.
IMPORTANT:
The Properties option in the Edit Menu is not applicable to
the XMO2.
65