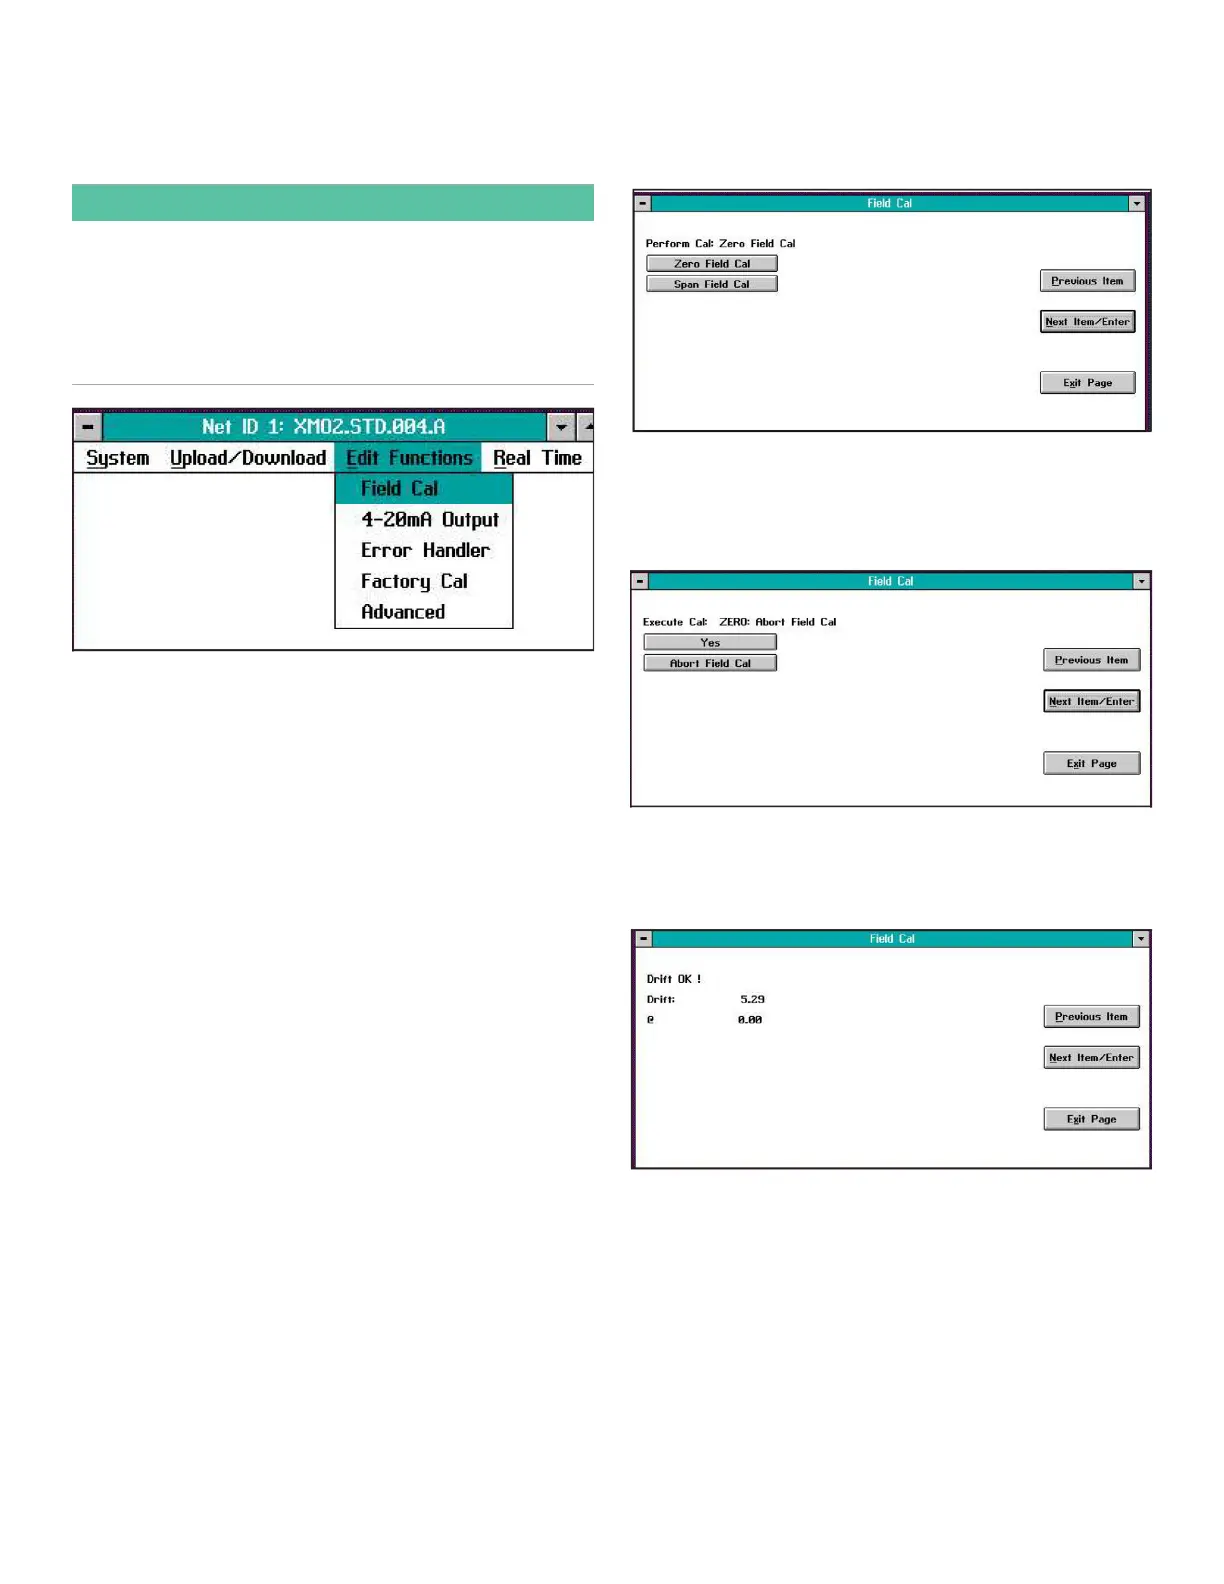
3.13 The field cal menu
When you select the Field Cal option, a window similar to the
one in Figure 13 below opens.
IMPORTANT:
The instructions in this section assume that the factory-
programmed 2-Gas calibration method is still selected. If
you have previously changed this to the 1-Gas calibration
method, any windows that show Zero and Span calibration
gas buttons are replaced with a window that shows just
the single Offset calibration gas button.
Figure 13: Field cal window
The Field Cal option offers the following five choices:
• Perform Cal - calibrates the XMO2
• Configure Cal - sets the calibration type and
parameters
• Calibration Drifts - lists drift percentages for zero and
span gases
• Clear Calibration - clears the last calibration
• Hold Last Value - holds the last value calibrated
Note: Clicking on the Next Item/Enter button selects the
option listed on the status line above the option buttons
(Perform Cal in Figure 13 above). The option listed on the
status line in any window is the option that was chosen the
last time that menu was used.
Clicking on any of the above choices opens a new window
that allows you to perform that function. Proceed to the
appropriate section for a detailed description of each
option.
3.13.1 Perform cal
Clicking on the Perform Cal button opens a window similar
to Figure 14 below.
Figure 14: Perform cal window
Click on the Zero Field Cal button to calibrate the zero point
or on the Span Field Cal button to calibrate the span point. In
either case, a window similar to Figure 15 below opens.
Figure 15: Zero cal window
Click Yes to perform the calibration, or Abort Field Cal to stop
the calibration and return to the previous menu. The result of
a completed calibration is shown in Figure 16 below.
Figure 16: Zero cal results
Click on Previous Item or on Next Item/Enter to return to the
previous window, or on Exit Page to return to the Instrument
Menu.
20