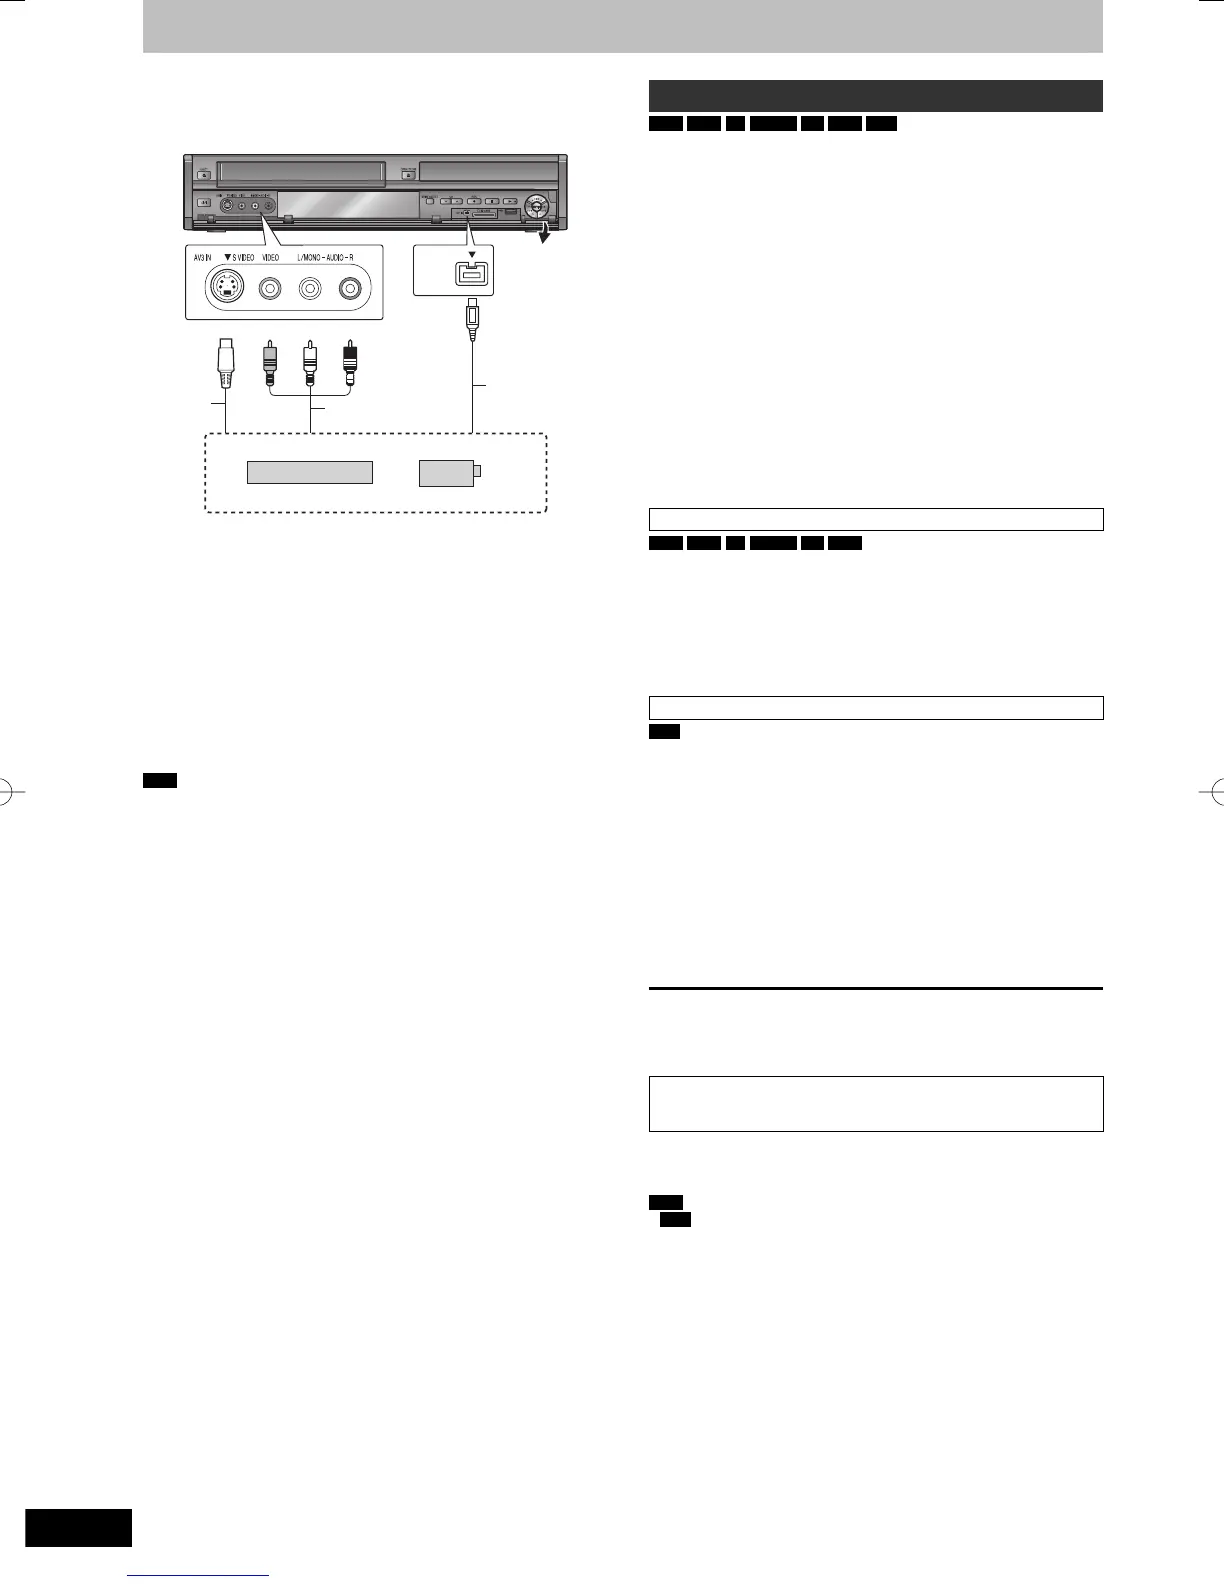
Audio/Video
cable
S Video
cable*
DV cable
(IEEE 1394,
4-pin)
This unit
Yellow
Other video equipment
Connect to Audio/Video output terminals.
White Red
If the audio output of the other equipment is monaural
Connect to L/MONO on the AV3 input terminals at the front.
* The S VIDEO terminal achieves a more vivid picture than the
VIDEO terminal.
When recording from the unit’s DV terminal
y Select the type of audio recording from “Audio Mode for DV Input”
in the Setup menu (➡ 74).
y When recording from DV equipment (e.g., digital video
camcorder), you can record audio/video recordings from DV tape
only.
y When “Rec for High Speed Copy” (➡ 73) is set to “On” and you
make a copy, the copy will be made using the picture size selected
in “Aspect for Recording” (➡ 73) of the Setup menu.
About the aspect when recording a programme (➡ 23)
Note
y If it becomes time for a timer recording to start while copying, the
recording will start and the copying will stop.
y If video is copied from another piece of equipment to this unit,
then the video quality will be degraded.
Manual recording
HDD
RAM
-R
-RW(V)
+R
+RW
VHS
Preparation
y Press [DRIVE SELECT] to select the HDD, DVD or VHS drive.
y Press [REC MODE] to select the recording mode.
y When recording bilingual programmes (➡ 23, Important notes for
recording)
y When the output signal from the external equipment is NTSC,
change the “TV System” to “NTSC” in the Setup menu (➡ 75). This
unit cannot record NTSC signals to discs that already have PAL
signal recordings. (However, both types of programmes can be
recorded onto the HDD.)
y To reduce noise in input from a video cassette recorder, set “Input
NR” to “On” in the on-screen menu (➡ 66).
y Check the time on the unit is correct.
1 While stopped
Press [INPUT SELECT] to select the
input channel for the equipment you
have connected.
e.g., If you have connected to AV3 input terminals, select
“A3”.
Recording to HDD or DVD
HDD
RAM
-R
-RW(V)
+R
+RW
Perform step 1 (➡ above).
2 Start play on the other equipment.
3 When you want to start recording
Press [
*
REC].
Recording starts.
Recording to VHS
VHS
Perform step 1 (➡ above).
2 Press [
q
] (PLAY)
Start playing the video cassette and fi nd the recording start
point.
3 Press [
h
], then press [
*
REC].
Put the unit in recording standby mode.
4 Start play on the external device.
5 Press [
h
] at the point where you want
to start recording.
To skip unwanted parts
Press [
h
] to pause recording. (Press again to restart recording.)
To stop recording
Press [
g
].
Almost all videos and DVD-Video on sale have been treated to
prevent illegal copying. Any software that has been so treated
cannot be recorded using this unit.
y Using Flexible Recording (➡ 26), you can record the content of a
video cassette (approx. 1–8 hours) to a 4.7 GB disc with the best
possible quality of recording without wasting disc space.
Note
y
VHS
It is not possible to record SECAM signal on a video
cassette.
 Loading...