142 VQT2R24 VQT2R24 143
Some printers can print directly from the camera’s memory card.
For details, see the manual for your printer.
Printing
■
To cancel print Press [MENU/SET]
●
Do not use any other USB connection cables except the supplied one.
●
Disconnect USB connection cable after printing.
●
Turn off power before inserting or removing memory cards.
●
When the battery begins to run out during communication, a warning beep sounds.
Cancel printing and disconnect USB connection cable (recharge the battery before
reconnecting).
●
Setting the [USB MODE] to [PictBridge (PTP)] removes the need to make the setting
each time the camera is connected to the printer.
●
Motion pictures recorded in [AVCHD Lite] format cannot be printed.
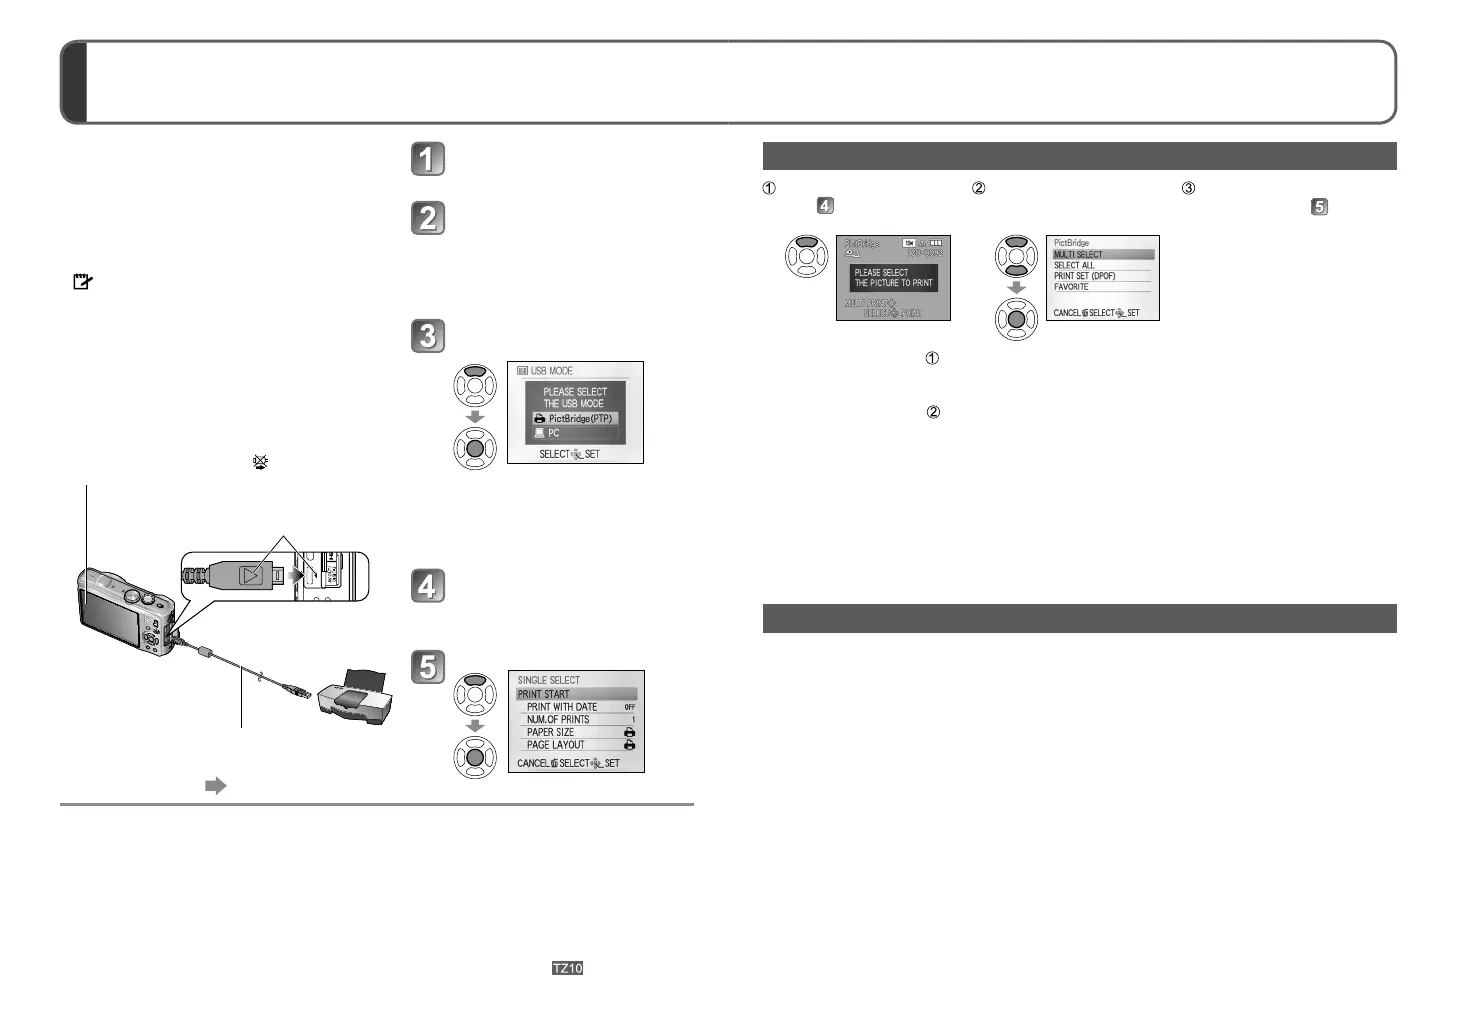
You can connect directly to a PictBridge-
compatible printer for printing.
Getting Ready:
• Charge the battery sufficiently. Or, connect
the AC adaptor (optional) and DC coupler
(optional). (→18)
• Insert card and set mode dial to any except
. When copying pictures from the built-in
memory, remove any memory cards.
(Copy [CLIPBOARD] pictures to the card in
advance)
• Adjust the print quality or other settings on
your printer, as needed.
Turn on power of both
camera and printer
Connect camera to printer
• Please make sure you use the
supplied USB connection cable. Use
of cables other than the supplied
USB connection cable may cause
malfunction.
Select [PictBridge (PTP)]
on the camera
When [CONNECTING TO PC…] is
displayed, cancel the connection and
set [USB MODE] to either [SELECT
ON CONNECTION] or
[PictBridge (PTP)].
Press ◄► to select a
picture to print and press
[MENU/SET]
Select [PRINT START]
(Print settings (→144))
Check socket direction and insert straight in.
(Damage to socket shape can lead to faulty
operation.)
• Do not disconnect the USB connection cable when
the cable disconnection icon
is displayed (may
not be displayed with some printers).
USB connection cable
(always use cable supplied)
Printing multiple pictures
Select [MULTI PRINT] in
step
on the previous
page
Select item
(See below for details)
Print
(Previous page
)
• [MULTI SELECT] : Scroll between pictures with ▲▼◄►, select pictures with
[DISPLAY] button to print. (Press [DISPLAY] button again to
release selection.)
Press [MENU/SET] when selection is complete.
• [SELECT ALL] :Print all pictures.
• [PRINT SET (DPOF)] : Print pictures selected in [PRINT SET].
• [FAVORITE] : Print pictures selected as [FAVORITE].
(displayed only when [FAVORITE] pictures present and setting set
to [ON]).
●
Select [YES] if print confirmation screen is displayed.
●
An orange
●
displayed during printing indicates an error message.
●
Print may be divided into different stints if printing several pictures.
(Remaining sheets display may differ from set number.)
Print with date and text
■
With [TEXT STAMP]
Recording date and following information can be embedded into still pictures.
●
Recording date
●
[NAME] and [AGE] from [BABY] and [PET] scene modes
●
[TRAVEL DATE] elapsed days and destination
●
Text registered in [TITLE EDIT]
●
Names registered in [FACE RECOG.]
• Do not add date printing in stores or with printers to still pictures where [TEXT
STAMP] is applied (text may overlap).
■
Printing date without [TEXT STAMP]
●
Printing in store: Only recording date can be printed. Request date printing in store.
•
Making [PRINT SET] settings on the camera in advance allows settings for numbers
of copies and date printing to be designated before giving the card to the store.
• When printing still pictures of 16:9 aspect ratio, check in advance that the store can
accept this size.
●
Using computer : Print settings for recording date and text information can be made
using the supplied CD-ROM ‘PHOTOfunSTUDIO’.
●
Using printer : Recording date can be printed by setting [PRINT SET] on the
camera, or by setting [PRINT WITH DATE] to [ON] when connecting
to a printer compatible with date printing.
Example of DMC-TZ10

 Loading...