48
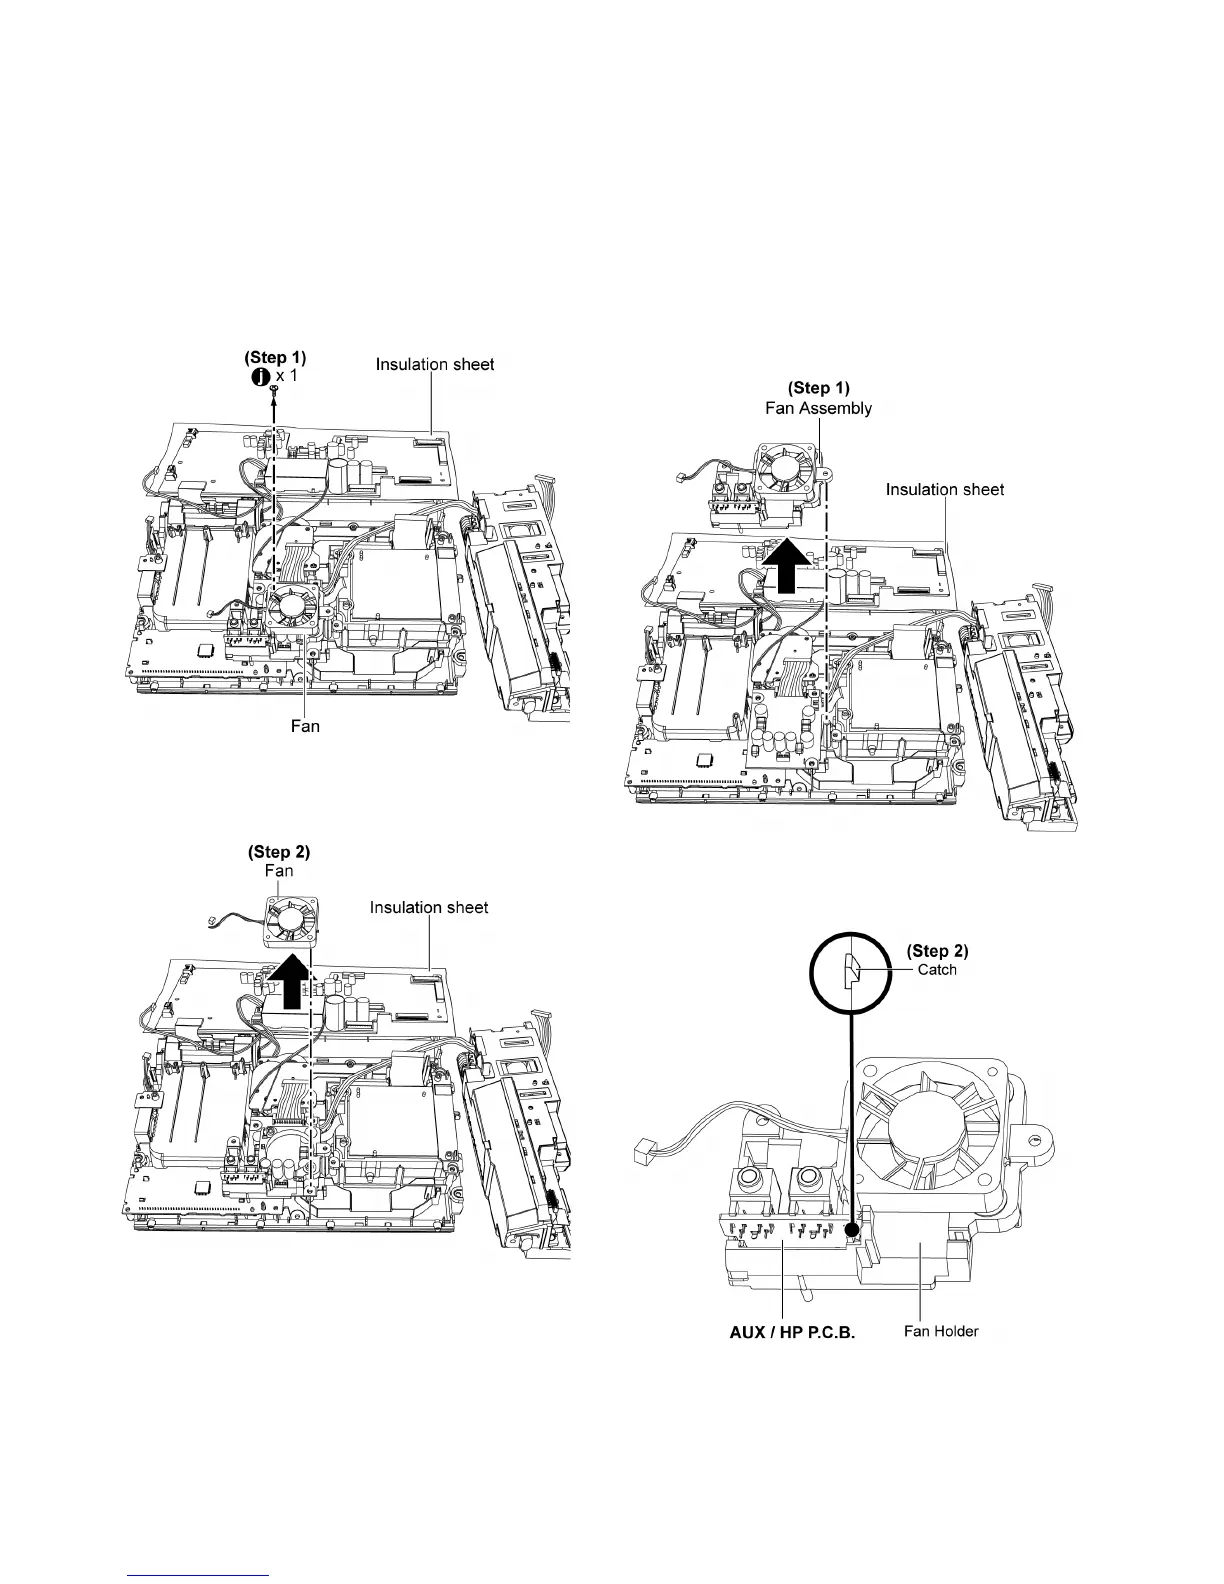
9.20. Disassembly of Fan
• Follow the (Step 1) - (Step 4) of item 9.4.
• Follow the (Step 1) - (Step 4) of item 9.5.
• Follow the (Step 1) - (Step 3) of item 9.6.
• Follow the (Step 1) - (Step 3) of item 9.7.
• Follow the (Step 1) - (Step 9) of item 9.10.
• Follow the (Step 1) - (Step 2) of item 9.11.
• Follow the (Step 1) - (Step 2) of item 9.12.
• Follow the (Step 1) of item 9.13.
• Follow the (Step 1) - (Step 11) of item 9.19.
Step 1 : Remove 1 screw.
Step 2 : Remove the Fan.
9.21. Disassembly of AUX / HP
P. C .B .
• Follow the (Step 1) - (Step 4) of item 9.4.
• Follow the (Step 1) - (Step 4) of item 9.5.
• Follow the (Step 1) - (Step 3) of item 9.6.
• Follow the (Step 1) - (Step 3) of item 9.7.
• Follow the (Step 1) - (Step 9) of item 9.10.
• Follow the (Step 1) - (Step 2) of item 9.11.
• Follow the (Step 1) - (Step 2) of item 9.12.
• Follow the (Step 1) of item 9.13.
• Follow the (Step 1) - (Step 11) of item 9.19.
Step 1 : Remove the Fan Assembly.
Step 2 : Release the catch on the Chassis unit.
Caution : Ensure the Aux/HP P.C.B. fix onto the Fan Holder.




 To Next Page