45
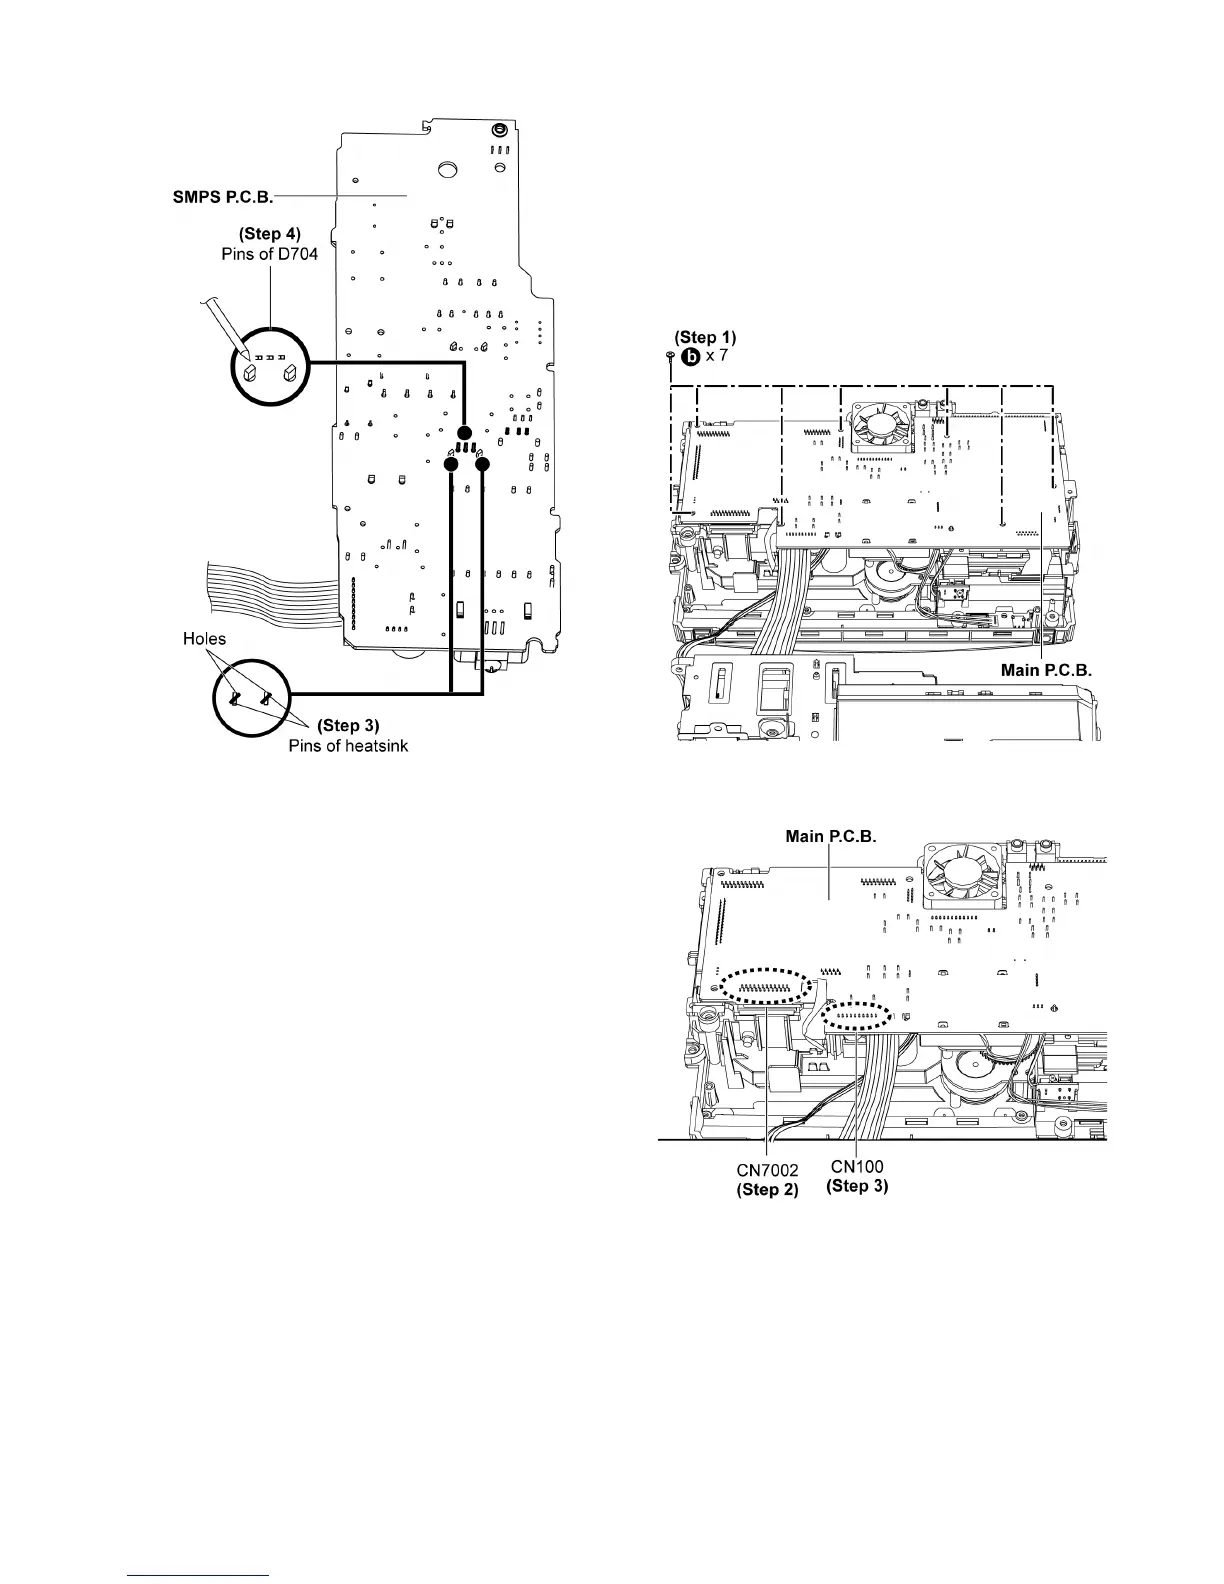
Step 3 : Twist the pins of heatsink unit.
Step 5 : Solder pins of Diode (D704) onto the solder side of the
SMPS P.C.B..
Caution : Ensure that pins of Diode (D702) are properly
seated and soldered onto the SMPS P.C.B..
9.19. Disassembly of Main P.C.B.
• Follow the (Step 1) - (Step 4) of item 9.4.
• Follow the (Step 1) - (Step 4) of item 9.5.
• Follow the (Step 1) - (Step 3) of item 9.6.
• Follow the (Step 1) - (Step 3) of item 9.7.
• Follow the (Step 1) - (Step 9) of item 9.10.
• Follow the (Step 1) - (Step 2) of item 9.11.
• Follow the (Step 1) - (Step 6) of item 9.12.
• Follow the (Step 1) of item 9.13.
Step 1 : Remove 7 screws.
Step 2 : Detach 25P FFC cable at the connector (CN7002) on
the Main P.C.B..
Step 3 : Detach 10P cable at the connector (CN100) on the
Main P.C.B..