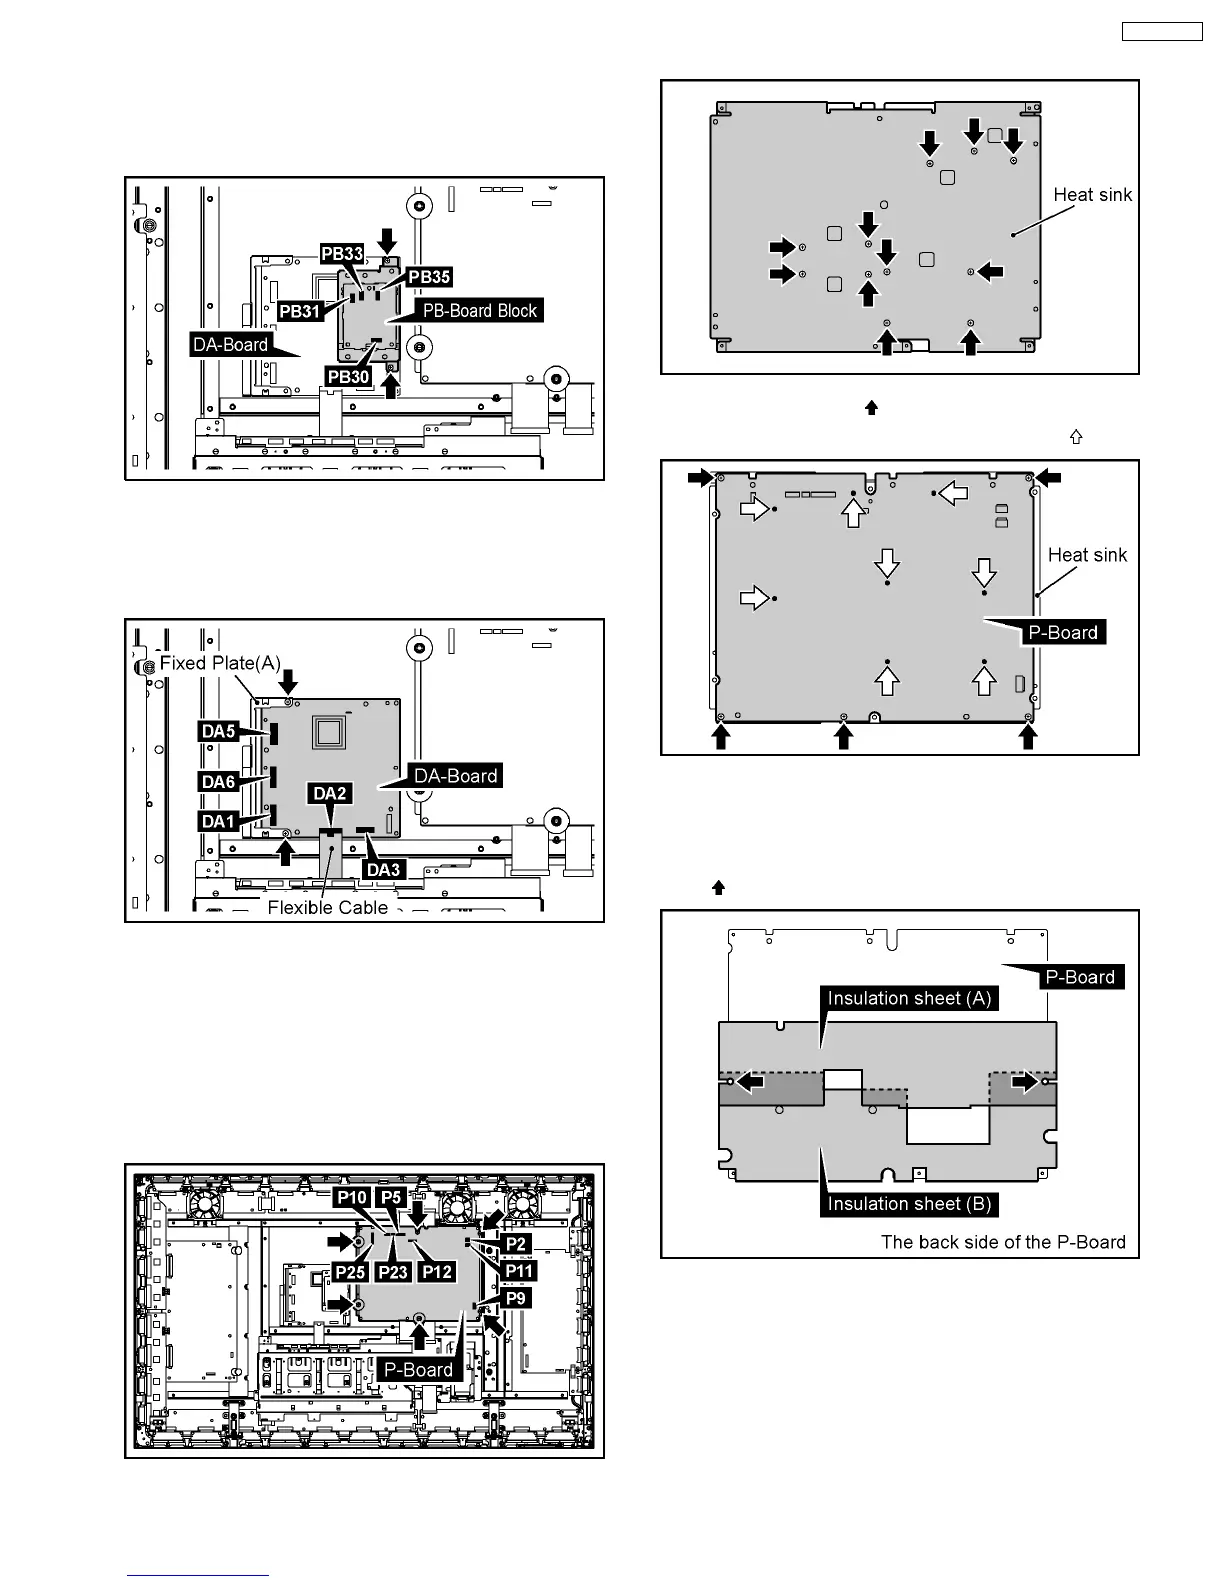
6.8. Removal of the DA-Board
1. Disconnect the couplers(PB30, PB31, PB33, PB35).
2. Remove the 2 screws and then remove the PB-Board
Block.
3. Disconnect the couplers(DA1, DA3, DA5, DA6).
4. Remove the Flexible Cable from the coupler(DA2).
5. Remove the 2 screws and then remove the DA-Board and
Fixed Plate.
Note:
A re-setup of the destination is performed by MS mode
after DA-Board exchange.
6.9. Removal of the P-Board
1. Disconnect the couplers(P2, P5, P9, P10, P11, P12, P23,
P25).
2. Remove the 6 screws and then remove the P-Board.
3. Remove the 11 screws (Bottom view).
4. Remove the 5 screws ( ).
Remove the P-Board from the 8 molding props (
).
Note:
·
When assembling the P-Board, the position of each
hole of the insulation sheets(A, B) are set to the position
of each hole of the P-Board and then assemble them.
(
marks indicate setting positions.)
11
TH-50PH9UK