Programming and sewing
Function summary
● Program the stitch counter.
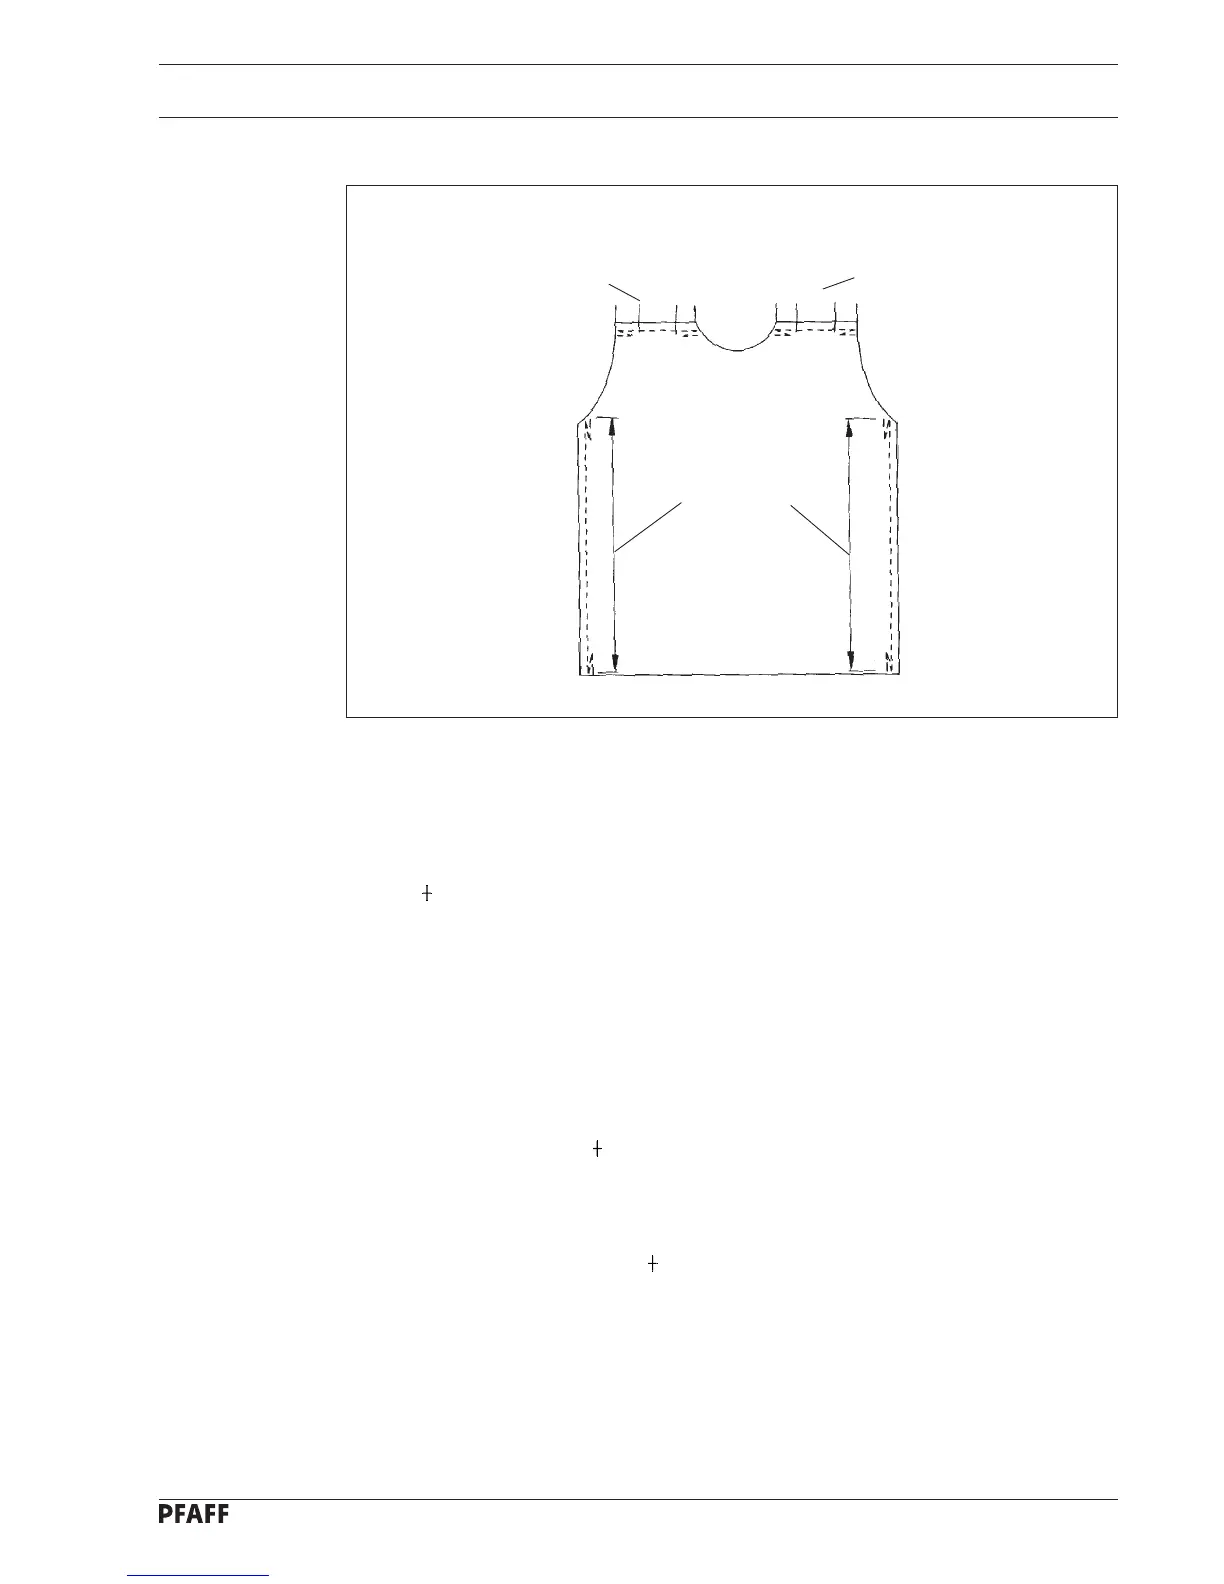
● Insert the workpiece - 1st side seam.
● Sew the start bartack. Trigger the bartack function with the pedal.
● Close the rest of the seam.
● Apply fullness if desired. To do so press the hand button for fullness. The button lights
up. A appears in the display.
● Sew an end bartack at the end of the material. Trigger the bartack function with the
pedal.
● Cut the threads at the end of the seam. Trigger the thread trimming function with the
pedal.
● Start the automatic function by pressing the knee lever with the right knee.
● Insert the workpiece - 1st shoulder seam.
● Close the 1st shoulder seam. The start bartack, fullness and end bartack are completed
automatically one after the other. Seam segments 1 to 3 are shown in the display. When
fullness is being applied a is shown in the display and the fullness button is lit.
● Insert the workpiece - 2nd shoulder seam.
● Close the 2nd shoulder seam. The 2nd shoulder seam is sewn automatically as a mirror
image of the 1st shoulder seam. In the display the seam segments 4 to 6 are shown.
When fullness is being applied a is shown in the display and the fullness button is lit.
After completing seam segments 4 to 6 the seam segment 0 appears in the display.
● Insert the workpiece - 2nd side seam.
● Sew the start bartack.
● Close the seam. Apply fullness if desired.
● Sew the end bartack.
● Trim thread.
12 - 2
Fig. 12 - 01
Activate knee lever
End bartack and
thread trimming
(pedal -2)
1st side seam
with fullness if desired
Start bartack
4
5
6
3
1
2
Seam segments
Seam
segment 0
End bartack and
thread trimming
(pedal -2)
2nd side seam
with fullness if desired
Start bartack
1st and 2nd shoulder seams
Start bartack
Seam with fullness
Automatic
end bartack and
thread trimmer
Seam segments