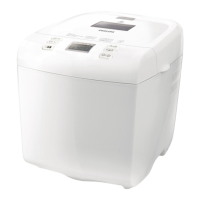
Using the Timer for Delayed Completion
Use the TIMER when you wish to delay the completion of your bread.This feature allows
you to delay the baking time for up to 15 hours. For example, you can set the TIMER at
6 p.m. in the evening and wake up to fresh bread by 8 a.m. the following morning.
To set the TIMER, follow these instructions:
NOTE: Do not use the TIMER and DELAY function with recipes that call for fresh
ingredients that might spoil such as eggs, fresh milk, sour cream, or cheese.
1. To set the
TIMER, determine when you would like your bread to be finished and
count the number of hours until then. For example, if it is 6 p.m. when you
measure all your ingredients in the bread pan and you would like to wake up to
the aroma of fresh-baked bread at 8 a.m. the next morning, you need a total of 14
hours before your bread is complete.
Select the appropriate program, loaf size, and crust colour settings for your recipe
(e.g. Basic, 2.0 lb, medium crust).The total process time for your selected program
will appear in the display window.Then set the
TIMER for the total number of
hours - in this case, 14 hours.
2. Press the
TIMER button on the control panel. It will advance in 10 minute
increments, until the display reads 14:00 (the total number of hours until your
bread is complete).To advance the timer rapidly, press and hold down the
TIMER
button. If you pass the 14:00, continue to press the TIMER button until you reach
14:00 again.
3.
Once you have set the time, press “I/O” (Start/Stop).The colon ( : ) in the display
window and the preheat
LED will flash to indicate that the TIMER has been set and
the countdown will begin.The
TIMER will count down in one-minute increments.
When the display reaches 0:00, your bread is complete and the signal beep will sound.
4.
If you make a mistake while setting the TIMER, press and hold the “I/O” (Stop/Start)
button until it beeps.This will clear the display and you can set the TIMER again.
Utilisation de la minuterie pour retarder la cuisson
Vous pouvez vous servir de la minuterie si vous voulez retarder la cuisson du pain. Elle
vous permet de retarder le moment de la cuisson de 15 heures au maximum. Par
exemple, vous pouvez régler la minuterie à 18 heures et obtenir du pain frais pour
déjeuner à 8 heures le lendemain matin.
Instructions de réglage de la minuterie :
NOTA : Ne pas utiliser la minuterie pour les recettes comprenant des ingrédients frais
qui peuvent se gâter comme les oeufs, le lait frais, la crème sûre ou le fromage.
1. Pour régler la MINUTERIE, décidez de l’heure à laquelle vous voulez que le pain
soit prêt et comptez le nombre d’heures jusqu’à ce moment. Par exemple, s’il est
18 heures lorsque vous placez tous les ingrédients dans le moule à pain et que
vous voulez vous réveillez en humant l’odeur du pain frais à 8 heures le lendemain
matin, il faudra 14 heures pour que le pain soit terminé.
Choisissez le programme, la taille de la miche de pain et la couleur de la croûte
convenant à votre recette, puis choisissez le nombre total d’heures sur la MINUT-
ERIE, 14 heures dans ce cas. La durée totale du programme que vous avez choisi
apparaîtra sur l’affichage.
2. Appuyez sur le bouton « MINUTERIE » des commandes jusqu’à ce que « 14:00 »
apparaisse sur l’affichage (nombre total d’heures jusqu’à ce que le pain soit prêt).
Si vous dépassez 14:00, continuez d’appuyer sur le bouton « MINUTERIE » jusqu’à
ce que « 14:00 » soit de nouveau affiché.
3. Lorsque vous aurez réglé la durée, appuyez sur le bouton « I/O » (marche/arrêt).
Le symbole des deux points (:) de l’affichage et l’affichage à DEL de préchauffage
clignoteront pour signaler que la MINUTERIE a été réglée et que le compte à
rebours a commencé. La MINUTERIE fera le compte à rebours par tranches d’une
minute. Lorsque l’affichage indiquera « 0:00 », le pain sera cuit et le signal sonore
se fera entendre.
4. Si vous faites une erreur en réglant la MINUTERIE, appuyez sur le bouton « I/O »
(marche/arrêt) et gardez-le enfoncé jusqu’à ce qu’un signal sonore se fasse enten-
dre. L’affichage sera vide et vous pourrez de nouveau régler la MINUTERIE.
Comment utiliser le boulangeur 20
Using Your Breadmaker 20