System
wlan
16
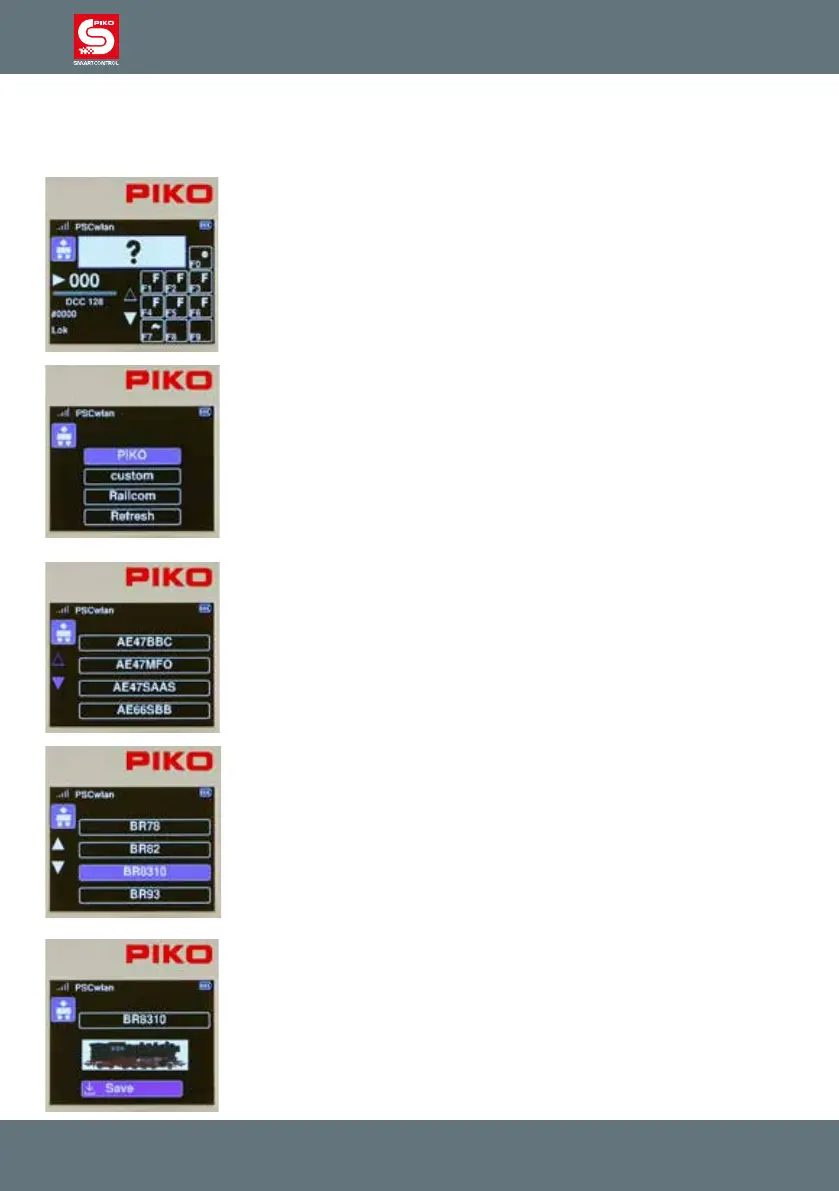
The following example shows how to create a new locomotive data set for the BR 83.10. This
locomotive, which is not RailCom Plus® compatible, will be entered into the system under DCC
address “4” with 28 speed steps, a name of “BR 83.10” and several function keys.
Since this is a new locomotive data set, we choose an empty locomotive
data eld, whose DCC address appears as “0”.
Editable data elds are always highlighted in blue. In the rst step, the
locomotive image is highlighted with the blue editing frame. If you wish
to change the image, press the OK button. If not, scroll down to the next
highlighted frame
To select the image for the BR 83.10, we scroll to the “PIKO” option and
select it, as all PIKO locomotive images are available under the PIKO option.
If a message appears about a non-existent image (while the SD card is
inserted), please use the bottom menu option "Update" to display the entire
image database.
RailCom
®
locomotive images and your own customer-specic images can
be saved to the image database. Your own pictures must rst be saved to
the SD card using the PSCw app in order to automatically get the correct
display size.
All PIKO locomotive images are now available for selection.
You can scroll through the list page by page using the “up/down” navigation
keys.
If the "BR 83 10" page appears, use the “right” navigation key to select one
of the four locomotives oered.
Now highlight "8310" with the "down" button and then conrm with the OK
button.
The locomotive image is saved when the “save” symbol is selected and
conrmed with the OK button.
The display then jumps back to a list of other locomotive data.
The new locomotive image for the BR 83.10 retains a blue editing frame and
can be changed again if desired.