39
BT37 MarkII: Service Manual MA200606 1.0.0
Component replacement
18) Ensure the cable clamps are fully pushed back towards the connector body to
securely clamp the cable in position.
19) Offer the back panel up to the enclosure ensuring the fan wire is not entangled and
the gas manifold connectors protrude through the aperture in the rear panel.
20) Refit the 14 screws that hold the rear panel in position, see Fig.2.
21) Refit the 2 screws and washers that secure the gas manifold to the rear panel, see
Fig.1.
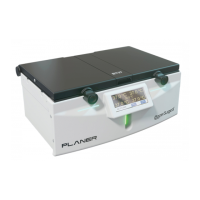
3.2 Lid seal
1. Remove old seal from both lids and discard.
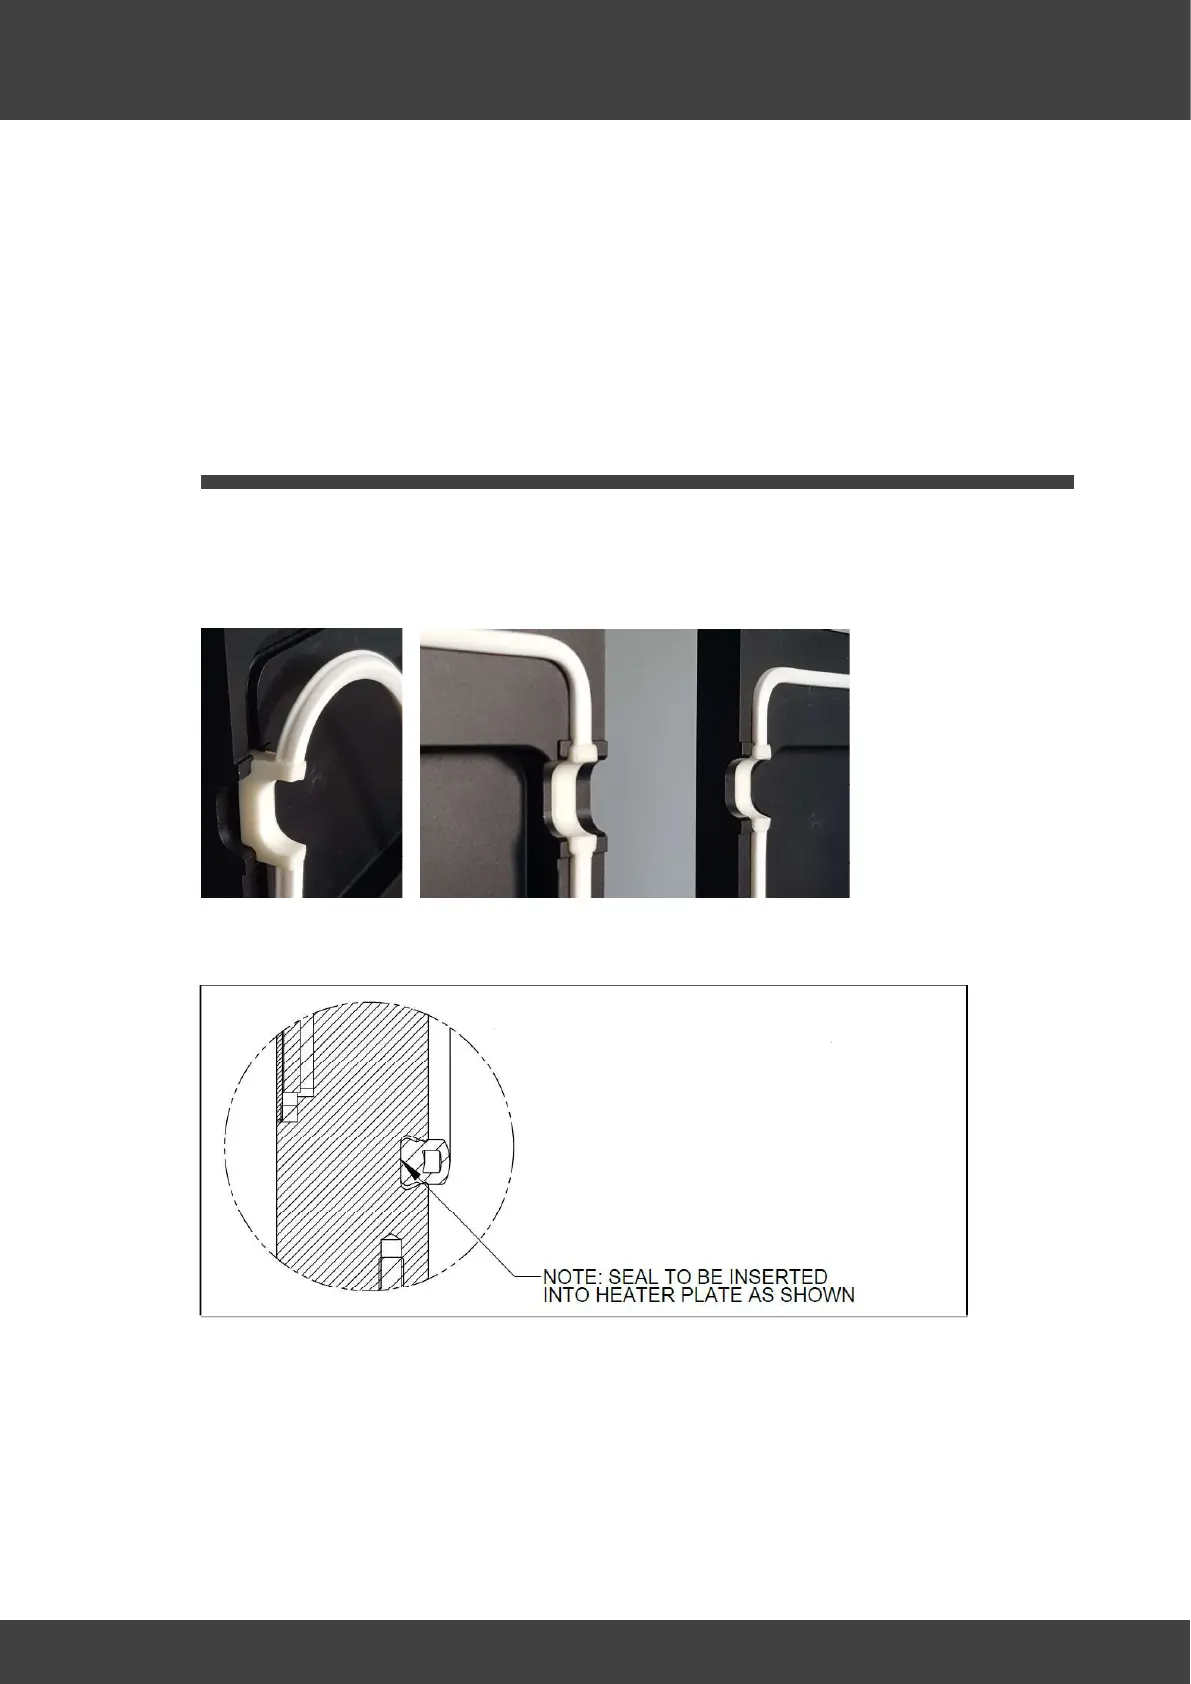
2. Fit the new seal to both lids, by placing the rectangular section in the recess first.
Make sure the seal is orientated with the flat side against the groove; see fig.2. Do not
stretch the seal when installing as this will result in excess material at the end.
Fig.1 - Showing the correct orientation of the rectangular section
Fig 2 - Showing the correct orientation of seal
3. Check both seals are fully pushed into the groove.
4. Check that both lids and latches close without any problems.