Chapter D - ADJUSTMENT & CALIBRATION
D-16 Planmeca Proline CC panoramic x-ray
Technical Manual
Adjustment in ball phantom’s x-direction
If the patient positioning mechanism is too far forward or too far backwards the fore/aft position
must be adjusted and the new position programmed into the memory.
Enter the test mode.
Press the ready key to drive the x-ray unit to the exposure position. When the x-ray is ready the
indicator light will come on.
Start to take a test exposure by pressing and holding down exposure button on the remote con-
trol. Stop pressing the exposure button after about two seconds so that the rotating unit stops
moving.
An error code will appear on the display. Clear the error code with the CTL-key.
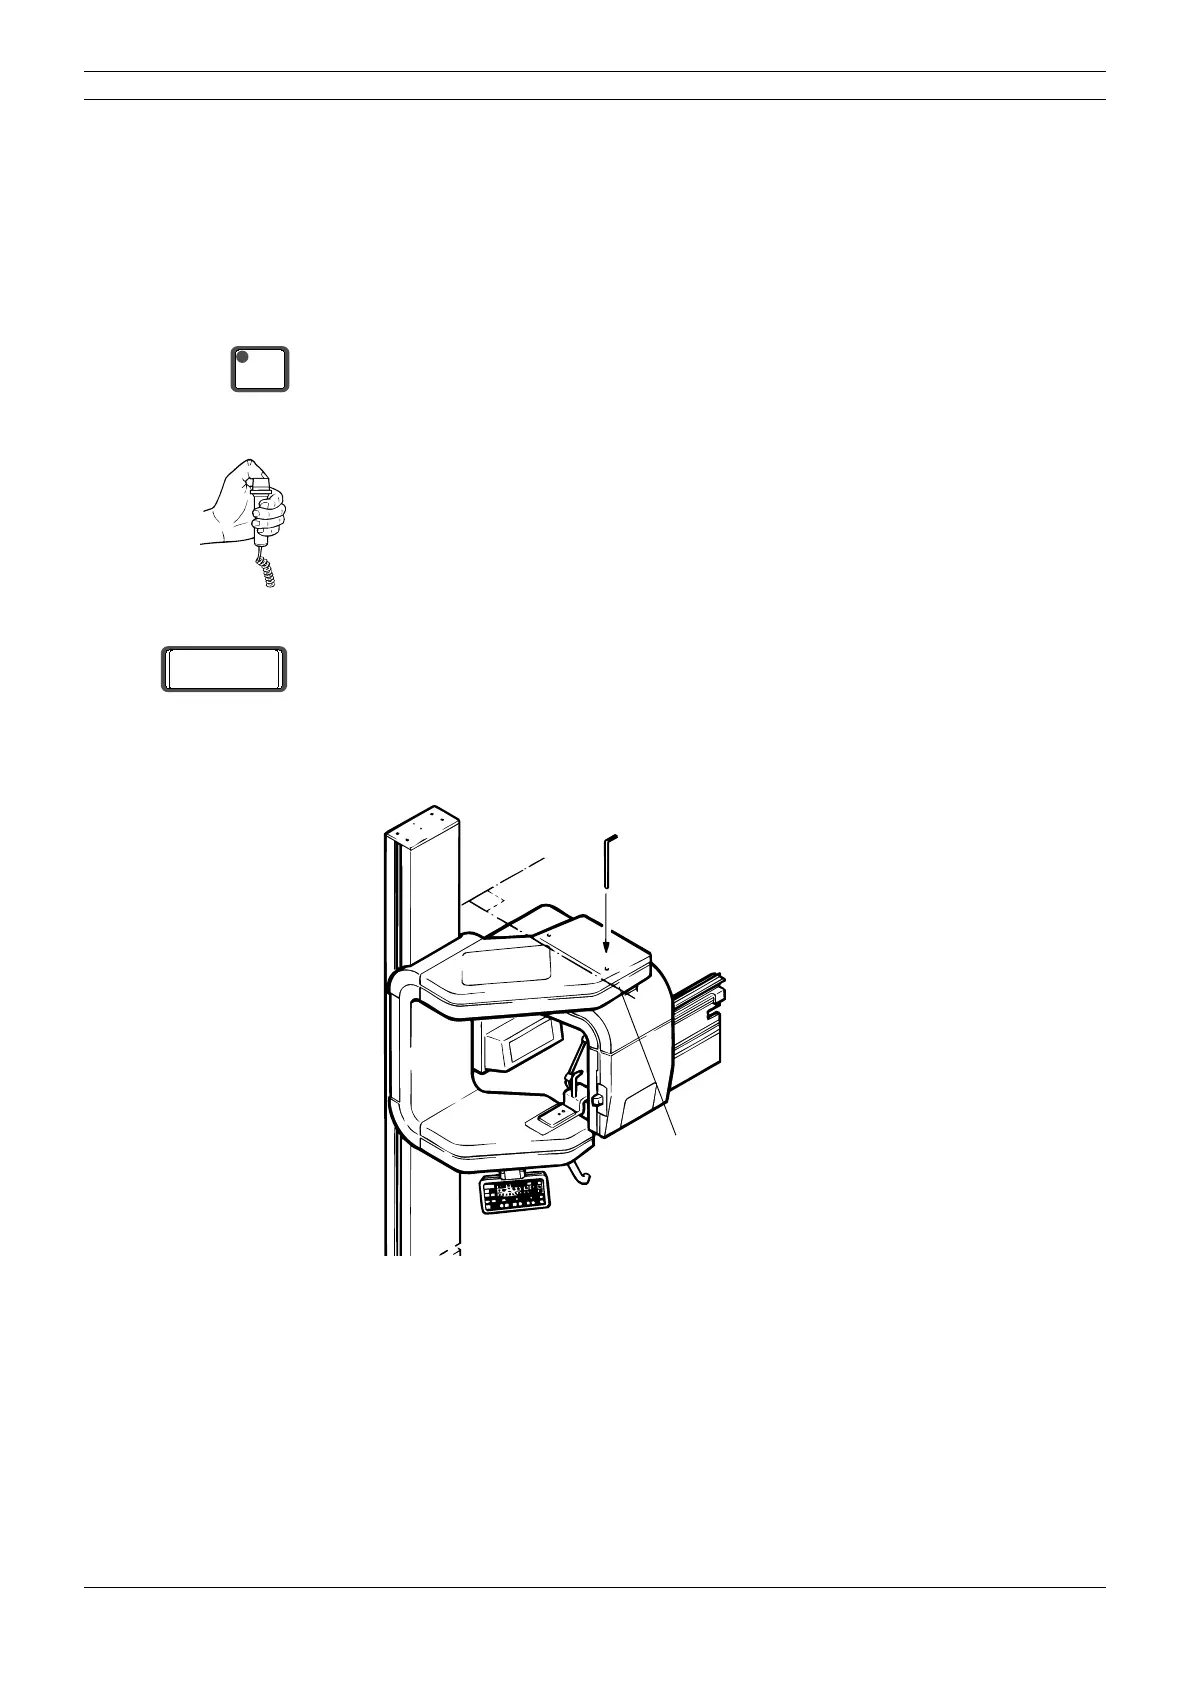
Manually position the rotating unit so that the center line that runs through the tube head and film
cassette mechanism is at a right angle to the wall. Slide the alignment pin through the hole in the
top of the vertical carriage so that it goes into the positioning hole in the rotating unit. (
Fig. 24)
Figure 24
NOTE Adjust the position of the rotating unit by holding the cassette carriage. Never use the
tube head to adjust the position.
READY
PRET
Er 00
Alignment pin
Center line at a right
angle to the wall