3-40
3 First Steps
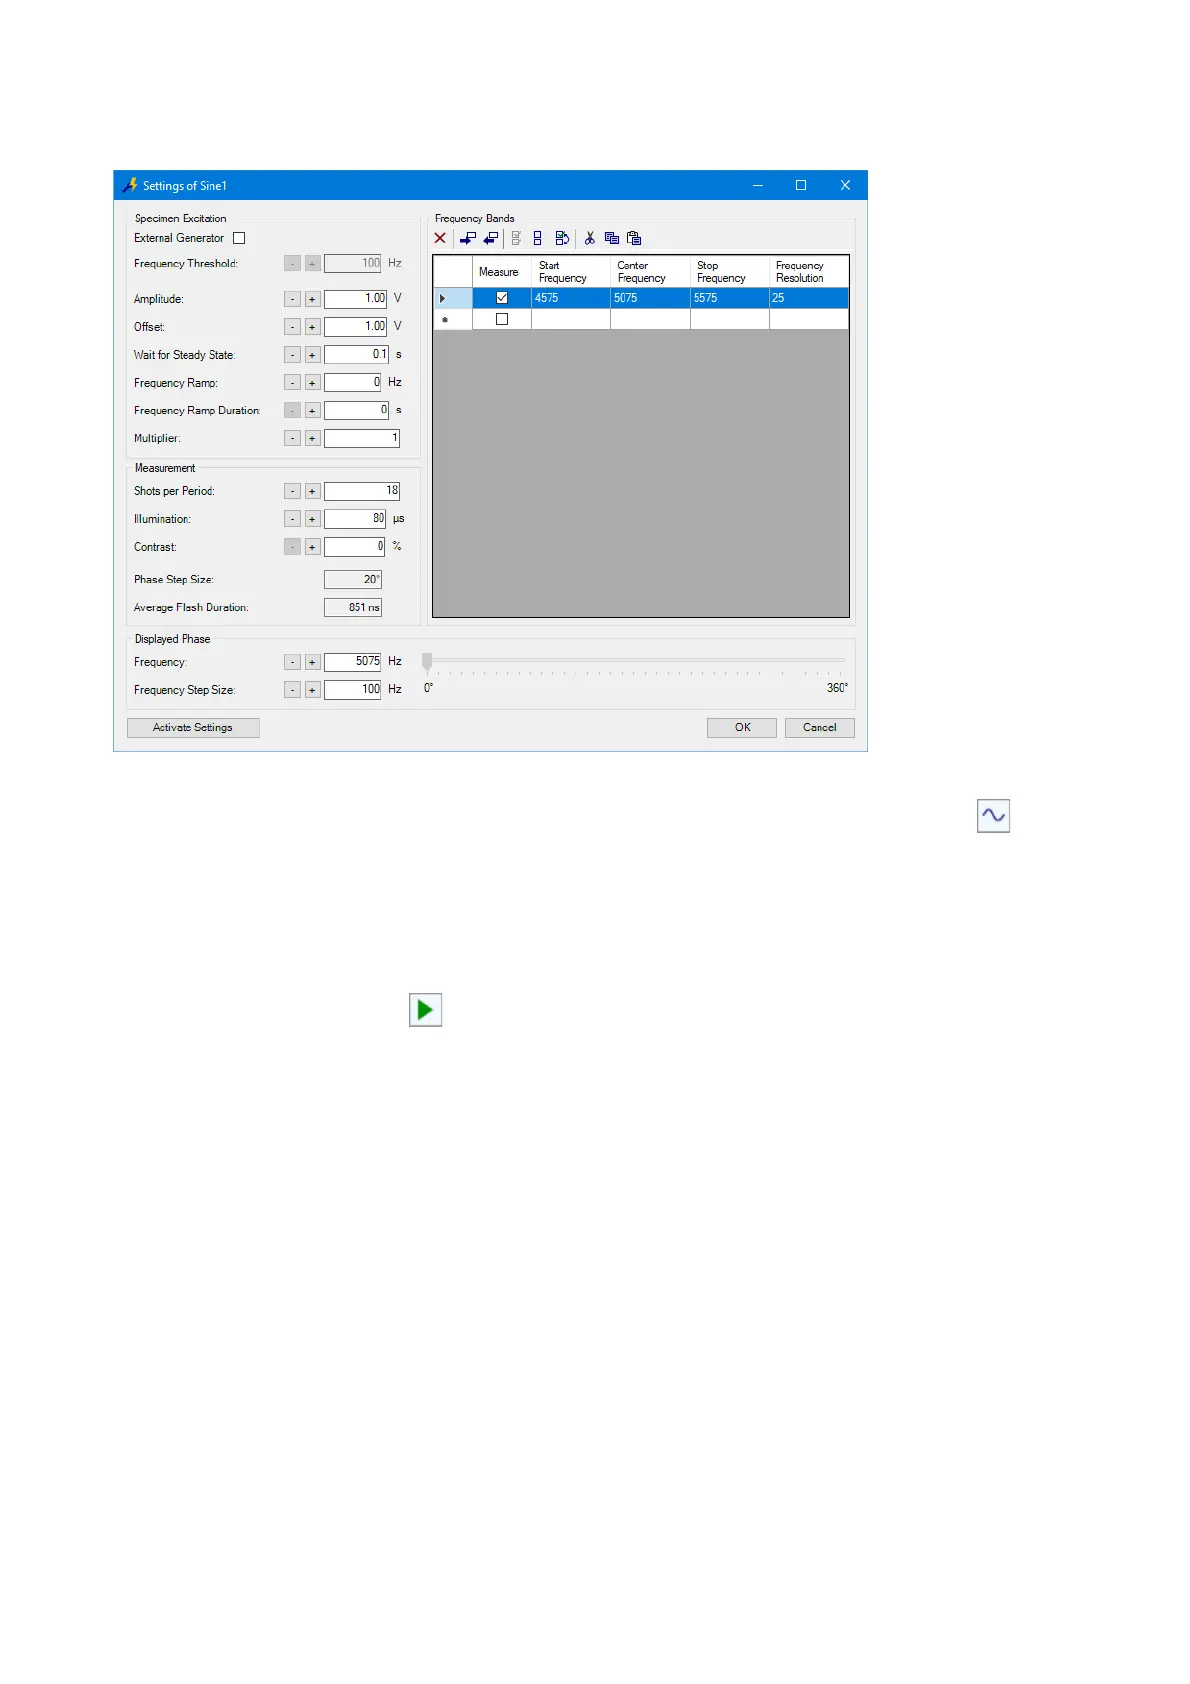
Figure 3.29:
Settings of Sine1
dialog
Start live
evaluation
16. To activate the signal generation for the specimen excitation, click in
the toolbar of the application window.
17. Change the value for Frequency in the Displayed Phase field using the
plus/minus keys to find out how the MEMS resonator behaves at different
frequencies. Watch the live video image while doing so.
Start
measurement
18. To start a measurement, select Acquisition > Start in the menu bar
(toolbar: ).
The
Save As
dialog appears.
19. Navigate to the saving location and enter the file name.
20. Click Save.
The software immediately saves every image captured. Depending on
the settings selected, the measurement may take a several minutes. As
an alternative, use the resonant frequency from the respective
measurement file which is supplied with the system.
Once the measurement is complete, the document window appears for
evaluation.
Evaluate
measurement
To evaluate the measurement, proceed as follows:
21. If required, zoom and pan the image section with vibration characteristics
which you want to examine in greater detail. In the toolbar of the
document window you will find corresponding tools.
22. In the Pattern Selection field, select the A area of evaluation.