Poseidon SE7EN+ User Manual Chapter 1 Page 20
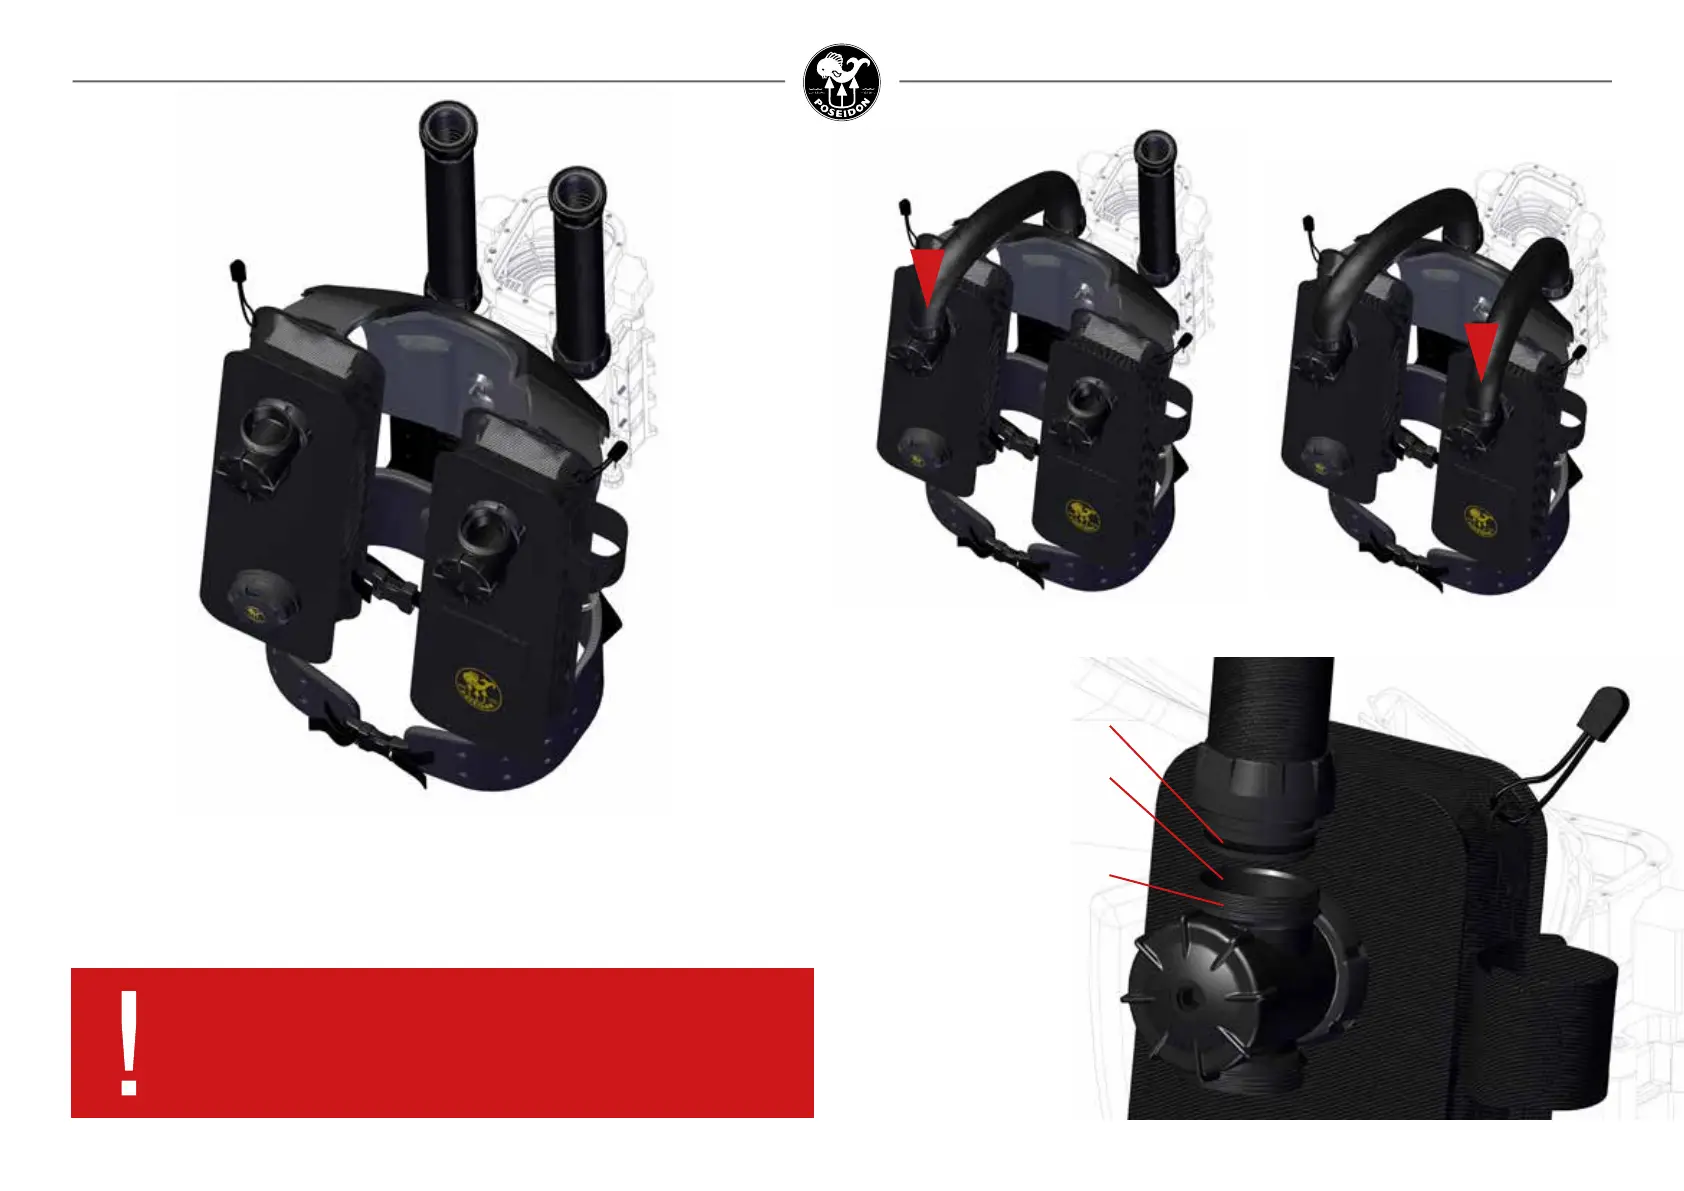
The next step is to attach the rear right breathing hose to the “back” (see Figure 1-31 ) of the
water diversion manifold. Insert the hose as shown in Figures 1-31. Follow the same procedure
for o-ring and sealing surface inspection and lubrication as previously described for all hose
connections. Tighten (but do NOT over-tighten) the right rear hose nut onto the right rear
manifold thread.
Repeat these steps for the left water diversion manifold and counterlung (Figure 1-32).
Figure 1-32. Attach the left rear breathing
hose to the left counterlung shoulder port.
Figure 1-31. Attach the right counterlung
water diversion manifold to the right rear
breathing hose.
”Radial” o-ring seal
Sealing surface for ”radial” o-ring seal
Retainer nut capture thread
DANGER:
Placing weights between the counterlung and counterlung shell
affects the work of breathing and hydrostatic balance. Doing so is
dangerous and can cause serious injury or death.