Poseidon SE7EN+ User Manual Chapter 2 Page 40
The system waits for the diver to perform a power-up conrmation procedure before proceeding.
There are two steps to this procedure. First, the diver must ensure that the wet-switch contacts
on the back of the Primary Display are not connected to each other. In most cases, this is
accomplished by simply releasing the ngers from the wet-switch contacts. In very wet conditions,
it may be necessary to blow off excess water from the back of the Primary Display. If they are
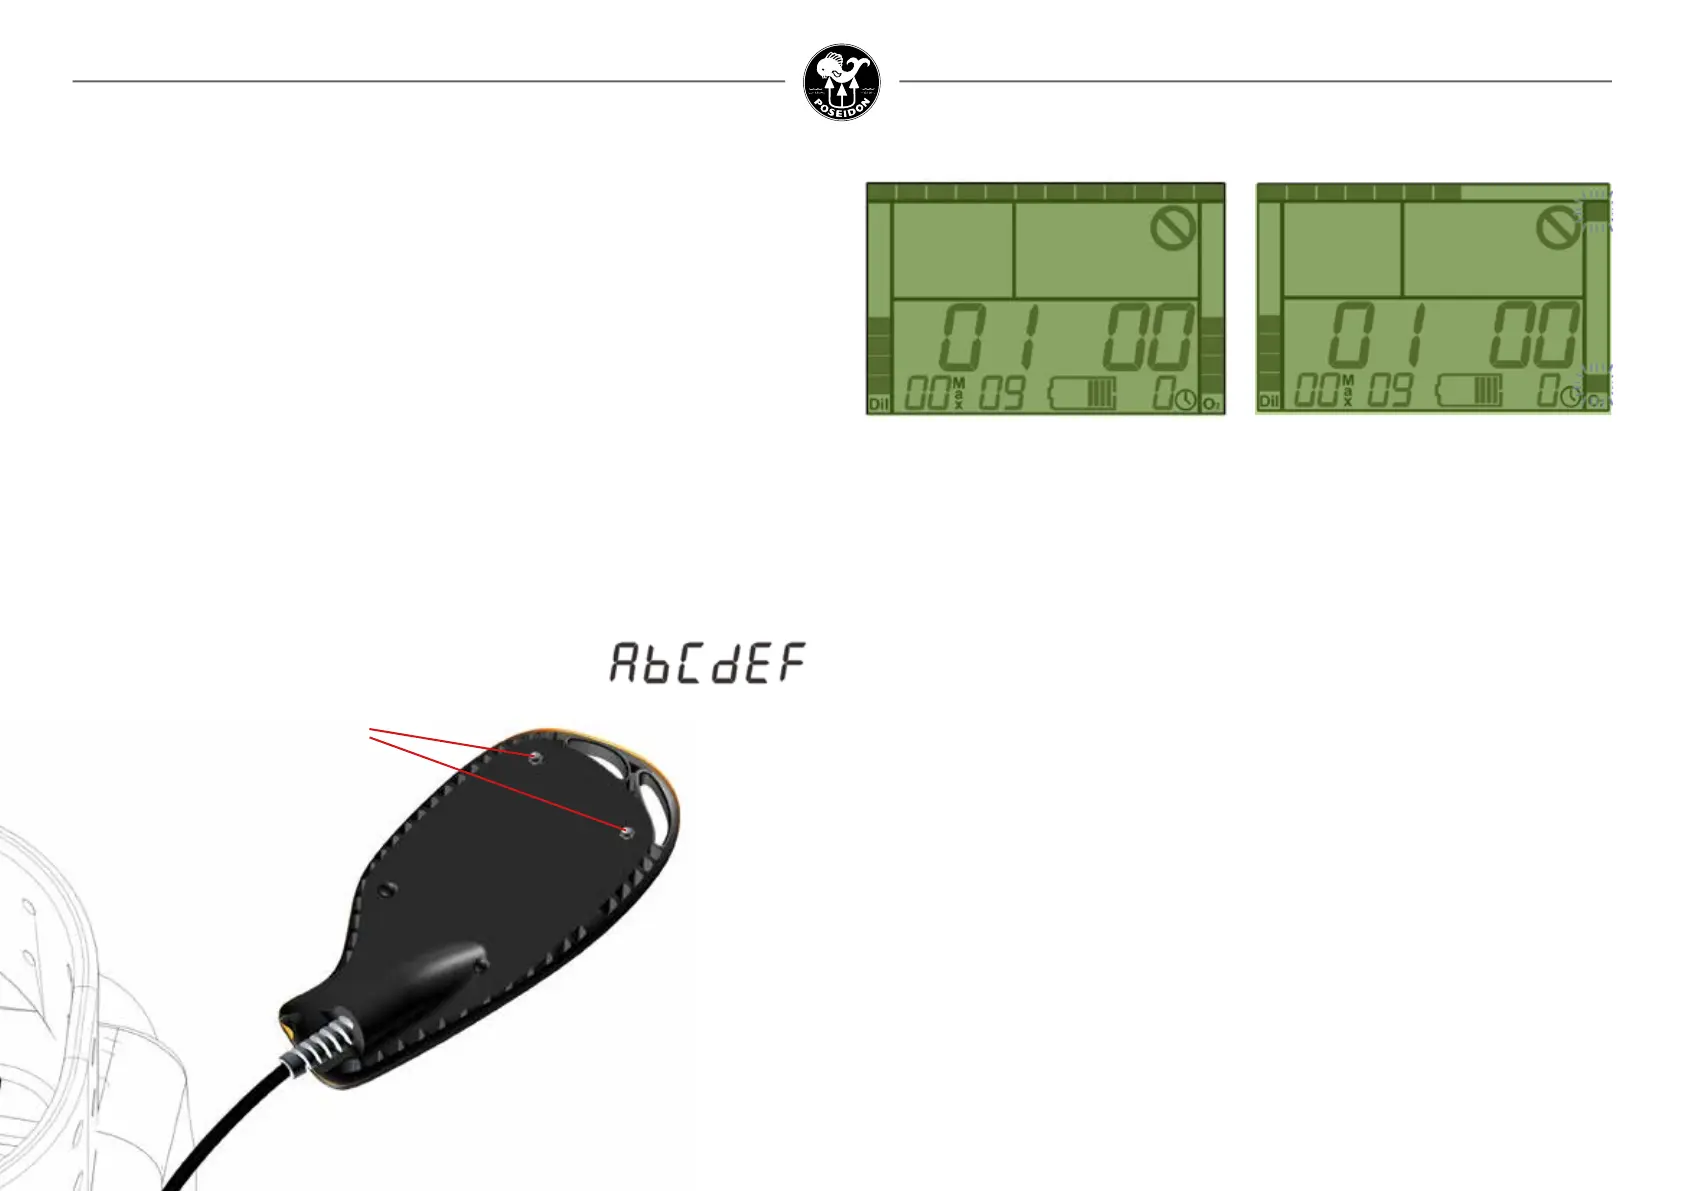
connected, the right side of the display will ash an alternating “checker-board” pattern (every
other segment of the oxygen pressure bar graph) indicating that the contacts need to be dried.
After the wet-switch contacts have been dry for ve consecutive seconds, the top and bottom
segments on the right side of the screen begin to ash (Figure 2-3). This ashing signals the
diver to again connect the two wet-switch contacts (either with ngers, water, or a metal
object) for a period of about eight seconds (as indicated by the bar graph on the right side of
the screen increasing from top to bottom). The normal power-up procedure consists of the
following three steps:
• Connect the wet-switch contacts momentarily until the initial screen appears
• Release the contacts for 5 seconds, until the two segments ash on the right side
of the screen
• Connect the wet-switch contacts a second time and hold continuously for 8 seconds.
The ascent-rate bar graph across the top of the screen serves as a progress bar, indicating the
amount of time remaining for the diver to complete the power-up conrmation routine (about
30 seconds). After completing the power-up conrmation procedure, all of the segments in the
Primary Display will display momentarily (Figure 2-4). It’s important for the user to note whether
any segments are missing; and if so, not to attempt to dive the unit until it has been repaired
at an authorized service center. After displaying all segments, the system proceeds to the initial
start up tests.
Electronics Power-Up
If your system includes a M28 Dive Computer, please look in the Appendix 3 for more
information.
Insert the battery following the procedures described in Chapter 1, which will automatically
power-up the electronics. If the battery is already inserted, the electronics can be powered-up
by connecting the wet switch on the back of the display with a pair of wet ngers, as shown in
Figure 2-1.
What happens next depends on how the system is initially powered up. If it is powered-up by
touching the wet-switch (Figure 2-1), then the rst screen displayed shows the pressure in
each cylinder, current battery state of charge and installed rmware version number and the
Poseidon SE7EN+ serial number (Figure 2-2). The rmware version number is shown in large
digits on the left and right side of the display screen to identify rmware version (left) and patch
number (right). Because the SE7EN+ is designed to accept rmware updates, knowing the
specic version number of the rmware is extremely important when diagnosing problems.
In the lower right corner the remaining weeks until required service is displayed. The serial
number of the rebreather unit is displayed in the lower-left corner of the screen. The serial number
is represented in “hexadecimal”; each digit can be either a numeral (0-9), or one of six letters
(A-F). Letters are represented as upper-case A,C,E, and F, and lower-case b and d:
Figure 2-1.
Connect the wet switch on the back
of the Primary Display for Power-Up.
Wet switch contacts
Figure 2-2. Initial displays during the rst
ve seconds of Power-up, showing rmware
version and serial number.
Figure 2-3. When the top and bottom
segments on the display starts to blink,
re-connect the wet-switches.