PreciseFlex_Robot
136
10. Remove the Base Mounting Plate by removing 4 M5 SHCS. The right splash guard is
attached to the base mounting plate.
11. Remove the M4 Locking Screws that attach the J1 Motor Mount Bracket to the Z Column.
12. Slide the J1 Stage 1 timing belt off the large idler pulley.
13. Slide the J1 Motor and Motor Mount Bracket assembly out the bottom of the Z Column.
14. Remove the J1 Motor Assembly from the J1 Motor Mount Bracket and replace with the new
motor, using Loctite 243.
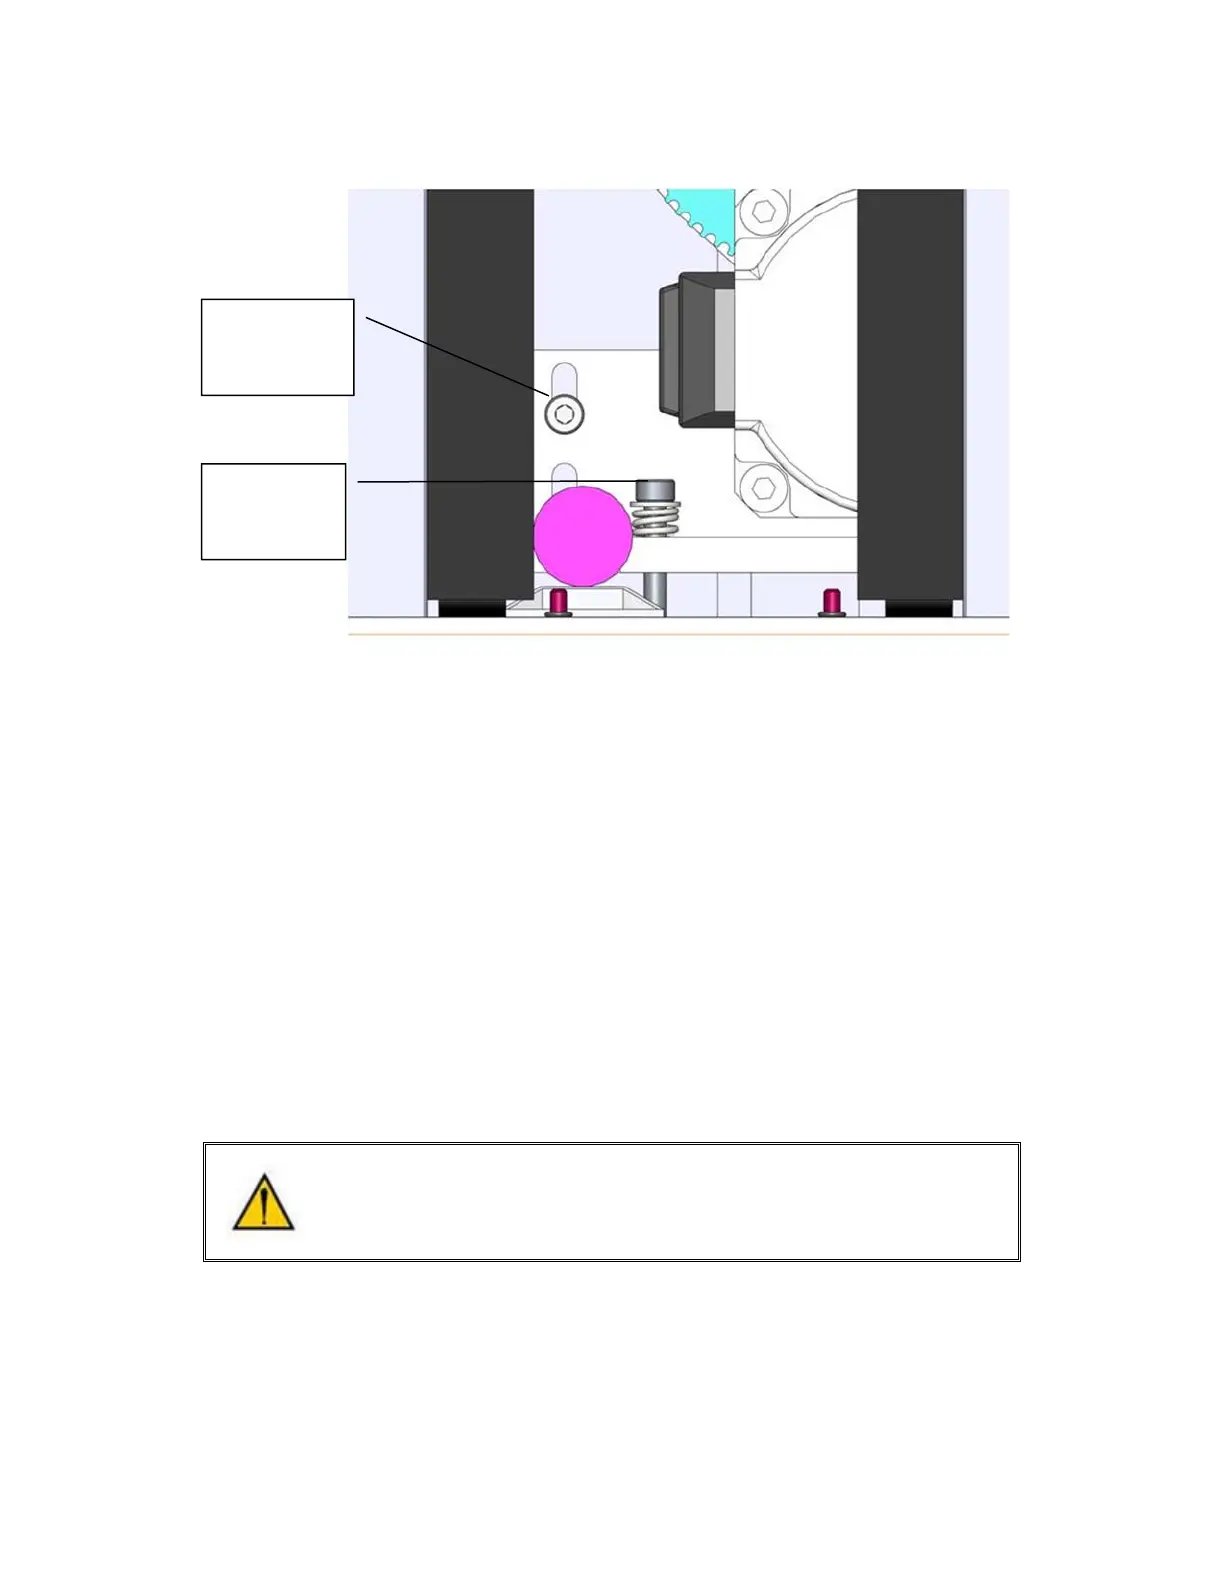
15. Replace the components in reverse order. Compress the tension spring to 5.5mm under the
washer with the M4 Motor Bracket Locking screws slightly loose, then tighten the screws.
Use Loctite 222 or 243 on the Base Plate and Top Plate screws.
16. Before replacing the Front Cover and Top Plate, the Cal Pins should be removed from inside
the Front Cover and the robot should be re-calibrated following the Calibration Procedure.
Replacing the J2 (Shoulder) Axis Motor or Timing Belt
DANGER: Before replacing the J2 Motor, the AC power should be removed.
Tools Required:
1. 5.0mm hex driver or hex L wrench
2. 4.0mm hex driver or hex L wrench
M4 Locking
Screws and
lock washers
M4 Tension
Screw