PreSonus StudioLive
™
24.4.2
126
Quick Start:
Level
Setting
Overview Controls Connecting
to a
Computer
Scenes,
Presets &
System
Menu
Technical
Information
Trouble-
shooting
& Warranty
Tutorials
8 Tutorials Owner’s Manual
127
Quick Start:
Level
Setting
OverviewControlsScenes,
Presets &
System
Menu
Connecting
to a
computer
Technical
Information
Trouble-
shooting
& Warranty
Tutorials
Tutorials 8
Software
Universal Control,
Capture, and
Studio One Artist
Hookup
Hookup
Software
Universal Control,
Capture, and
Studio One Artist
If you are using a new or nonstandard type of microphone (e.g.,
USB, headset, laser, MEMS), please consult your microphone’s user’s
manual for power requirement and compatibility information.
Regardless of the microphone type you are using, we recommend
reading your microphone’s user’s manual thoroughly before
engaging phantom power and if other usage questions arise.
8.1.4 Microphone Placement
The following are a few recording applications to help you get started with your
StudioLive. These are by no means the only ways to record these instruments.
Microphone selection and placement is an art. For more information, visit
your library or local bookstore, as there are many books and magazines
about recording techniques. The Internet is also a great source of recording
information, as are instructional videos. Some of these microphone-placement
suggestions can be used in live applications, as well as for studio recording.
Grand Piano
Place one microphone above the high strings and one
microphone above the low strings. Experiment with
distance (the farther back the more room you will
capture). This technique can be used for live and
studio applications.
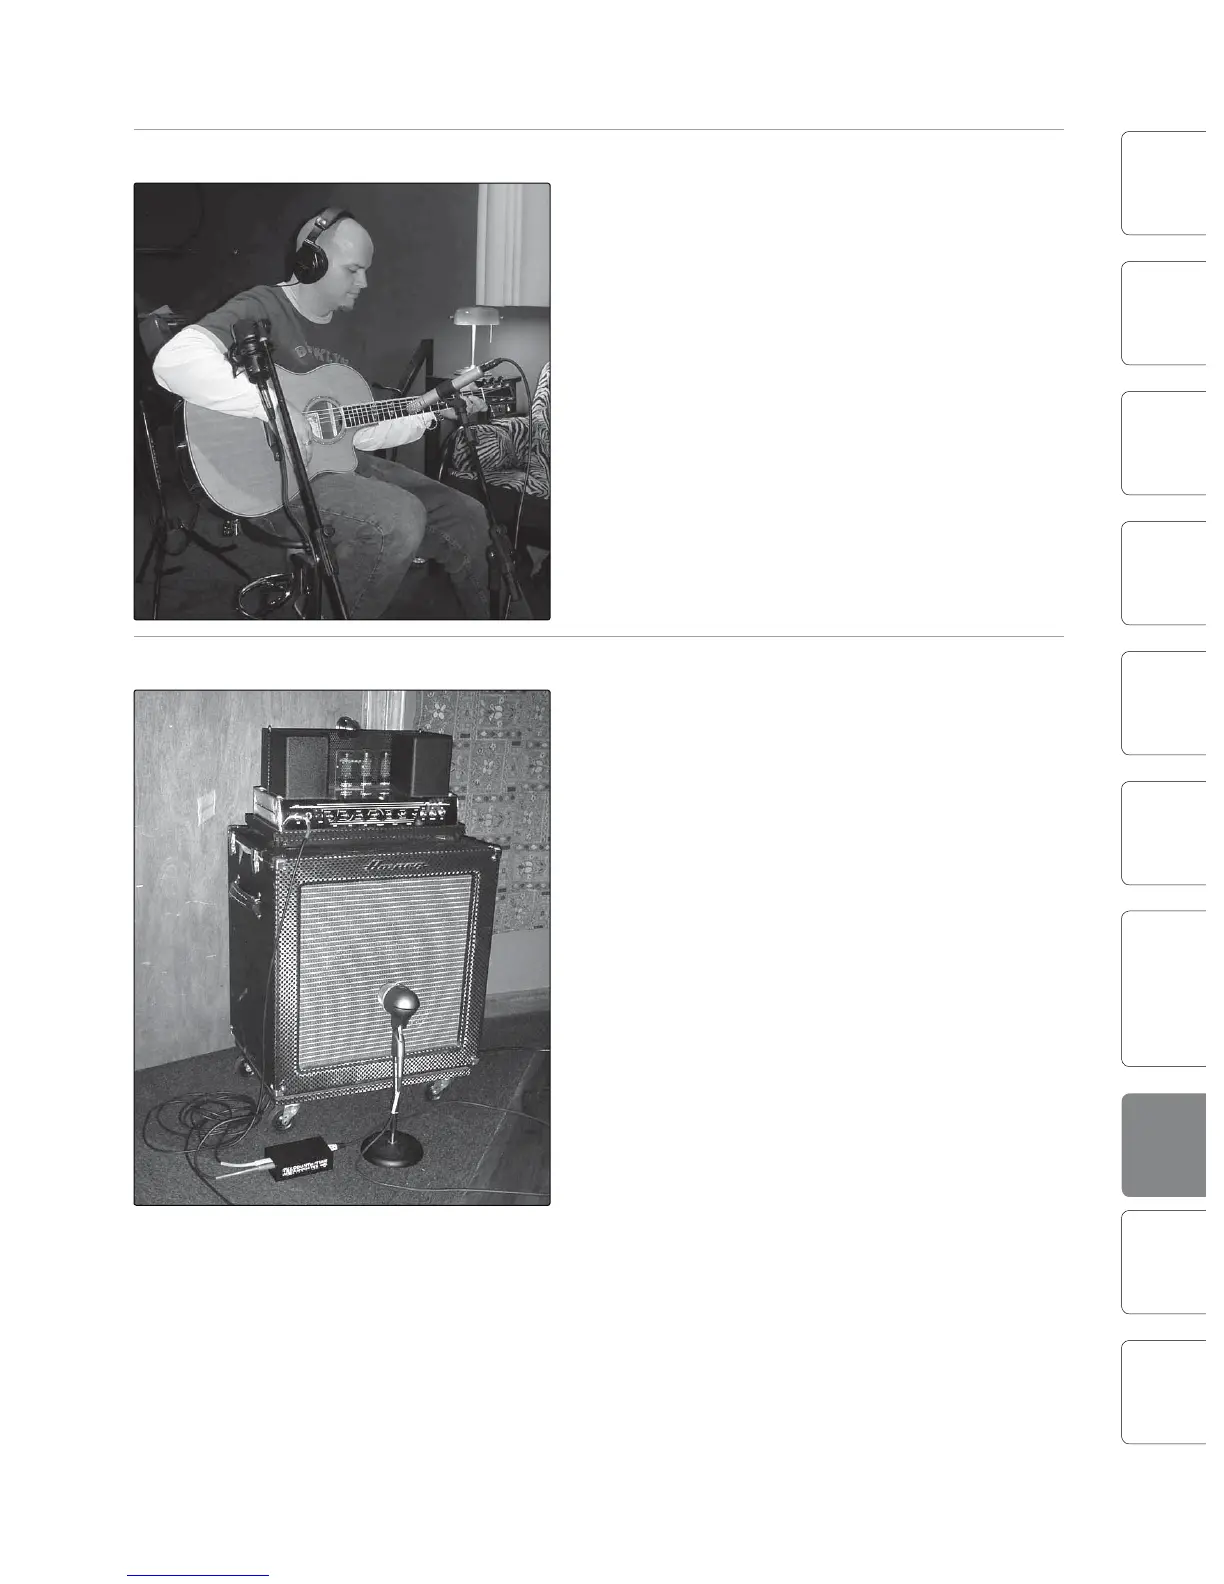
Electric Guitar
Place a dynamic microphone an inch or two away
from the speaker of the guitar amplier. Experiment
with exact location. If you are recording an amp with
multiple speakers, experiment with each one to see if
one sounds better than the others. Place a condenser
microphone approximately six feet away, pointed at
the amp. Experiment with distance. Also experiment
with inverting the phase of the room microphone to
check for phase cancellation and reinforcement.
(Select the “fuller”-sounding position.) To use this
technique in a live application, omit the condenser
microphone.
Acoustic Guitar
Point a small-diaphragm condenser microphone at
the 12th fret, approximately 8 inches away. Point a
large-diaphragm condenser microphone at the bridge
of the guitar, approximately 12 inches from the guitar.
Experiment with distances and microphone
placement. Another popular method is using an XY
microphone placement with two small-diaphragm
condenser microphones. (See drum-overheads photo
on the next page.)
Bass Guitar (Direct and Speaker)
Plug the electric bass guitar into a passive direct box.
Connect the instrument output from the passive
direct box to a bass amplier. Place a dynamic
microphone an inch or two away from the speaker
and connect it to a StudioLive microphone input.
Connect the line output from the passive direct box to
a line input on a dierent channel of the StudioLive.
For recording, place these signals on separate tracks.
During mixing, you can blend the direct and amplier
signal to taste. This technique can also be used in live
applications.
8.1 Microphones Microphones 8.1