PreSonus StudioLive
™
24.4.2
92
Quick Start:
Level
Setting
Overview Controls Scenes,
Presets &
System
Menu
Technical
Information
Tutorials Trouble-
shooting
& Warranty
Connecting
to a
Computer
Owner’s Manual
93
Quick Start:
Level
Setting
OverviewControlsScenes,
Presets &
System
Menu
TutorialsTechnical
Information
Trouble-
shooting
& Warranty
Software
Universal Control,
Capture, and
Studio One Artist
Hookup
Hookup
Software
Universal Control,
Capture, and
Studio One Artist
Connecting
to a
Computer
Capture 7.3
SOFTWARE: Universal Control, Capture, and Studio One Artist 7
7.3 Capture
7 SOFTWARE: Universal Control, Capture, and Studio One Artist
t Loop: Engage/Disengage Loop Mode.
t Time Display: Displays the time at the
current playback-cursor position.
t Remaining Time: Displays the remaining time that can
be recorded, based on the size of the available storage
left on the hard drive to which you are recording.
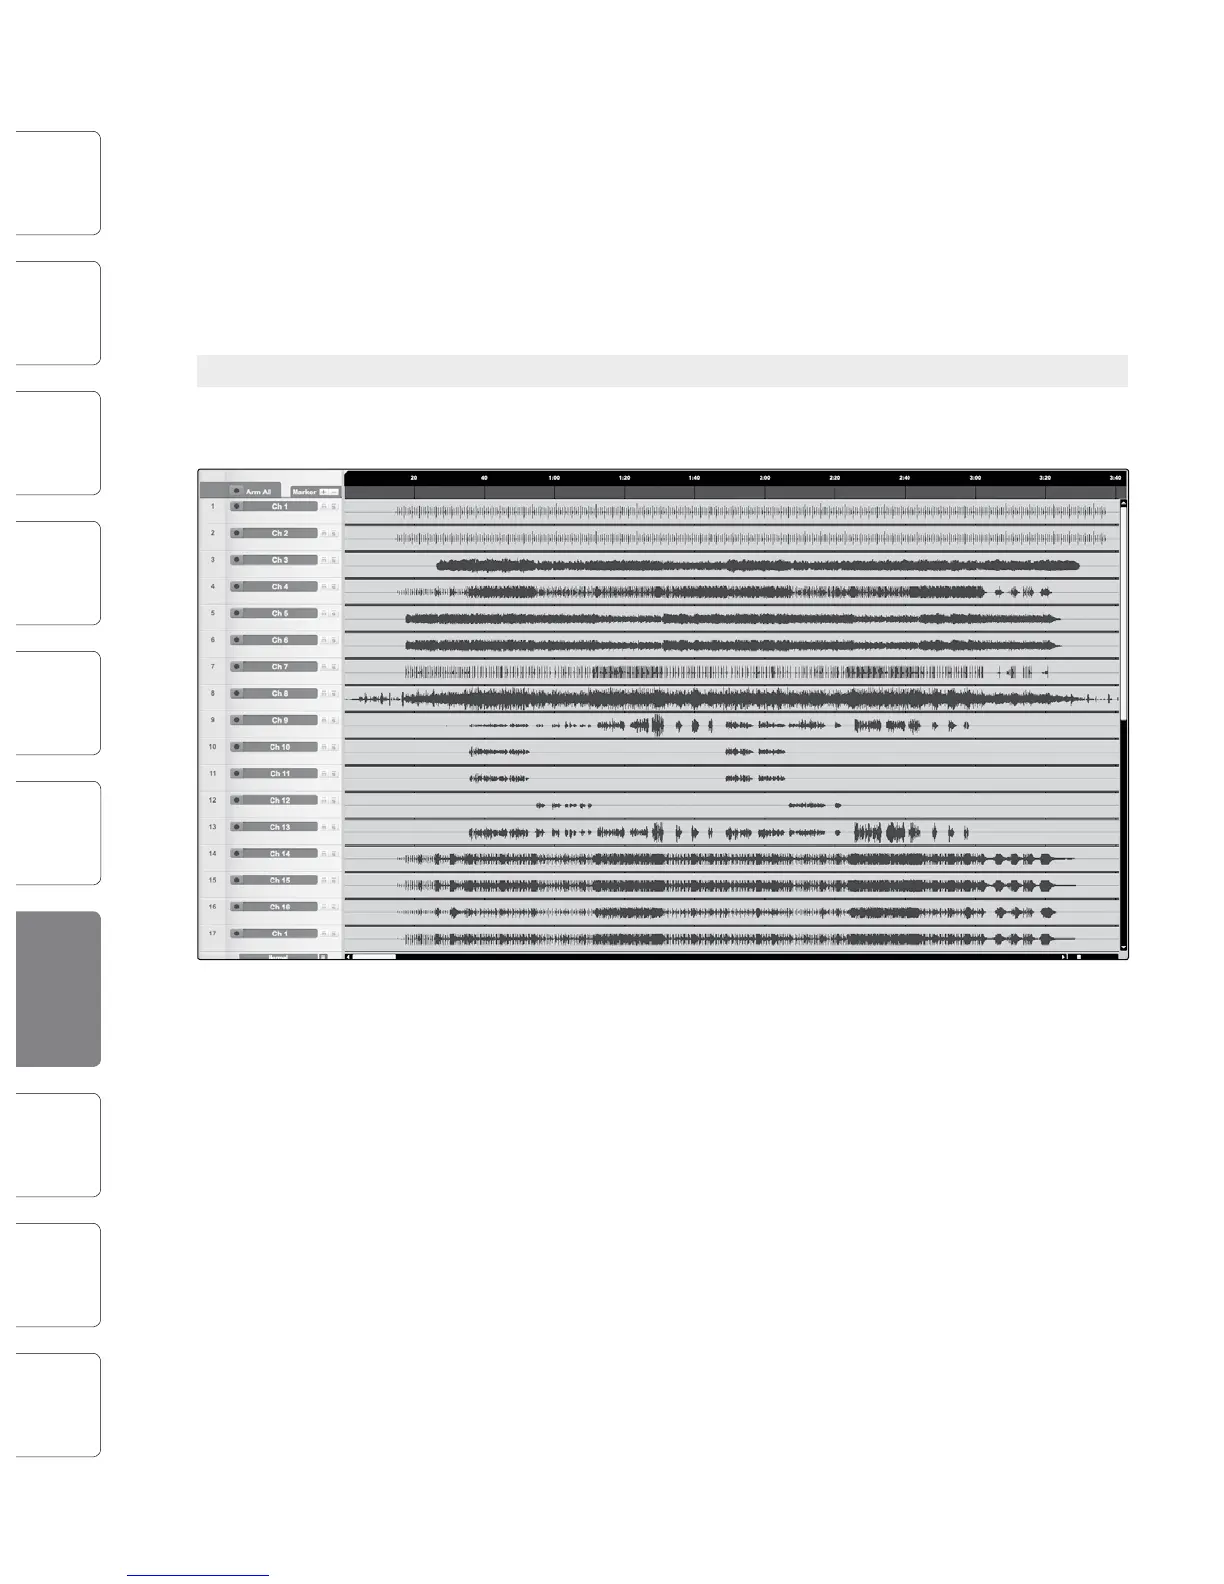
7.3.4 The Edit Window
The Edit window is the main view of the Session page,
which provides an overview of the Session for editing.
The Edit Window contains the following:
t Timeline Ruler: Displays time increments in seconds.
t Marker Lane: Displays user-inserted markers.
t Arm All: Click this button to arm all inputs for recording.
t Marker ±: Click on the plus (+) button to add a marker at
the current playback cursor position. Select a marker and
click on the minus (-) button to remove the marker.
t Track Column: Contains a dedicated mono audio
track for each audio input into Capture from the
StudioLive mixer, including a Main stereo track.
t Vertical Zoom: Increases or decreases the
size of the tracks and audio files.
t Horizontal Zoom: Zooms the session in or out.
7.3.5 Getting Started in Capture
Tracking is the rst stage of audio production. The following
chapter discusses aspects of recording tracks in Capture, including
Session creation and setup, Audio Tracks and Events, and more.
Audio Device
Before recording anything in Capture, please take a
moment to be sure your StudioLive mixer is properly
connected to the computer via FireWire and that
Capture displays the StudioLive as your audio device
on the Start page.
When the StudioLive mixer is not connected to the
computer successfully, Capture will display “No Audio
Device” in the Audio Device window.
Creating a New Session
A Session is the document type in which all recording
takes place in Capture. To create a new Session, do one
of the following:
1. From the Start page, click on the
New Session button.
2. Navigate to File/New Session.
3. Press [Ctrl]/[Cmd]+N on the keyboard.
Session Setup
When a new Session is created, a setup menu
with the following options will pop up:
Session Title
This will be the title of your Session. This name will be the
Session le name (Title.Session), as well as the name of the
new folder that contains all data related to your Session.
Session Location
This is where new Sessions and all related data will be saved. The Session
location can be chosen each time you create a Session. By default, the
new Session location will be the Capture folder in your Documents
folder. You can choose a dierent le location by clicking on the Browse
button and browsing to a new location. The last known save location
will appear as the default the next time you create a new Session.