PreSonus StudioLive
™
24.4.2
54
Quick Start:
Level
Setting
Overview Controls Technical
Information
Tutorials Trouble-
shooting
& Warranty
Scenes,
Presets &
System
Menu
Connecting
to a
Computer
Owner’s Manual
55
Quick Start:
Level
Setting
OverviewControlsTutorialsTechnical
Information
Trouble-
shooting
& Warranty
Scenes,
Presets &
System
Menu
Software
Universal Control,
Capture, and
Studio One Artist
Hookup
Hookup
Software
Universal Control,
Capture, and
Studio One Artist
Connecting
to a
Computer
Saving and Loading Channel Presets 5.2
Scenes, Presets, and the System Menu 5
5.1 Creating and Recalling a Scene
5 Scenes, Presets, and the System Menu
t Assigns: All output and bus routing (Mains, Subgroups, Stereo
Linking, FireWire Returns to Inputs, Solo and Monitor bus
assignments, and Master Control Assignments)
t EQ and Dyn: All Fat Channel dynamics processing and lter parameters (Phase,
High Pass, Noise Gate, Compressor, EQ, and Limiter) for every channel and bus
t Aux Mix: All aux mixes (analog Aux Mixes 1-10, FXA and FXB, and Pre1/Pre2 positions)
t Faders: All fader positions
t Pots: All digital knob positions (Aux 1-10 Outputs, FXA and FXB Levels, Cue,
2 Track In, Phones, Monitor, and Aux Input A and Aux Input B knobs)
t GEQ: Graphic EQ settings
If you enable Fader positions as a part of your Scene recall, the StudioLive will
automatically put the meters in Fader Locate mode after you press the Recall
button. The Fader Locate button will illuminate, and the meter section of the Fat
Channel will display the recalled fader position. Move the faders up or down until
only the center LED is illuminated in each meter to recall the stored position. The
subgroup and main meters at the top right of the StudioLive will display the
recalled positions for their respective faders. As long as you remain in Fader Locate
mode, the faders on your StudioLive will not be active. The level of the audio
passing through them will be set according to the stored fader position, not the
current location of the physical fader. Once you have recalled each of the faders to
their Scene location, press the Locate button again. This will take you out of Fader
Locate mode and reactivate your faders so that they control the level of their
channels and buses.
If you enable knob positions as a part of your Scene recall, all of the digital knobs
(Aux 1-10 Outputs, FXA and FXB Levels, Cue, 2 Track In, Phones, Monitor, Aux
Input A and Aux Input B knobs) will remain at their stored position until they
are moved manually. Once a knob is turned, its value will jump to the value
of its current physical position. Therefore, if you intend to save a scene and
recall it later, it is highly recommended that you use the recall sheet provided
in the back of this manual to note the stored position of these controls.
It is important to note that the recalling groups have no eect on what
parameters are stored with a scene. All storable parameters are saved
with a scene regardless of what recalling groups are enabled.
A Quick Note About the AutoStore Feature
It is not necessary to create a Scene for your StudioLive in order to preserve its
settings when you power it down. Periodically, you will notice the Store button
ash once, indicating that the current settings on your StudioLive have been saved
to internal memory. The StudioLive will take a snapshot of the current position
of every parameter on the mixer whenever no changes have been made for ten
seconds. If you wish to ensure that your StudioLive will hold its current settings
before you power down, simply wait for a few seconds until the Store button
ashes. This is your indication that it is now safe to turn o your StudioLive. The
next time you turn it on, all of your settings will be recalled automatically.
Please note: If you make changes to a stored Scene, AutoStore will not
save these changes as a permanent part of the Scene. Any changes
made to a Scene in the StudioLive’s library must be saved using the
Scene menu, as described in the rst part of this section.
5.2 Saving and Loading Channel Presets
The StudioLive comes with a suite of channel-strip presets created
by professional users of PreSonus products. These presets provide
a great jumping-o point to create a mix quickly and easily. The
StudioLive also allows you to create your own library of presets.
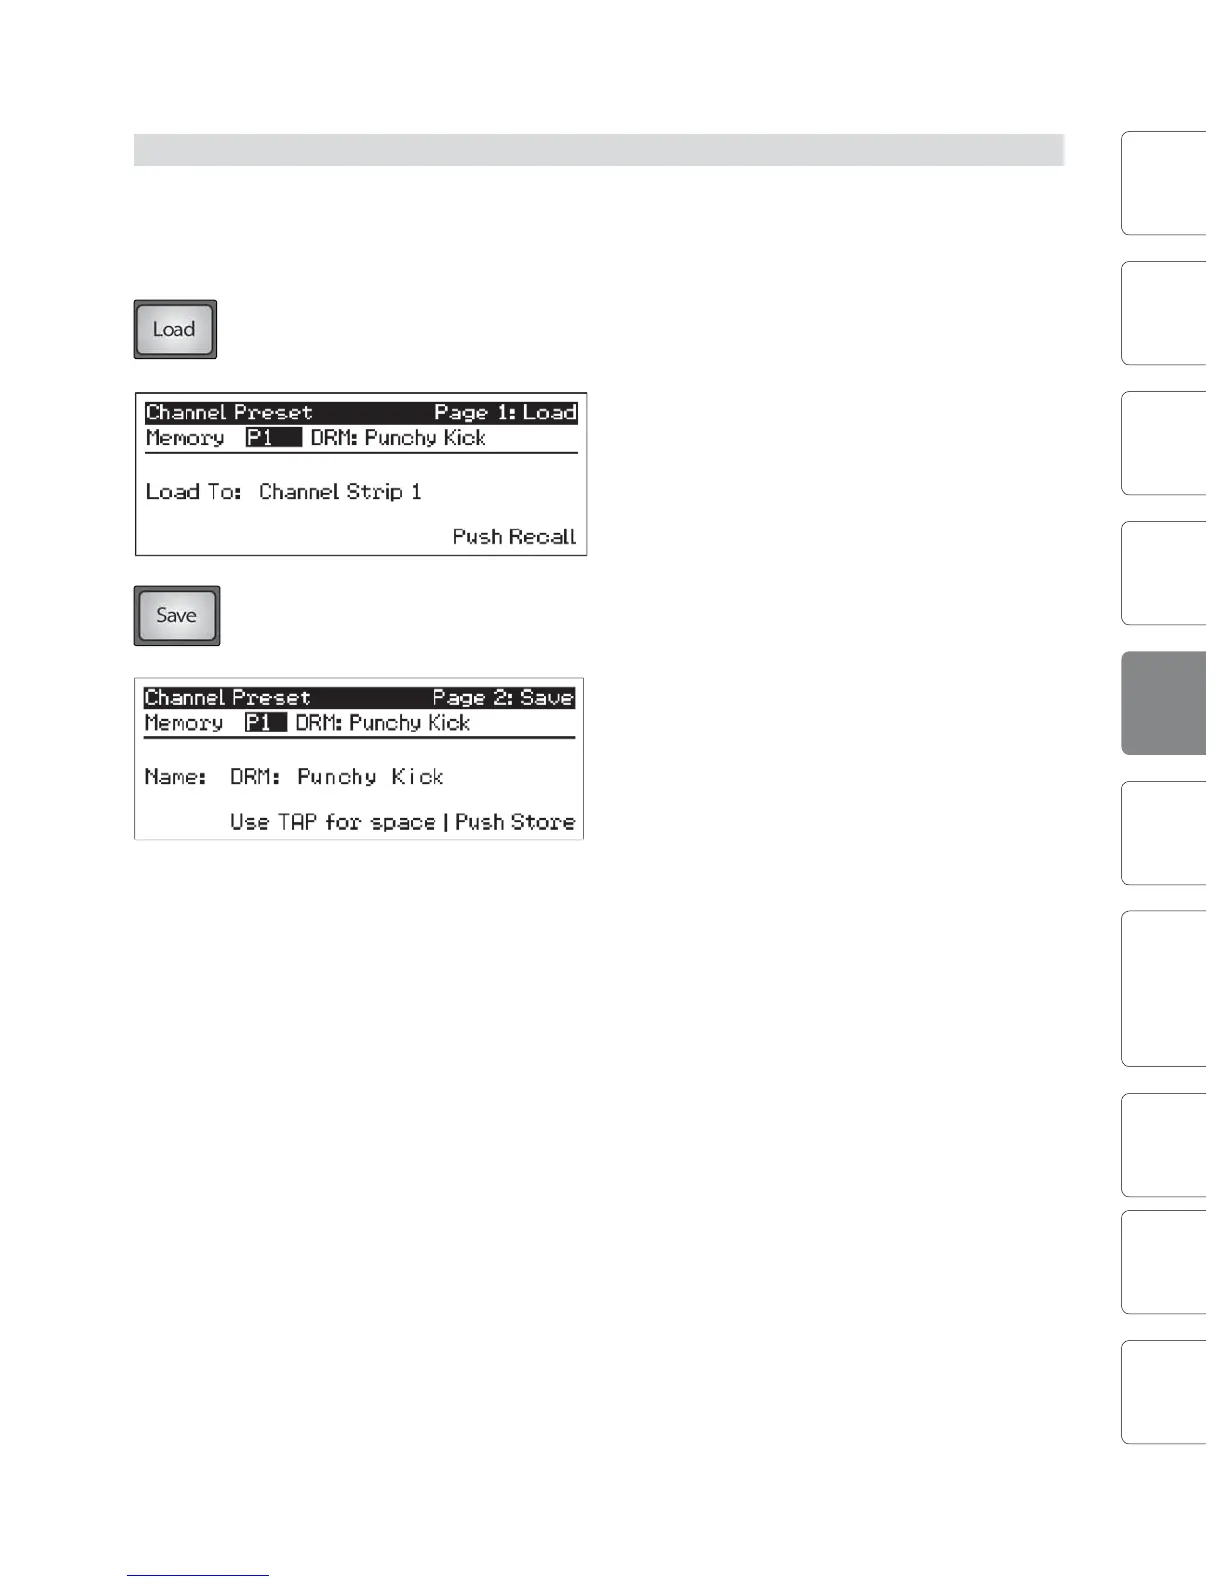
To load a preset to any channel on the StudioLive, rst press the Select button for
the desired channel. From the Fat Channel, press the Load button. You will notice
that LCD now displays the Channel Preset Load menu.
The Channel Preset Load menu always displays the
selected channel onto which the preset will be
loaded. Use the Value encoder to locate the preset
you would like to use. Once you have made your
selection, press the Recall button. If at any time you
would like to cancel this operation, simply press the
Load button again.
If you have created a channel-strip setting in the Fat Channel that you would like to
save to the Channel Preset library, press the Fat Channel’s Save button. You will
notice that the LCD will display the Channel Preset Save menu.
To begin, use the Value encoder to scroll to an empty
position in the Channel Preset library. Press the Next
button to navigate to the category location. Create
the category in which your preset would t (DRM,
VOX, GTR, etc.). Press the Next button again to
navigate to the rst letter of the preset name.
Turn the Value Encoder clockwise or counter-clockwise to change the letter.
The StudioLive allows you to customize the name with uppercase and
lowercase letters, as well as a selection of numerals and punctuation marks.
You can insert a space by simply pressing the Tap button. Once you are
satised with your changes, press the Store button. It will illuminate while the
Channel preset is being written to the StudioLive’s internal memory. Once
the Channel preset is saved, the Store button will return to its unlit state.