PreSonus StudioLive
™
24.4.2
90
Quick Start:
Level
Setting
Overview Controls Scenes,
Presets &
System
Menu
Technical
Information
Tutorials Trouble-
shooting
& Warranty
Connecting
to a
Computer
Owner’s Manual
91
Quick Start:
Level
Setting
OverviewControlsScenes,
Presets &
System
Menu
TutorialsTechnical
Information
Trouble-
shooting
& Warranty
Software
Universal Control,
Capture, and
Studio One Artist
Hookup
Hookup
Software
Universal Control,
Capture, and
Studio One Artist
Connecting
to a
Computer
Capture 7.3
SOFTWARE: Universal Control, Capture, and Studio One Artist 7
7.3 Capture
7 SOFTWARE: Universal Control, Capture, and Studio One Artist
Audio Device and Sample Rate
Capture was specifically created for use with the PreSonus
StudioLive series mixer and will only work with that device. It
is not possible to configure any other audio device for use with
Capture. The Audio Device window will either display “PreSonus
FireStudio” or “No Audio Device”; the former indicates that your
StudioLive mixer is connected to the computer correctly and is
ready to use with Capture. The Sample Rate window displays the
currently configured sample rate, as set on the StudioLive mixer.
About Capture
To view information about Capture, including your version number and
acknowledgements, choose About Capture from the Help le menu.
7.3.3 The Session Page
Capture features a single-window user interface so you don’t
need to manage multiple windows and views. When a new
Session is created or an existing Session is opened, you will
be taken to the Session page. This page contains all of the
necessary tools to record and edit multitrack audio.
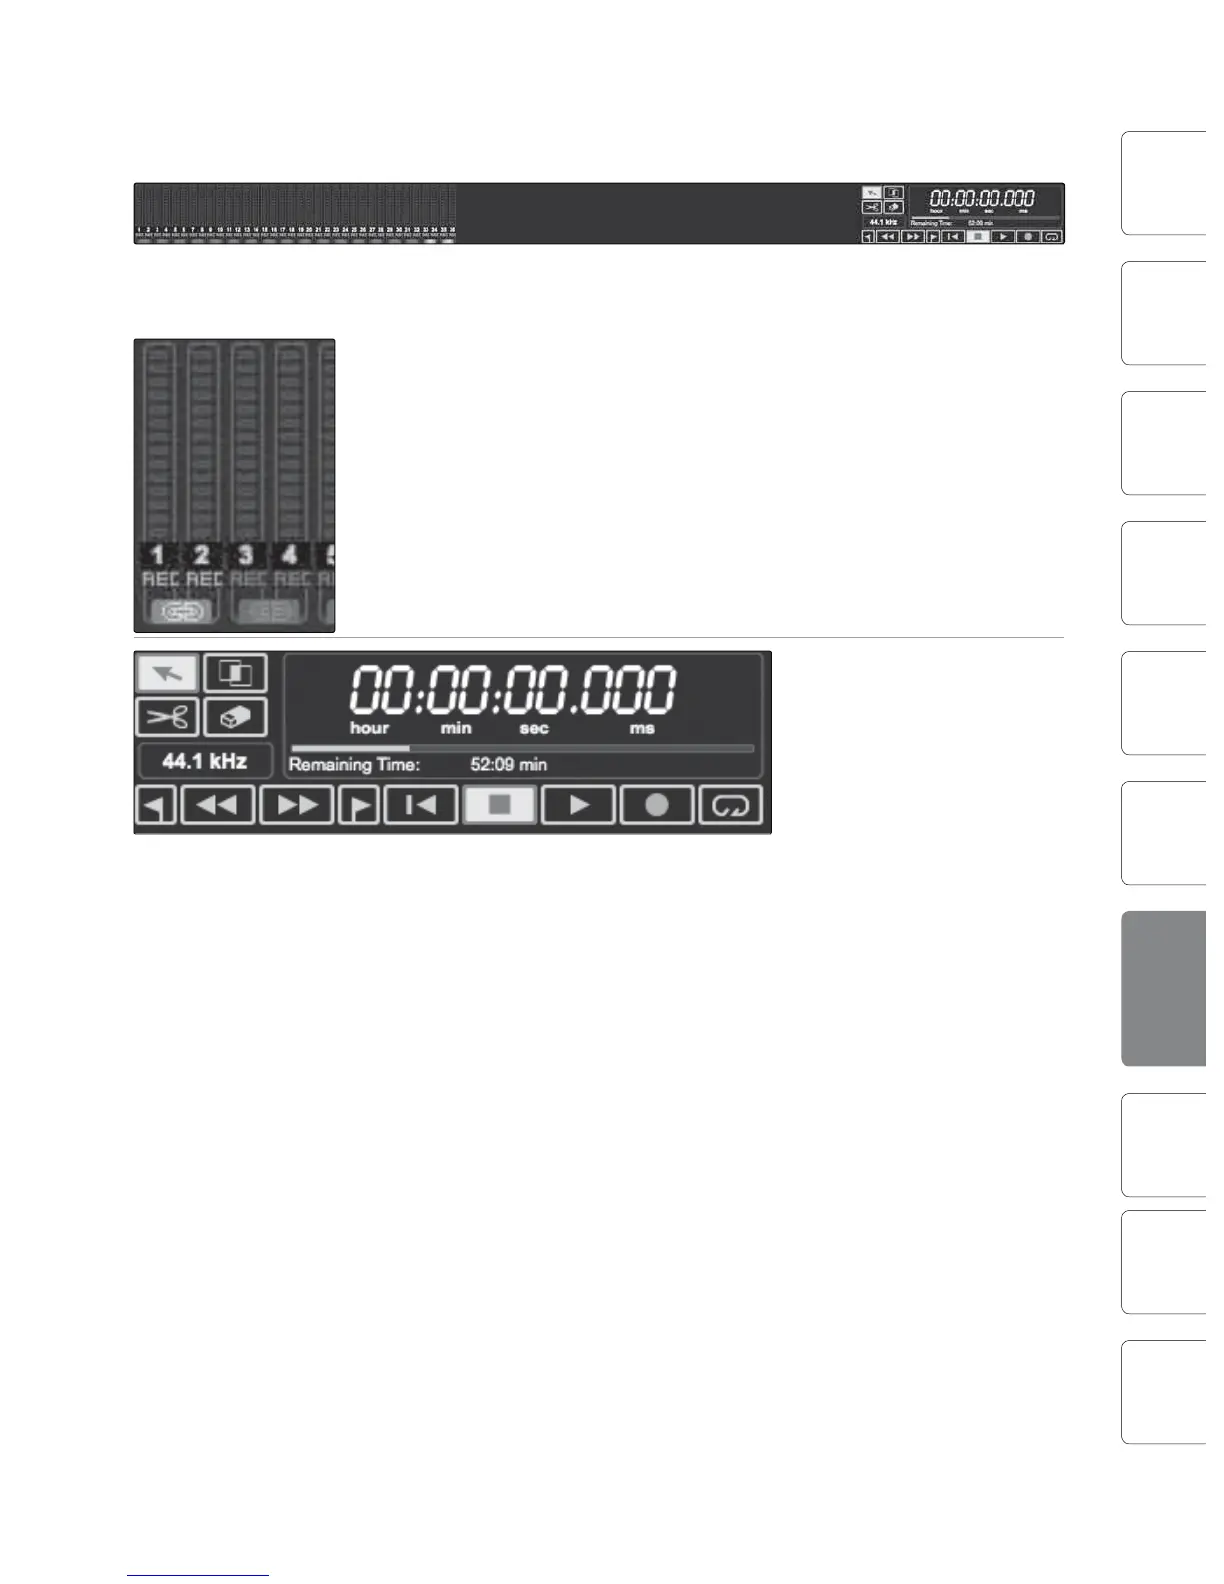
The following are diagrams and descriptions of the Session interface.
Transport
The Transport is at the top of the Session page and contains:
t Meter Bridge: Peak LED-style meters with clip indicators for each input
into Capture from your StudioLive mixer, plus an additional pair of
meters for the routable Master track. (See Section 7.2.5 for details on
how to route a bus to this track.)
t Link Button: Between each meter you will find a link button When this
button is active, Capture will record that track as a stereo interleave
file. By default, the routable bus pair (25 and 26) is link-enabled.
t Record Arm Button: Below each meter, you will find the
Record Arm button for that track. When this button is
active, Capture will record audio from that input.
t
Mouse Tools
t Arrow Tool: The default tool for access to most functions.
t Range Tool: Select the range of an Audio Event for editing.
t Splice Tool: Splice Audio Events.
t Eraser Tool: Erase Audio Events.
t Sample Rate Display: Displays the current
Capture/StudioLive Sample Rate.
Transport Controls
t Previous Marker: Jump the playback cursor to the previous marker.
t Rewind: Rewind for the duration this button is held down.
t Fast Forward: Fast Forward for the duration this button is held down.
t Next Marker: Jump the playback cursor to the next marker.
t Back to Beginning: Return to the beginning of the Session.
t Stop: Stop playback.
t Play: Start playback at the current playback-cursor position.
t Record: Start recording at the current playback-cursor position.