PreSonus StudioLive
™
24.4.2
16
Quick Start:
Level
Setting
Overview Controls Connecting
to a
Computer
Scenes,
Presets &
System
Menu
Technical
Information
Tutorials Trouble-
shooting
& Warranty
3 Hookup
16
Hookup
Owner’s Manual
17
Quick Start:
Level
Setting
OverviewControlsScenes,
Presets &
System
Menu
TutorialsTechnical
Information
Trouble-
shooting
& Warranty
Hookup
Hookup 3
17
Software
Universal Control,
Capture, and
Studio One Artist
Connecting
to a
Computer
Software
Universal Control,
Capture, and
Studio One Artist
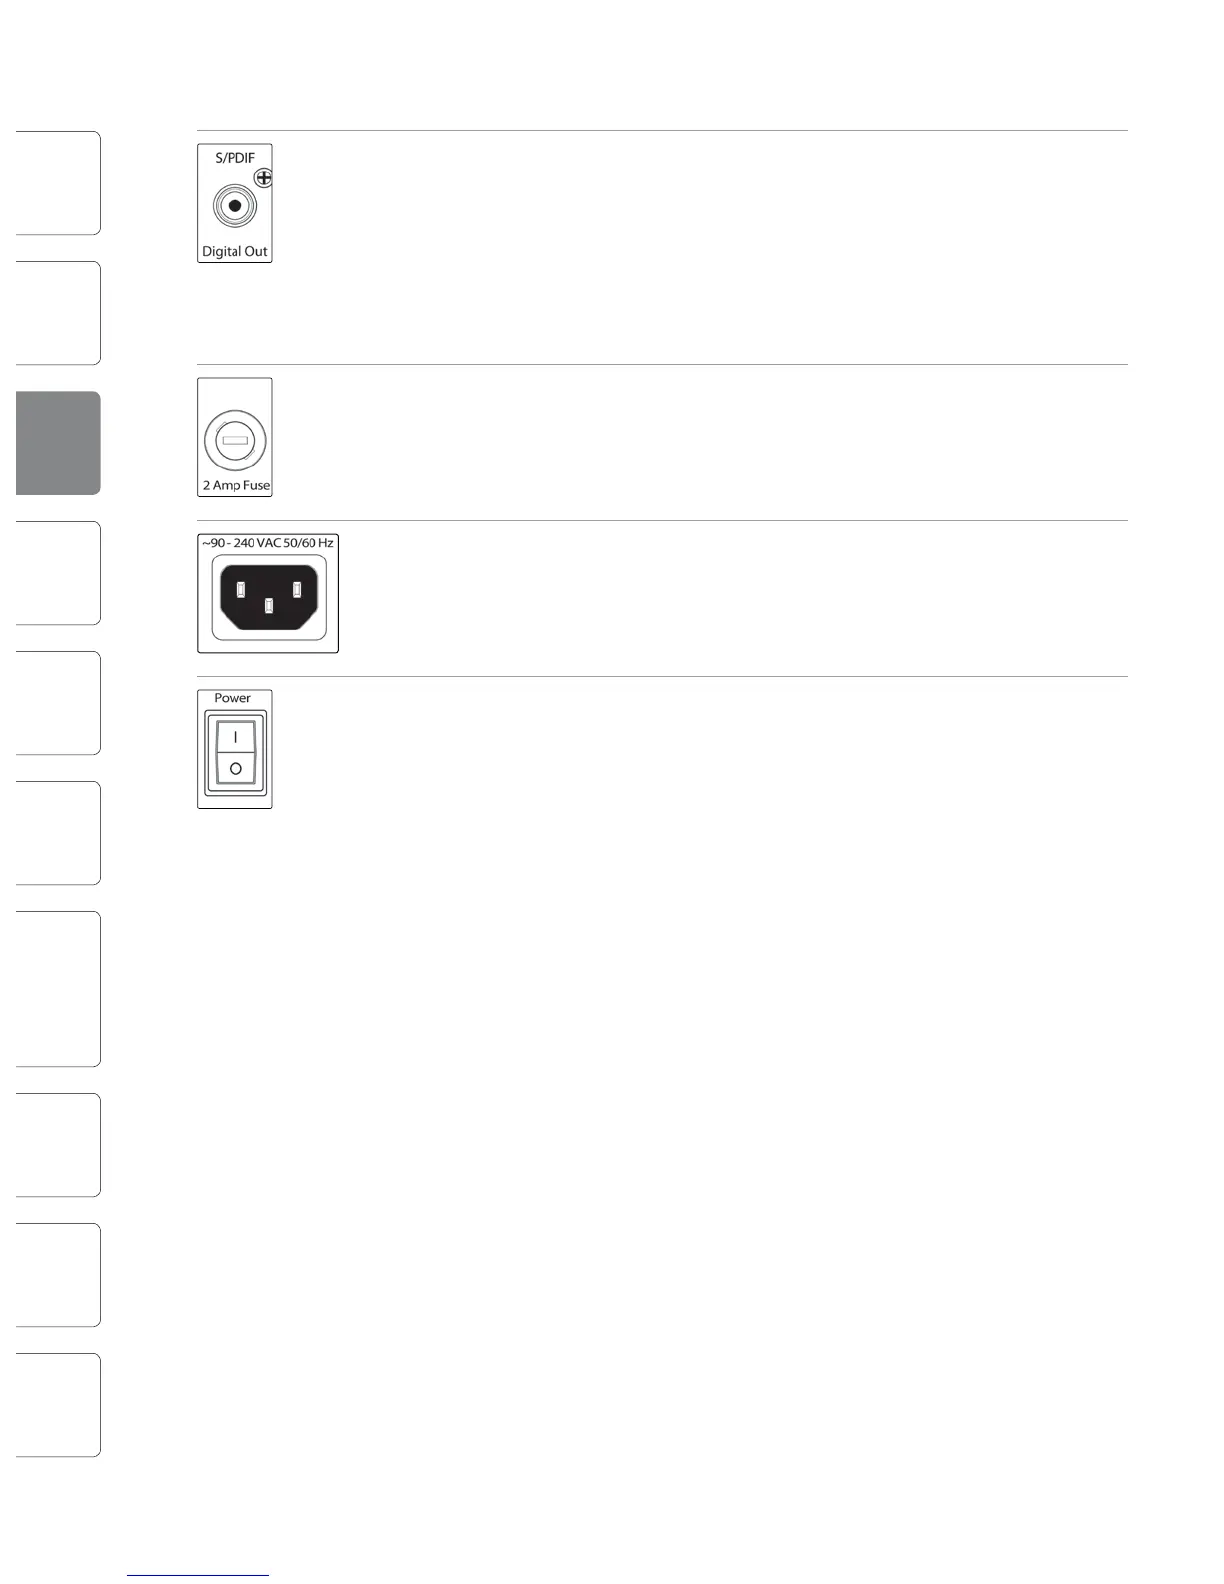
3.1 Rear Panel Connections
S/PDIF Output. By default, the S/PDIF output receives the same signal as the main
outputs, so no activation is necessary. However, any buses that can be routed to
the auxiliary FireWire returns can be routed to the S/PDIF output, either through
the System menu in the Digital Eects | Master Control section, or in the StudioLive
Control Panel. (See Sections 5.4 and 7.2.5 for more information.) Because the
StudioLive cannot be synced externally, you will need to use it as the master clock
and set your S/PDIF-equipped device to receive word clock externally via S/PDIF.
Please consult the documentation for your external digital device for instructions.
2 Amp Fuse. This is the StudioLive’s fuse housing. Your StudioLive uses a 5 mm x 20
mm, 250 VAC, fast-acting fuse.
Power-adapter Input. This is where you plug in the provided IEC power cable.
Power Switch. Push the top part of the switch ( | ) to turn on your StudioLive. Push
the bottom part of the switch ( O ) to turn it o.
3.2 Basic Hookup Diagram
Vocal Mic
Vocal Monitor
Bass
Bass Monitor
Bass D.I.
Drum Monitor
Drum kit
Keyboards
Monitor
Keyboard
Guitar Amp
Guitar Monitor
Main P.A.