PreSonus StudioLive
™
24.4.2
40
Quick Start:
Level
Setting
Overview Connecting
to a
Computer
Scenes,
Presets &
System
Menu
Technical
Information
Tutorials Trouble-
shooting
& Warranty
Controls
4 Controls
40
Owner’s Manual
41
Quick Start:
Level
Setting
OverviewScenes,
Presets &
System
Menu
TutorialsTechnical
Information
Trouble-
shooting
& Warranty
Controls
Controls 4
41
Software
Universal Control,
Capture, and
Studio One Artist
Hookup
Hookup
Software
Universal Control,
Capture, and
Studio One Artist
Connecting
to a
Computer
Aux Sends 4.44.4 Aux Sends
Channel Fader Controls the Overall Level of the Channel.
Each input channel features a 100 mm long-throw fader for accurate level
adjustment. Unity gain (0 dB) is denoted by a “U.”
The white area above the fader can be used as a scribble strip. Use only
oil pencils; other types of pens or pencils cannot be wiped o.
To clean the scribble strip, use a lightly damp cloth to remove the writing.
4.4 Aux Sends
The StudioLive has ten analog aux buses and two internal eects buses. The aux
buses are mono; however, two aux buses can be linked to create a stereo bus.
Section 8.5 discusses how to use these aux buses for monitor and eects mixing.
4.4.1 Analog Aux Send Controls
Solo Button Turns Soloing On and O.
This button will solo the aux bus to the main outputs or to the
monitor outputs. Only PFL Soloing is available for the aux buses
When a Solo button is enabled, that channel or bus will automatically
be selected, and its Select button will illuminate.
Post-Fader Send Button Enables and Disables Post-Fader Send.
When this button is enabled, the send levels to that aux bus will be post-Fat
Channel and post-fader, and therefore are aected by fader settings. If the button
is disabled, by default, the aux buses use the Pre 1 setting, so that all channels on
your StudioLive are sent to the aux bus after the phase-reverse switch, high-pass
lter, and noise gate but before the compressor, EQ, limiter, and fader. However, in
the System Menu, you can select the Pre 2 setting, which makes the send occur
after all Fat Channel processing but before the fader. Please review Section 5.4 for
details.
Output Level Control Adjusts the Master Level of the Aux Output.
This knob controls the overall output level of the aux mix.
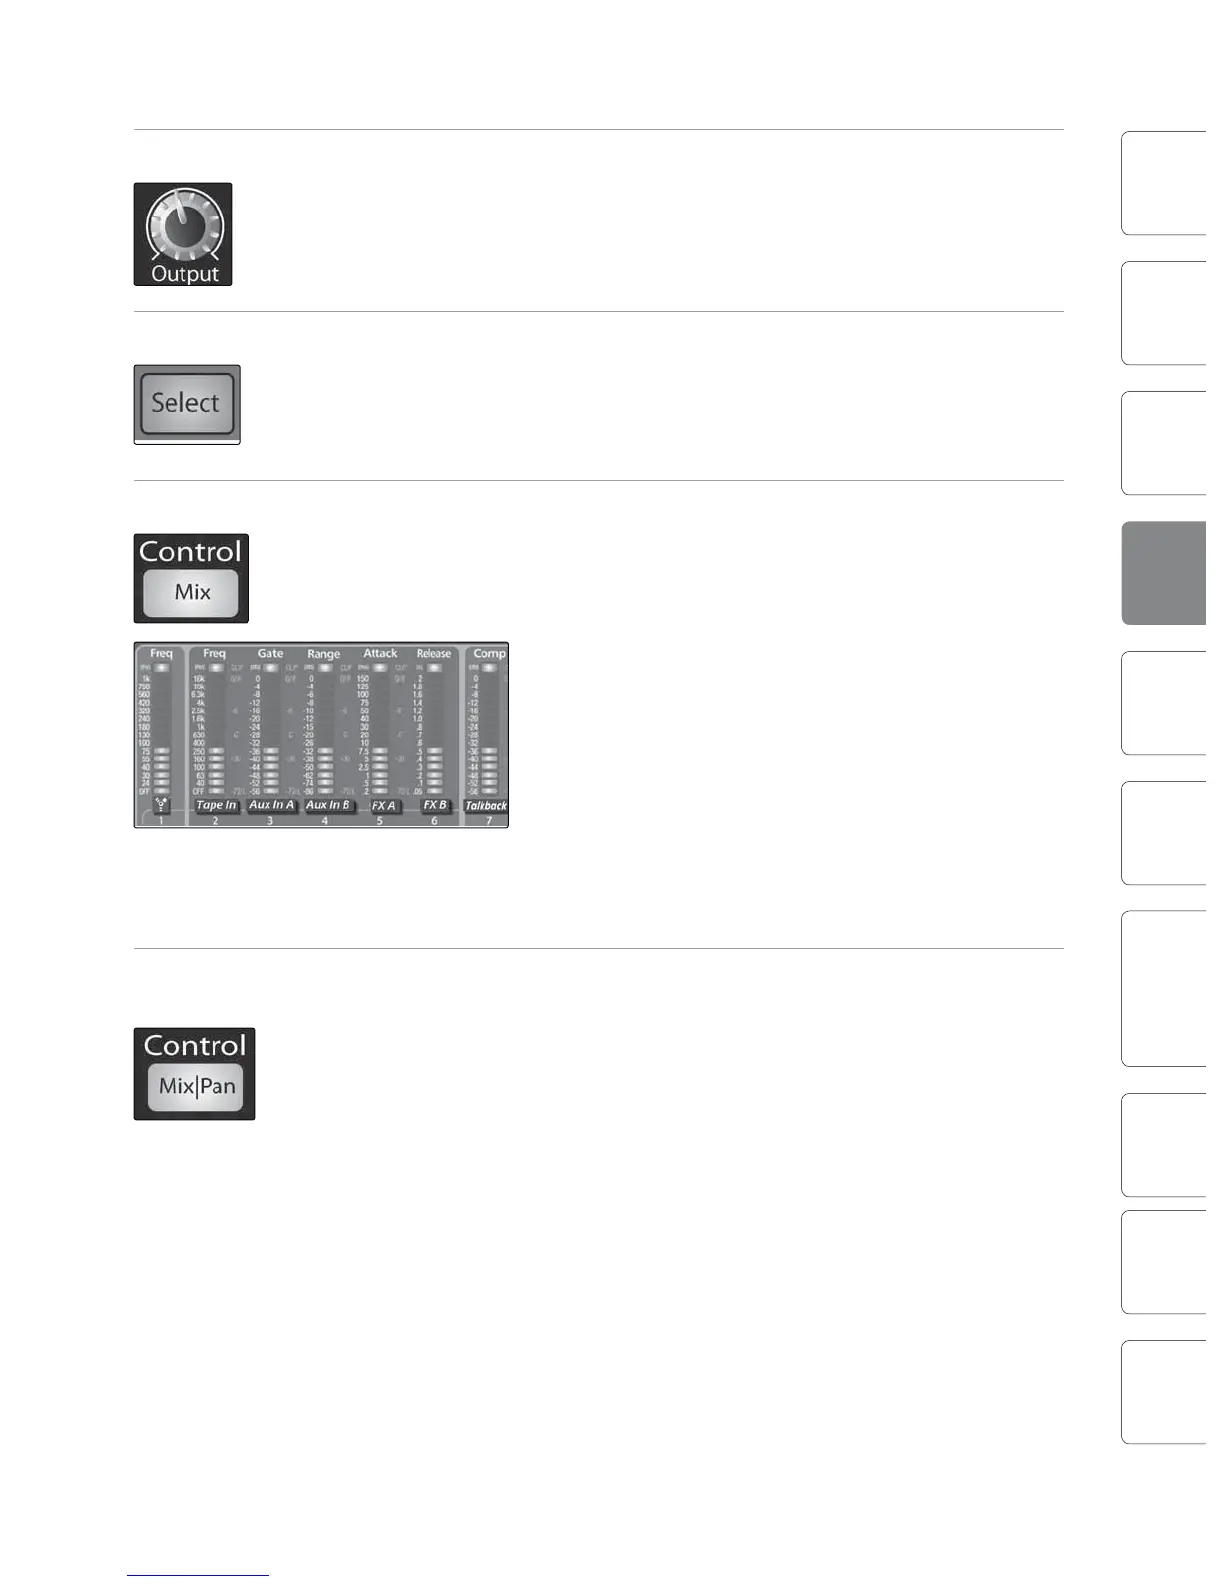
Aux Send Select Button Enables Fat Channel Viewing.
As previously described in section 4.1.1, the Select button routes its aux bus
through the Fat Channel, allowing you to add dynamics processing and EQ
Mix Button Enables Aux Bus Mixing in the Fat Channel.
When the Mix button is pressed once, the 24 encoder
knobs in the Fat Channel become the aux-send level
controls for each of their respective input channels.
The meters will display the send amount for each of
the input channels.
Pressing the Mix button a second time will switch
the rst six meters and encoders to become the
aux-send level controls for the Main FireWire
Return, Analog Tape In, Aux Input A, Aux Input B,
the output of FXA and FXB, and the Talkback mic.
While in this mode, the Mix button will remain
illuminated, and LEDs at the top, middle, and
bottom of meters 7-24 will also illuminate.
Press the Mix button a third time to disengage Aux Mix mode.
Mix|Pan Button Enables Pan Control and Metering in the Fat Channel
(Stereo Send Mode Only).
On Aux Sends 2, 4, 6, 8, and 10 the Mix button becomes the Pan control when two
auxes are linked. When this button is enabled, the 24 encoders in the Fat Channel
become the pan controls for each of their respective input channels. The meters
will display the pan setting of each of the input channels.
Press the Mix|Pan button a second time to disengage Aux Mix Pan mode.
For more information of stereo linking, please review Section 4.1.4.