PreSonus StudioLive
™
24.4.2
60
Quick Start:
Level
Setting
Overview Controls Technical
Information
Tutorials Trouble-
shooting
& Warranty
Scenes,
Presets &
System
Menu
Connecting
to a
Computer
Owner’s Manual
61
Quick Start:
Level
Setting
OverviewControlsTutorialsTechnical
Information
Trouble-
shooting
& Warranty
Scenes,
Presets &
System
Menu
Software
Universal Control,
Capture, and
Studio One Artist
Hookup
Hookup
Software
Universal Control,
Capture, and
Studio One Artist
Connecting
to a
Computer
5.4 System Menu System Menu 5.4
5 Scene, Presets, and the System Menu Scene, Presets, and the System Menu 5
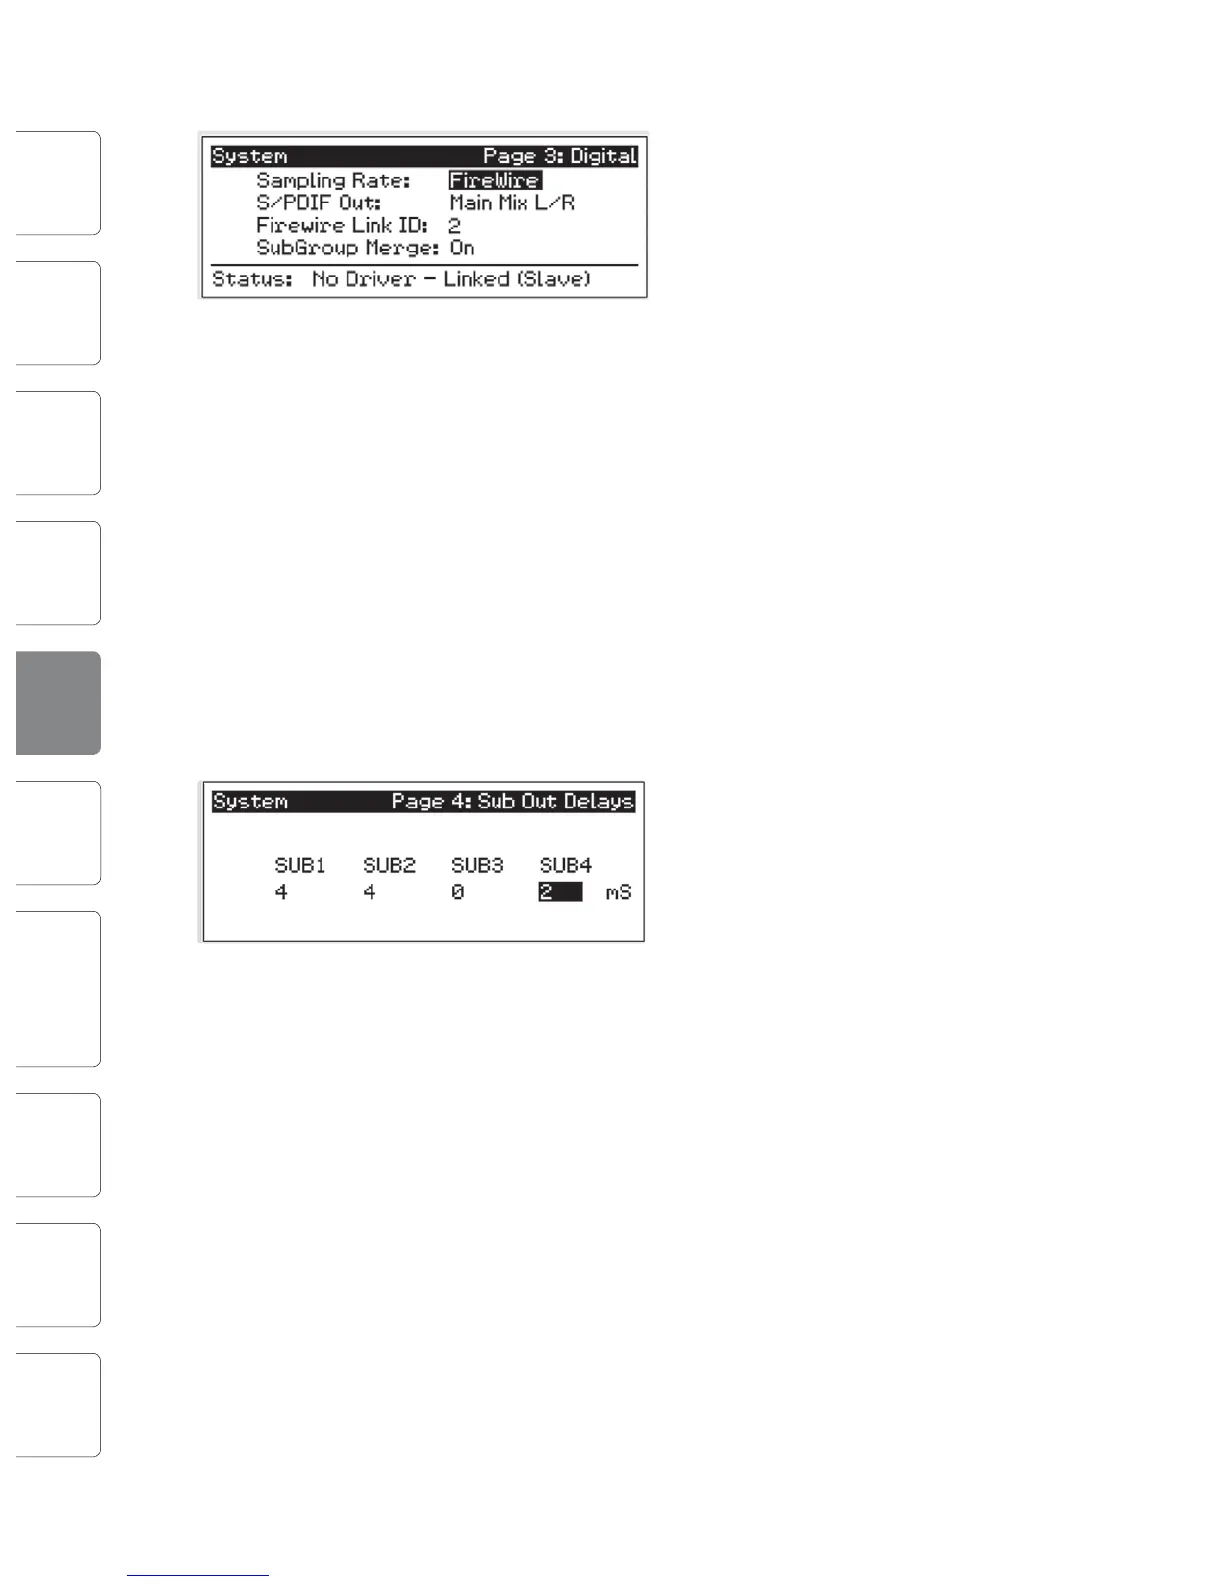
Digital Information.
Press the Page Down button to access the
Digital Information page. From here, you can
change the Sample Rate, view your FireWire
connectivity, route a stereo mix to the S/PDIF
output, assign which StudioLive in a cascaded
chain is the Master, and merge or unmerge
the subgroups in a StudioLive chain.
When the StudioLive is connected and synced to a computer via FireWire, the
Status will read “Driver On” and the Sampling Rate will read “FireWire.” Neither
parameter can be adjusted fom the StudioLive while it is synced to a computer,
in which case you need to use the Universal Control Device Window to make
your S/PDIF assignments and change your sample rate. (See Section 7.1.1 for
more details.) When two StudioLives are cascaded together, the Status will read
“Linked,” and you will be able to see which StudioLive is the Master unit. For
more information on using multiple StudioLives, please review Section 8.9.
To ensure the safety of the audio equipment connected to it, the StudioLive
will mute all post-converter outputs for two seconds when the sample rate is
changed and while it is connecting to a computer. This includes the main and
the control-room outputs, as well as the aux and subgroup outputs. While this
oers a good measure of protection to your sound system, it could put the
brakes on a live show. Because of this, it very important that the sample rate
be selected and locked in prior to beginning any recording or performance.
Sub Out Delay
On Page 4 of your System menu, you will nd
the Sub Out Delays. Your StudioLive provides
you with the ability to delay the audio from each
of your subgroup outputs by 2 to 500 ms, in
increments of 2 ms. When you correctly set the
delay time for these outputs, you ensure that the
sound from each speaker in the P.A. system arrives
at the listening position at the same time.
The delay should be set for the speakers to which your listener will be closest.
Let‘s say you are using your StudioLive in a large theater with a balcony, and you
have three pairs of speakers: a pair in front of the stage, a pair in the rear of the
auditorium, and a pair at the front of the balcony. You will need to delay the rear
speakers so that the listeners closest to them will hear the audio from both the
rear and stage speakers at the same time. This is also true for the audience in the
balcony. While the balcony speakers will provide the loudest source of audio, the
balcony audience will still be able to hear the stage speakers, so a delay must be
set for the balcony speakers. You will need to calculate approximately 0.885 ms
of delay time per foot. So if your balcony speakers in the above example are 61
feet from your stage speakers, you will need to set their delay time to 54 ms.
Speaker delay can also be used to correct o-axis phasing issues in small clubs.
Because of space restrictions, you can’t always place your main speakers for
the best possible sound reproduction. Sometimes your left-side speaker will
need to be closer to the audience to make room for a pillar or a staircase or
the bathroom, so an audience member standing in the center of the room
will not have the best listening experience. By using a pair of subgroups
as the source for your mains, you can factor in that 2 to 4 ms delay the left
speaker needs so that unbalanced speaker placement is no longer an issue.
Lockout Mode
Your StudioLive features a Lockout mode that
allows you to create a password and lock the
controls your StudioLive. This is especially useful
in situations where several people will be running
sound but only one or two are knowledgeable
enough to set up dynamics processing and the like.
Right out of the box, the StudioLive cannot be locked, so don’t worry
about hitting the wrong button. To enable the Lockout feature, you
must rst connect and sync your StudioLive to a computer. Please
review Section 7.2.6 for more information on this feature.
Firmware Version
Press the Page Down button to view the rmware
version currently loaded on your StudioLive.
You normally will only view this screen when
performing a system update, in order to conrm
that the new rmware was successfully loaded.